Sign In
Upload
Download
Table of Contents
Contents
Add to my manuals
Delete from my manuals
Share
URL of this page:
HTML Link:
Bookmark this page
Add
Manual will be automatically added to "My Manuals"
Print this page
×
Bookmark added
×
Added to my manuals
Manuals
Brands
Volvo Manuals
Construction Equipment
DD29
Operator's manual
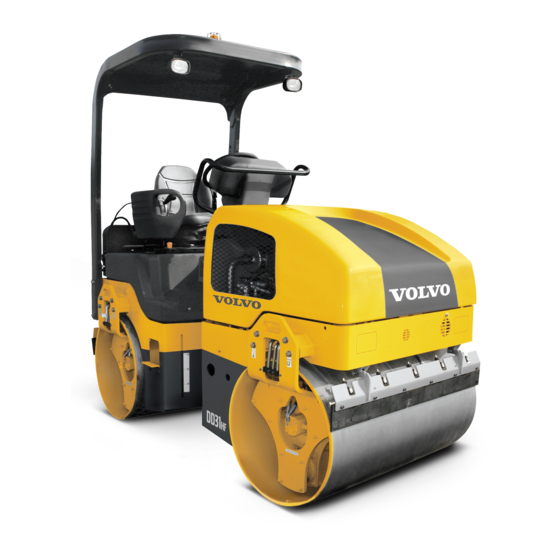
Volvo DD29 Operator's Manual
Hide thumbs
1
2
Table Of Contents
3
4
5
6
7
8
9
10
11
12
13
14
15
16
17
18
19
20
21
22
23
24
25
26
27
28
29
30
31
32
33
34
35
36
37
38
39
40
41
42
43
44
45
46
47
48
49
50
51
52
53
54
55
56
57
58
59
60
61
62
63
64
65
66
67
68
69
70
71
72
73
74
75
76
77
78
79
80
81
82
83
84
85
86
87
88
89
90
91
92
93
94
95
96
97
98
99
100
101
102
103
104
105
106
107
108
109
110
111
112
113
114
115
116
117
118
119
120
121
122
123
124
125
126
127
128
129
130
131
132
133
134
135
136
137
138
139
140
141
142
143
144
145
146
147
148
149
150
151
152
153
154
155
156
157
158
159
160
161
162
163
164
165
166
167
168
169
170
171
172
page
of
172
Go
/
172
Contents
Table of Contents
Troubleshooting
Bookmarks
Table of Contents
Table of Contents
Introduction
Procedure When Receiving the Machine
Identification Data
Machine Identification
Engine Identification
Instruction Manual Storage
General Information
Machine Description
Drums
Engine
Main Frame
Controls
Drum Water Spray System
Brakes
Serviceability
Rops/Seat Belt
Section 1 - Safety
Safety
Be Aware of Safety Information
Understand Signal Words
Overview
Warnings
General
Selection and Qualification of Personnel
Organizational Measures
Pre-Start Inspection
Safety Instructions Governing Operation
Starting
Operating
Stopping
Maintenance
Warning of Special Dangers
Transporting, Towing and Roading
Hazardous Substance Precaution
Safety Related Decals
U.s. Decals
Crush Area
Rollover
Improper Operation
Rotating Fan Blade
Hot Fluid Pressure
Check List
International Decals with Interpretation
Crush Area
Rollover
Improper Operation
Rotating Fan and Belt
Radiator
Check List
Section 2 - Symbol Identification
Symbol Identification
Machine Symbols
International Symbols
Section 3 - Operating Controls and Instruments
Operating Controls and Instruments
Articulation Lock Bar
Controls and Switch Locations
Controls and Switch Descriptions
Auto Vibration Switch
Drum Selector Switch
Auto/Manual Water Pump Switch
Emergency Stop Switch
Steering Wheel
Hourmeter
Indicator Lights
Brake Test Switch
Park Brake Switch
Horn
Ignition Switch
Water Flow Control
Engine Speed Control (Throttle)
Propulsion Control Lever
Vibration ON/OFF Switch
Suspension Seat
Options
Section 4 - Operating Instructions
Operating Instructions
General Information
Pre-Start Checks/Verifications
Starting Machine and Other Checks/Verifications
Operating the Machine
Operating Suggestions and Checks While Operating Machine
Moving the Machine (Propulsion Control)
Using Vibration Controls: Operating the Machine Using Auto Vibration
Using Vibration Controls: Operating the Machine Using Manual Vibration
Parking, Stopping and Shutting down the Machine
Parking the Machine
Stopping the Machine
Shutting down the Machine
Daily Precautions after Work
Mounting and Dismounting of Attachments
Movement of Machine between Work Sites
Loading the Machine under Its Own Power (Drive On) for Transporting
Securing the Machine to the Transporter (Tie-Down)
Towing the Machine: Models DD-29
Towing the Machine: Models DD-31Hf/DD-38Hf
Section 5 - Maintenance Instructions
Maintenance Instructions
General Maintenance Information
Prior to Conducting any Maintenance Work, Ensure that the Following Instructions Are Observed
Handling Fluids and Oil, Fuel Filters
Initial Break-In Maintenance
Maintenance Schedule
Routine Maintenance - as Required
Check Air Cleaner Connections and Ducts for Leaks
Checking and Removing the Air Cleaner Primary Element
Clean the Primary Air Cleaner Element
Replace the Air Cleaner Elements
Clean/Wash/Lubricate the Machine
Prior to Cleaning
After Cleaning
Torque Loose Bolted Connections
Check All Shock Mounts
10 Hour or Daily Routine Maintenance
Check Engine Oil Level
Check Engine Coolant Level, Clean Radiator and Oil Cooler
Check Air Cleaner
Check Air Cleaner Restriction Indicator
Check Fuel Level
Check Water Tank Level
Check Parking Brake
Clean Water Strainer
50 Hour or Weekly Routine Maintenance
Check Battery, Clean and Grease Terminals
Grease Articulation Pin Bearings
Grease Steering Cylinder Pin Bearings
Check Hydraulic Oil Level
Check Air Cleaner System Integrity and Filter Elements
Check Eccentric Oil Level
Check Engine Coolant Level
250 Hour or Quarterly Routine Maintenance
Change Engine Oil and Filter
Change Engine Fuel Filter Element and In-Line Fuel Filter
Purge Lube Carrier
Change Hydraulic Oil Filter
1000 Hour or Annual Routine Maintenance
Drain, Clean and Fill Hydraulic Oil Tank
Drain and Flush Water Tank and Spray Bars
Change Eccentric Lube
Drain and Flush Radiator, Replace Engine Coolant
Change Air Filter Elements
Clean Fuel Tank
Section 6 - Troubleshooting
Troubleshooting
Pre-Start Check
Engine will Not Start
Difficult Starting & Poor / Irregular Performance
Engine Makes Excessive Fumes
Engine Overheats - Stop Engine Immediately
Low Engine Oil Pressure - Red Warning Light Illuminates
Voltmeter Indicates Low or Negative Value
Fuse Troubleshooting
Section 7 - Technical Specifications
Technical Specifications
General Identification
Environmental Information
Machine Weights and Figures DD-29 / DD-31Hf
Machine Weights and Figures DD-38 Hf
MACHINE DIMENSIONS DD-29 and DD-31HF
Machine Dimensions DD-38 Hf
Section 8 - Fuel and Lubricant Specifications
Fuel and Lubricant Specifications
General Information
Service Functions
Fluid Capacities
Hydraulic Oil Requirements and Specifications
Lubricating Oil/Grease (Except Engine)
Extreme Pressure Multipurpose Lubricant
Extreme Pressure Multipurpose Grease
Synthetic Component Lubricant
Engine Lubricating Oil Specifications
Diesel Fuel Specifications
Hazardous Substance Precaution
Section 9 - Torque Specifications
Torque Specifications
Sae Torque Chart
Iso Metric Torque Chart
DD-29/31Hf/38Hf Special Torque Values
Advertisement
Quick Links
1
Controls
2
Drum Water Spray System
Download this manual
Ref. No. VOE21A1004089
English
CPN 43924968
Printed in Sweden 2008-05
CST
Volvo, Shippensburg
Table of
Contents
Previous
Page
Next
Page
1
2
3
4
5
Advertisement
Table of Contents
Troubleshooting
SECTION 6 - TROUBLESHOOTING
119
TROUBLESHOOTING
120
FUSE TROUBLESHOOTING
124
Need help?
Do you have a question about the DD29 and is the answer not in the manual?
Ask a question
Questions and answers
Related Manuals for Volvo DD29
Construction Equipment Volvo DD25 Product Manual
Asphalt compactor (32 pages)
Construction Equipment Volvo DD31HF Operator's Manual
(172 pages)
Construction Equipment Volvo DD38HF Operator's Manual
(172 pages)
Construction Equipment Volvo DD24 Operator's Manual
Vibratory asphalt compactors (169 pages)
Construction Equipment Volvo DD30 Operator's Manual
Vibratory asphalt compactors (169 pages)
Construction Equipment Volvo EC60E Operator's Manual
(342 pages)
Construction Equipment Volvo EC35 Operator's Manual
(140 pages)
Construction Equipment Volvo ECR 58 Translation Of The Original Instructions
Rototilt control system - ics (42 pages)
Construction Equipment Volvo ECR25 Electric Operator's Manual
(220 pages)
Construction Equipment Volvo L30G Operator's Manual
Compact wheel loaders (262 pages)
Construction Equipment Volvo G700B Series Operator's Manual
(238 pages)
Construction Equipment Volvo EC480E Instructions Manual
(462 pages)
Construction Equipment Volvo L150H Manual
(318 pages)
Construction Equipment Volvo Ingersoll Rand SD-116 TF Series Operator's Manual
(300 pages)
Construction Equipment Volvo ECR50D Operator's Manual
(213 pages)
Construction Equipment Volvo BHL Service Information
(24 pages)
This manual is also suitable for:
Dd31hf
Dd38hf
Table of Contents
Print
Rename the bookmark
Delete bookmark?
Delete from my manuals?
Login
Sign In
OR
Sign in with Facebook
Sign in with Google
Upload manual
Upload from disk
Upload from URL


Need help?
Do you have a question about the DD29 and is the answer not in the manual?
Questions and answers