Table of Contents
Advertisement
Quick Links
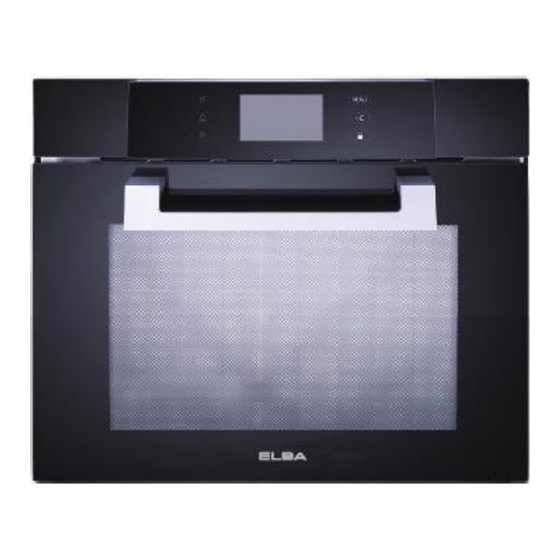
BUILT-IN STEAM OVEN
MODEL: ESGO-H3850TFT(BK)
Owner's Manual
Please read this manual carefully before
operating your set.
Retain it for future reference.
Record model number and serial number
of the set.
See the label attached on the set and
quote this information to your dealer when
you require service.
For The Warranty Terms & Conditions, Please Refer To Warranty Certificate
Advertisement
Table of Contents

Related Manuals for Elba ESGO-H3850TFT(BK)


Summary of Contents for Elba ESGO-H3850TFT(BK)
- Page 1 BUILT-IN STEAM OVEN MODEL: ESGO-H3850TFT(BK) Owner’s Manual Please read this manual carefully before operating your set. Retain it for future reference. Record model number and serial number of the set. See the label attached on the set and quote this information to your dealer when you require service.
-
Page 2: Table Of Contents
CONTENTS SAFETY PRECAUTIONS …………..…………………………………………………………………………………………….1 ATTENTIONS …………………………………………………………………………………………………………………………2 INSTALLATION …………………..…………………………………………………………………………………………….2 BEFORE THE INSTALLATION………………………………………………………………………………………………2 INSTALLATION OF BUILT-IN OVEN…………………………………………………………………………………………3 ACCESSOIES…………………………………………………………………………………………………………………………4 CONNECTION OF THE APPLIANCE …………………………………………………………………………………………4 FITTING ON A POWER SUPPLY CABLE……………………………………………………………………………………4 CONNECTING THE SUPPLY CABLE TO THE MAINS…………………………………………………………………4 HOW TO USE YOUR OVEN …………………………………………………………………………………………………….5 PRODUCT DESCRIPTIONS ……………………………………………………………………………………………………….5 PRODUCT OVERVIEW………………………………………………………………………………………………………………..5... -
Page 3: Safety Precautions
We recommend that you read the instructions in this owner’s manual carefully before using it for the best performance and to extend the lifespan of your appliance, as it will provide you with all the instructions you require to ensure its safe installation, use and maintenance. 1. -
Page 4: Attentions
In order to avoid electric shock, please make sure the oven has been shut off before carrying out the maintenance. Use only original accessories provided by ELBA or its authorized service center. Do not use wet parts of body to touch the oven. -
Page 5: Installation Of Built-In Oven
3.2 Installation of Built-in Oven The material of the cabinet should be insulated, and the clearance between the edge of the cabinet and the oven should be over 100mm for ventilation. The panels of the adjacent cabinets must be made of heat-resistant material which can withstand temperatures of up to 100°C. In compliance with current safety standards, contact with the electrical parts of the oven must not be possible once it has been installed. -
Page 6: Accessoies
3.3 Accessories The following accessories are provided with your oven. 1. Wire rack 2.Steam tray 3. Drip tray 4. CONNECTION OF THE APPLIANCE 4.1 Fitting on a Power Supply Cable The appliance has to be equipped with a three-core power supply cable which is designed to operate with an alternating current. -
Page 7: How To Use Your Oven
5. HOW TO USE YOUR OVEN The first time you use your appliance, we recommend that set the thermostat to the highest setting and leave the oven on for about half an hour with nothing in it, with the oven door shut completely. -
Page 8: Oven Control Panel
6.2 Oven Control Panel Recipe Number Icon Descriptions ON / OFF Button, Press button to turn appliance on or off. Buzzer Button, Press button and set the countdown timer for reminder. Light Button, Press button to turn light on or off. Menu Button, Press button to return to the main menu screen. -
Page 9: Display Descriptions
6.3 Display Descriptions Number Descriptions Menu Current Time Program Selection Scroll Up Scroll Down Press to turn on appliance. The main menu appears in the display with a list of options. Select the program by touching the screen. If the desire program is not appear in display screen, please scroll up or down to search for the programs. -
Page 10: Symbol
6.5 Symbol The following symbols will be appear in the display screen. Symbol Descriptions You may scroll up or down by touching button. A tick will appear behind the option which is currently selected. This indicates additional information is available. This information window will be turned off by selecting OK button. -
Page 11: Programs And Functions
7. PROGRAMS AND FUNCTIONS 7.1 Selecting the Cooking Programs To select the cooking programs, turn the knob to desire program. The detail of the programs as below: Symbol Function Descriptions Steam: To steam the dishes at the maximum 100 ºC. The temperature range can be set within the range of 40-100ºC. - Page 12 TIME Click time setting and enter the actual time by touching the keyboard input. The time sequence will display as “HOURS : MINUTES” (12:59). The real time display will show on the top right corner. Click “OK” to save and return back to setting interface. (If clock format in 12 hours, the maximum for time setting is 12:59, if clock format in 24 hours, the maximum for time setting is 23:59) CLOCK FORMAT...
- Page 13 WATER HARDNESS SETTING Click water hardness setting and select the hardness by touching the screen. The water hardness selection are Soft, Medium and Hard. Click the desire hardness and your selection will show as “√” behind the option. Click “OK” to save and return back to setting interface. BRIGHTNESS Click brightness setting and select the brightness by sliding the screen.
- Page 14 TEMPERATURE UNITS Click temperature units setting and select the temperature units by touching the screen. The temperature unit selection are ºC / ºF. Click the desire temperature unit and your selection will show as “√” behind the option. Click “OK” to save and return back to setting interface. FACTORY DEFAULT SETTING Click factory default setting if you wish to restore all the setting into default setting.
-
Page 15: Oven Operation
7.3 Oven Operation Below is the quick overview for the oven operation. 1. Press to turn on appliance. The main menu appears in the display with a list of options. Select the program by touching the screen. If the desire program is not appear in display screen, please scroll up or down to search for the programs. -
Page 16: Checking The Water Tank
HEATING-UP PHASE Touch the heating-up phase and select the heating-up phase that you wish to apply. The heating-up phase selection are Normal and Fast. Click the desire heating-up phase and your selection will show as “√” behind the option. The default setting for the heating-up phase will be Normal. -
Page 17: End Of The Program
7.5 End of the program When the program cycle has ended, the water pump will pump the boiled water back to water tank. In this process, you can touch the “MENU” button and return back to function interface. When the temperature falls, the system will automatically operate for the water drainage. The system will back to standby mode after the pumping process 7.6 Change the running program In the process of program is running, you may click “CHANGE”... -
Page 18: Cancel The Running Program
7.7 Cancel the running program In the program is running, you may touch button to return to the function interface. The display will show the message as below. Touch “YES” to back on the function interface and will terminate the running program. If you wish to continue to running program, touch “NO” to continue. -
Page 19: Descaling Function
7.10 Descaling Function The descaling cycle is determine by the user setting on the water hardness, the higher of the water hardness, the more frequent of the descaling function is require. Below is the table that show on the frequencies of the descaling. Water Hardness Soft Medium... - Page 20 Open the oven door, remove the water tank and pour all the water from water tank until it is empty. Add 500 ml descaling liquid into water tank and insert the water tank back to original position. Then close the door oven and click “OK” to begin the function. The descaling function will start to operate for 45 minutes.
- Page 21 When the descaling function is complete, open the oven door and remove the water tank. Empty the water tank and ensure the water tank is dry before insert back to original position and ready for next usage.
-
Page 22: Cleaning And Maintenance
8. CLEANING AND MAINTENANCE Before cleaning or performing maintenance on your oven, disconnect the oven from the power supply. To extend the lifespan of your oven, it must be cleaned frequently. Water Tank Before using the steam oven for the first time, we suggest to flush the built in water tank. Connect the appliance to power and turn on. - Page 23 4. Replace the glass cover and reconnect the oven to the mains power supply. Removing the Oven Door For a thorough cleaning, you can remove the oven door. Proceed as follow: 1. Open the oven door to the fullest extends. 2.
-
Page 24: Troubleshooting
9. TROUBLESHOOTING Troubles Reason Solution Appliance cannot Door is not closed properly. Check if the door is closed tightly. start up No power supplied. Check if power plug is inserted well. No water supplied. Check if water level is sufficient. Check if button “On/Off”...
Need help?
Do you have a question about the ESGO-H3850TFT(BK) and is the answer not in the manual?
Questions and answers