Table of Contents
Advertisement
Quick Links
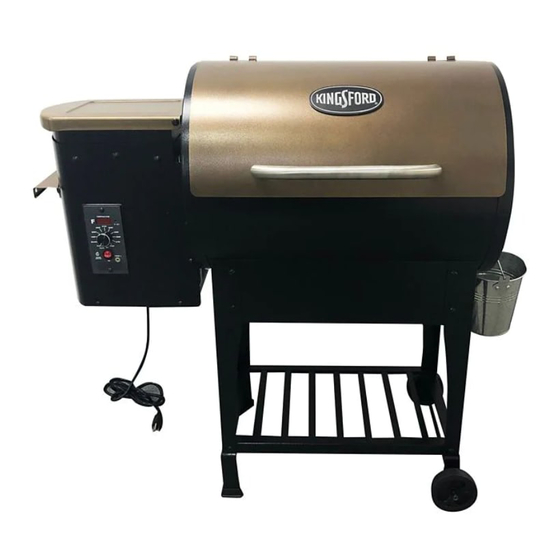
Model number: CG2324001-KF
ASSEMBLY & OPERATING INSTRUCTIONS
⚫ Please read this entire manual before installation and use of this pellet
fuel-burning appliance.
⚫ Follow all warnings and instructions when using the appliance.
⚫ Failure to follow these instructions could result in property damage, bodily
injury or even death.
⚫ Contact local building or fire officials about restrictions and installation
inspection requirements in your area.
⚫ Save these instructions.
DO NOT return product to the retail store!!
For assistance, contact customer service at
or at 1-888-837-1380, Mon to Fri, 8:00am – 5:00pm Pacific Standard time
WOOD PELLET GRILL
For Outdoor Use Only
Should you encounter any problem,
CALL US FIRST.
WE CAN HELP.
1 of 30
customerservice@rankam.com
20191010-Ver.1.0
Advertisement
Table of Contents

Subscribe to Our Youtube Channel
Related Manuals for Kingsford CG2324001-KF


Summary of Contents for Kingsford CG2324001-KF
- Page 1 WOOD PELLET GRILL Model number: CG2324001-KF ASSEMBLY & OPERATING INSTRUCTIONS For Outdoor Use Only ⚫ Please read this entire manual before installation and use of this pellet fuel-burning appliance. ⚫ Follow all warnings and instructions when using the appliance. ⚫ Failure to follow these instructions could result in property damage, bodily injury or even death.
-
Page 2: Prop 65 Warning
WARNINGS SAFETY LABELS DANGER: Indicates an imminent hazardous situation which, if not avoided, will result in death or serious injury. WARNING: Indicates a potentially hazardous situation which, if not avoided, could result in death or serious injury. CAUTION: Indicates a potentially hazardous situation which, if not avoided, may result in minor or moderate injury. - Page 3 WARNING Important Safety Instructions When using electrical appliances, basic safety precautions should always be followed, including the following: ⚫ READ ALL INSTRUCTIONS BEFORE INSTALLING AND USING THE APPLIANCE. ⚫ This grill is for outdoor use only. Do not use it in any enclosed area. ⚫...
- Page 4 property damage, which could also result in personal injury. ⚫ Maintain a minimum clearance of 60 inches (152.4 cm) between all sides of grill, deck railings, walls or other combustible material. DO NOT use grill under any overhead combustible construction. ⚫...
- Page 5 WARNING When using electrical appliances, basic safety precautions should always be followed, including the following: ⚫ Electrical Rating: 120 Volts / 60 Hz / 250W, Phase 1. ⚫ Must be electrically grounded in accordance with local codes or, in the absence of local codes, with the National Electrical Code, ANSI/NFPA 70, or the Canadian Electrical Code, Part I, CSA C22.1 when install this appliance.
- Page 6 WARNING ⚫ Creosote - Formation and need for removal. When wood pellets are burned slowly, they produce tar and other organic vapors that combine with expelled moisture to form creosote. The creosote vapors condense in a relatively cool oven flue and exhaust hood of a slow burning fire.
-
Page 7: Product Diagram
PRODUCT DIAGRAM 7 of 30 20191010-Ver.1.0... -
Page 8: Component List
COMPONENT LIST 1. Cooking Grate 2. Grease Drip Tray 3. Upper Hopper Assembly Qty: 1pc Qty: 1pc Qty: 1pc 4. Lower Hopper Assembly 5. Hopper Handle 6. Flame Tamer Qty: 1pc Qty: 1pc Qty: 1pc 7. Lid Handle 8. Grill Body Assembly 9. - Page 9 13. Leg Pad 14. Right Rear Leg 15. Right Front Leg Qty: 2pcs Qty: 1pc Qty: 1pc 16. Bottom Shelf 17. Wheel Axle 18. Wheel Qty: 1pc Qty: 1pc Qty: 2pcs 19. Meat Probe 20. Sealing Strip Qty: 1pc Qty: 1pc 9 of 30 20191010-Ver.1.0...
-
Page 10: Hardware List
HARDWARE LIST Item No. Item name Diagram 1/4-20 x 7/10 Bolt 1/4-20 Nut Washer (Φ16 x Φ6.5 x 1.2 mm) Washer (Φ20 x Φ10.5 x 1.8 mm) 5/16-18 Locking Nut 8#-32 Nut 8#-32 x 3/5 Step Bolt 1/4-20 x 3/4 Hexagon Bolt Washer (Φ12 x Φ4.2 x 1.0 mm) - Page 11 Screwdriver Wrench A Wrench B Note: Hardware D, E, H, I, and J have been pre-attached on the related components. For Bolt A, 18 pcs are stored in the hardware pack, and 2 pcs have been pre-attached on the related components. For Washer C, 14 pcs are stored in the hardware pack, and 6 pcs have been pre-attached on the related components.
- Page 12 Replacement Part List (I) 12 of 30 20191010-Ver.1.0...
- Page 13 Replacement Part List (II) Part Part Name Part Part Name Number Number Cooking Grate Grease Drip Tray Upper Hopper – Hopper Lid Upper Hopper Assembly Upper Hopper – Upper Hopper Upper Hopper – Limit Blade Body Lower Hopper – Body Lower Hopper Assembly Lower Hopper –...
-
Page 14: Assembly Procedures
ASSEMBLY PROCEDURES Step 1. Attach the Front and Rear Legs (11,12,14,15) to the Grill Body Assembly (8) using 12 sets bolt (A), washer (C) and nut (B). Step 2. Attach the Bottom Shelf (16) to the legs using 4 pcs bolt (A). Tighten all the bolts and nuts for step 1 and step 2. - Page 15 Step 3. Remove 2 sets pre-attached bolt (E) and washer (D) from the Wheel Axle (17). Attach the Wheel Axle (17) and the Wheel (18) to the right legs using the removed bolts and washers. Attach the Leg Pad (13) to the left legs as shown. Step 4.
- Page 16 Step 5. Attach the Hopper Handle (5) to the Lower Hopper Assembly (4) using 2 sets bolt (A) and washer (C). Attach the Upper Hopper Assembly (3) to the Lower Hopper Assembly (4) using 1 set bolt (G) and nut (F). Lock the Limit Blade in place as shown. Step 6.
- Page 17 Step 7. Insert the RTD wire connector from the grill body through the hole on the hopper as shown. Connect the RTD wire male and female connectors together. Step 8. Remove 4 sets pre-attached bolt (H) and washer (C) from the hopper assembly. Attach the hopper assembly to the grill body using the removed bolts and washers.
- Page 18 Step 9. Remove 2 sets pre-attached bolt (J) and washer (I) from the Grill Handle (9). Attach the Grill Handle (9) to the grill body using the removed bolts and washers. Step 10. Attach the Flame Tamer (6) to the feeder assembly as shown. 18 of 30 20191010-Ver.1.0...
- Page 19 Step 11. Place the Grease Drip Tray (2) on the grill body as shown. Step 12. Place the Cooking Grate (1) on the grill as shown. 19 of 30 20191010-Ver.1.0...
- Page 20 Step 13. Place the Grease Bucket (10) on the grease bucket hook as shown. Step 14. Dot not attempt to press down the upper hopper. 20 of 30 20191010-Ver.1.0...
- Page 21 Step 15. Your unit is fully assembled! Make sure to read and follow the Instruction Manual before using this appliance. 21 of 30 20191010-Ver.1.0...
-
Page 22: Initial Lighting Instructions
OPERATING INSTRUCTIONS WARNING ⚫ Only Dia 6 mm Pellets can be used. INITIAL LIGHTING INSTRUCTIONS 1. Read instructions before lighting. 2. Open the lid and take out the cooking grate, grease drip tray and flame tamer. 3. Make sure power switch is in the "OFF" position and control knob is in the "Cool Down Cycle"... -
Page 23: Subsequent Start-Up
SUBSEQUENT START-UP Set the control knob to “Smoke” with the lid open. Around 3 minutes, smoke will come out from the grill once the pellets are ignited. Then turn the control knob to any desired setting with lid closed. We advise to preheat your grill for 15 minutes with lid closed before placing any food in your grill. -
Page 24: Operating Tips
OPERATING TIPS 1. Just like other barbecues, the actual temperature of this grill or the cooking times will be affected by external temperature, humidity, wind conditions, quality of pellets and so on. 2. It is better to shelter your grill from the wind, this will aid in temperature output, heat retention and heat recovery time when opening the lid. -
Page 25: Using Wood Pellet Fuel
MEAT TEMPERATURE RECOMMENDATIONS Range Beef Lamb Pork Poultry Well 170°F 160°F 170°F 170°F Medium 160°F 155°F 160°F 170°F Medium Rare 145°F 145°F 170°F Rare 135°F 170°F USING WOOD PELLET FUEL Wood pellets appear no thicker than the eraser on the end of a pencil. People who see them for the first time think they look like rabbit food;... -
Page 26: Maintenance And Cleaning Instructions
MAINTENANCE & CLEANING INSTRUCTIONS CAUTION ⚫ Make sure your grill is OFF and cold completely before performing any maintenance and cleaning. STEEL SURFACES There are different stainless steel cleaners available. Always use the mildest one for cleaning first and scrubbing in the direction of the grain. To touch up noticeable scratches in the stainless steel, sand very lightly with dry 100 grit emery paper in the direction of the grain. - Page 27 THE PELLET CONTROL PANEL REPLACEMENT 1. Disassemble the bolts on the hopper bottom panel. 2. Cut off the cable tie for internal wires. 3. Disconnect all the wire couplings of fan motor, auger drive motor, hot rod and power cord (Detail wire pairing is as shown in P.28 DIGTAL THERMOSTAT CONTROL WIRING DIAGRAM).
-
Page 28: Digtal Thermostat Control Wiring Diagram
DIGTAL THERMOSTAT CONTROL WIRING DIAGRAM 28 of 30 20191010-Ver.1.0... -
Page 29: Troubleshooting
TROUBLE SHOOTING Problem: Possible Causes: Corrective Actions: 1. Make sure the power cord is plugged in. Verify there is power at the electrical outlet. 2. Remove the control, check the fuse on back. Replace the fuse if blown out. 3. If both of the Draft Inducer Fan and 1. -
Page 30: Limited Warranty
LIMITED WARRANTY Manufacturer warrants this Product to be free from defects in workmanship and materials for a period of Ninety (90) days from the date of purchase, PROVIDED claims are submitted, in writing, with proof of purchase. If any part of this item fails because of a manufacturing defect within the Limited Warranty Period, Manufacturer offers to replace such part(s) provided that such parts have not been improperly repaired, altered, or tampered with or subject to misuse, abuse or exposed to corrosive conditions.
Need help?
Do you have a question about the CG2324001-KF and is the answer not in the manual?
Questions and answers