Table of Contents
Advertisement
Advertisement
Table of Contents

Related Manuals for Panther S-TYPE DOLLY


Summary of Contents for Panther S-TYPE DOLLY
- Page 1 S-TYPE DOLLY USER MANUAL www.panther.tv...
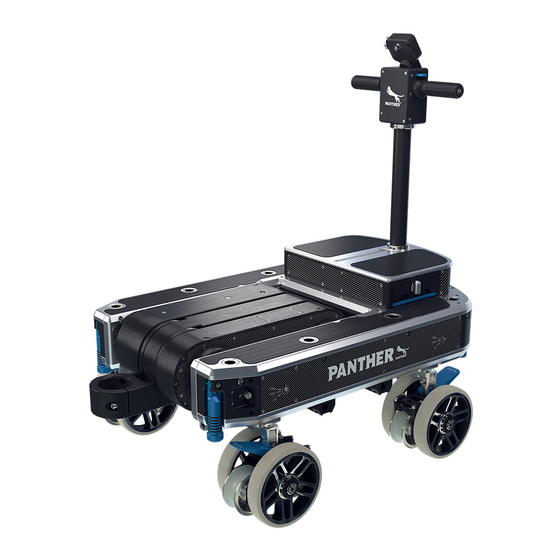
- Page 2 The Panther S-Type Dolly is a very useful Dolly, developed by specialists for specialists in order to meet the expectations of every cameraman or grip.
-
Page 3: Table Of Contents
TABLE OF CONTENTS TOPIC PAGE Technical Data Basic Knowledge Preparing Seat & Seatarm Power Supply Initial Operation Wireless Handset General Connect Manual Drive Speed / Ramps Adjustment Set Limits Program Movements Further Settings Service Menu Super Low Mode Control Panel Wheels Changing Wheels Big Wheels... - Page 4 TABLE OF CONTENTS TOPIC PAGE Steering General Crab & Round Conventional Front / Rear Narrow-Gauge Steering Rod Dolly on Tracks Accessories Push Bar Platform Set High Platform Flex Arm Counterweight Camera Mount Bumper Transport Remove the Scissors-Arm Carrying the Dolly Emergency Operation Notes...
-
Page 5: Technical Data
TECHNICAL DATA 64,5 cm / 25,4“ Length (Dolly) 96,5 cm / 38‘‘ Width (Dolly) 64,5 cm / 25,4‘‘ Height (Dolly) 39,5 cm / 15,55“ (front) | 48 cm / 18,9‘‘ (rear) Center Distance (Sciccors-Arm) 37 cm / 14,6‘‘ Standard Lift range (Low-Mode) 103 cm / 40,6‘‘... -
Page 6: Basic Knowledge
Only one integrated tool We designed the S-Type Dolly to be used almost tool-free in order to ensure a fast and easy operating. If there is a tool needed... -
Page 7: Preparing
Top View Mounting the seat arm is done by easy plug Now you can mount the Eccentric Panther & play. Just plug it into the desired position. Seat right into the seat arm. - Page 8 PREPARING SEAT & SEATARM Height Adjustment The height of the seat arm can be adjusted tool free. Pull the black knob on the seat arm tube and adjust the height. Push back the black button to fix the position. If you want to be very low, you can remove the seat arm tube by unlocking it with the blue lever and removing the tube.
-
Page 9: Power Supply
PREPARING POWER SUPPLY Dolly Batteries The S-Type Dolly is a fully electro-mechanical dolly. You need 2 batteries to operate the S-Type. Each pair of batteries lasts for one shooting day. We recommend you to reload it after every shooting day, even if they are still not empty. - Page 10 PREPARING POWER SUPPLY Combi Charger as Power Source The Combi Charger has one additional Connection Socket feature: you can use it to power the S-Type for Combi Charger Dolly directly via cable connection. You find the connection socket at the bottom side of the dolly.
- Page 11 PREPARING POWER SUPPLY Charging the Wireless Handset The Wireless Handset can be chargen in two different ways: regularly via mains power or by cable connection to the dolly. Regular Charging To charge the Wireless Handset you can use the standard charging cable (310848) and plug it into a wall socket.
-
Page 12: Initial Operation
Step 1: Connect the Panther S-Type Dolly batteries as described in „Power Supply“. The Panther S-Type Dolly may only be operated with the original Panther batteries. Although the batteries left our warehouse fully charged, it is possible that a long transit time/low temperatures caused the batteries to empty. -
Page 13: Wireless Handset
WIRELESS HANDSET GENERAL Charging / Connection socket Display Latching Disc Main Menu / Power Button variable Menu Button Rocker FRONT VIEW BACK VIEW Display The Display shows all current settings and allows to adjust everything with a easy user interface. It has an integrated backlight for dark environments. - Page 14 The Panther Wireless Handset sends on a frequency of 2,4 GHz (ISM band). Distance The maximum reach of the Panther Wireless Handset is up to 50m / 164 ft. - this value always depends on your current location (many walls or no walls, forest or field etc.).
-
Page 15: Connect
WIRELESS HANDSET CONNECT No Connection: If the wireless handset is not able to connect with your dolly you will see the screen left. You can check this situation by the crossed wireless icon. Connected: If your wireless handset is connected, but the dolly is turned off, you will see this „O“... -
Page 16: Manual Drive
WIRELESS HANDSET MANUAL DRIVE How to drive the arm manually To drive the S-Type Scissors-Arm manually you have to be in LIMIT-Mode (which is the „standard“-mode of the dolly). Attention Make sure that „Arm“ is set to „low“ (as shown in the picture). -
Page 17: Speed / Ramps Adjustment
WIRELESS HANDSET SPEED / RAMPS ADJUSTMENT Speed adjustment: You can see the current speed settings in the red marked area (right). In this case the speed is set to level „4“ (maximum speed). You can choose between speed 1-4: speed 1: 0...25% speed 2: 0...50% speed 3: 0...75% speed 4: 0...100% (maximum speed) -
Page 18: Set Limits
WIRELESS HANDSET SET LIMITS Setting a limit: To set an upper limit to your dolly column you have to press and hold the button and simultaneously double tap on the rocker (up - see right picture below). To set an lower limit to your dolly column you have to press and hold the button and simultaneously double tap on the rocker (down - see left picture below). -
Page 19: Program Movements
WIRELESS HANDSET PROGRAM MOVEMENTS Enter the Program Mode To program movements you first have to go into the PROGRAM-Mode. To do so you first have to exit the standard LIMIT-Mode by pressing the (return) button to go back to the Homescreen. Now press the button. - Page 20 Now you can drive your Scissors-Arm manually to the next desired point by using the handsets‘ rocker. The Panther electronics will memorize only the highest speed used to reach this point manually, and will repeat the move at this speed throughout.
- Page 21 WIRELESS HANDSET PROGRAM MOVEMENTS How to recall your stored program: When you are back in the Recallmode you can recall your stored program. Before recalling or resetting the program in sequence, move to the starting point by pressing the button (Go to Reference Flag). The Scissors-Arm automatically returns to this point at the maximum speed chosen with the speed selector.
-
Page 22: Further Settings
WIRELESS HANDSET FURTHER SETTINGS Screen brightness To get into the screen brightness settings you have to press the button in the Homescreen area. By pressing the button you can make the screen brighter. By pressing the button you can make the screen darker and also turn off the backlight. -
Page 23: Service Menu
WIRELESS HANDSET SERVICE MENU How to enter Service Menu: To get into the screen brightness settings you have to press the button in the main screen area until you see the right screen and then press the button. What you can do in the Service Menu: In the wireless handsets‘... - Page 24 Dolly Type The Wireless Handset was made not only for the S-Type dolly. If you want to use it on for example the Classic Plus dolly you can choose that option in the next point of the Service Menu.
-
Page 25: Super Low Mode
WIRELESS HANDSET SUPER LOW MODE Super Low Mode In order to use the full length of the scissors- arm, we developed the patented fullrange technology. This allows the scissors-arm to move the same way up as down into the negative. To prevent crashing the floor with the scissors-arm by mistake you have to activate the Super Low Mode in the Service Menu... -
Page 26: Control Panel
The error can be determined by removing the electronics cover and looking at the display on the left side of the electronics housing: Error determination of Panther Electronic Box: : (on) battery empty . (blinking )fault at rotary encoder . -
Page 27: Wheels
WHEELS CHANGING WHEELS Dolly Jack Changing the wheels is done very fast and easy with the Dolly Jack (311199) and the Wheel Changing Tool (100453). It lifts up the S-Type in seconds without needing much power. Adjust the height of the Dolly Jack depending Push the Dolly Jack into one of the holes on on the surface where you want to change the side of the S-Type. - Page 28 WHEELS CHANGING WHEELS Take the Wheel Changing Tool and open the Take out the wheel by pulling. screw on the side of the wheel. Attache the new wheel by pushing it into the Rescrew it with the Wheel Changing Tool. Wheel Mount axis.
-
Page 29: Big Wheels
WHEELS BIG WHEELS Big Wheels The Big Wheels are designed to bring your dolly easy to your location also on rough terrain. It gives the S-Type more ground clearance as usual. Mounting the Big Wheels is done very fast and easy with the Dolly Jack (311199) and the Wheel Changing Tool (100453). - Page 30 WHEELS BIG WHEELS Leverage the S-Type with the Dolly Jack. The wheels on one side are now free and ready to be changed. Use the integrated Allen Key to mount the Big Mount it on top of the Studio Wheels (without Wheels.
-
Page 31: Steering
STEERING GENERAL 4 Steering Modes The S-Type Dolly offers 4 different steering modes: Crab, Round, Conventional Front and Conventional Rear. -
Page 32: Crab & Round
STEERING CRAB & ROUND Switching between Crab & Round To switch from Crab to Round mode (or the other way) please follow these steps: Press and hold the blue button on the left side of your dolly push rod. Now turn the handle on the right side to CRAB / ROUND (depending on your initial position). -
Page 33: Conventional Front / Rear
STEERING CONVENTIONAL FRONT / REAR Switching to Conventional Front / Rear To use a front or a rear wheel steering you first have to go to regular Round Mode. The 2-wheel steering modes are activated by blocking either the front or rear wheels. Take the integrated Allen Key and block the front or rear wheels by switch the screws on the side of the dolly to „FIX“. -
Page 34: Narrow-Gauge
STEERING NARROW-GAUGE Narrow-Gauge The S-Type wheel arms are eccentric. That means you can easily switch between the standard gauge (62 cm on track) and a narrow gauge (48 cm on track) for passing doors or operate in tight environments. To do so you only have to turn the Steering Rod 180°: Standard Track Width 62 cm 62 cm... -
Page 35: Steering Rod
STEERING STEERING ROD Remove the Steering Rod The S-Type Steering Rod is removable. If you go for example from Standard Gauge to Narrow Gauge the Steering Rod is turned around into the other direction. To turn it, you only have to pull it out of the dolly. -
Page 36: Dolly On Tracks
STEERING DOLLY ON TRACKS Use the S-Type on Tracks The S-Type wheels are aligned in a square. Therefore the dolly can be moved both lengthwise and crosswise on track – without using other wheels or accessories. To bring it lengthwise on track, position the dolly in one line with the track. - Page 37 STEERING DOLLY ON TRACKS Now by turning the Steering Rod 90° all 4 wheel arms will go automatically into the outer eccentric position as shown in the picture. The wheels are in crosswise track position now and the dolly can be pushed on tracks. If the S-Type is used on curved tracks you have to put all 4 wheels to „FREE“...
-
Page 38: Accessories
ACCESSORIES PUSH BAR Foldable Push Bar The foldable Push Bar (310342) is designed to be used in many different ways. There is only one Push Bar needed for all situations such as pushing the dolly regularly, pushing the dolly beside the track, pushing the dolly crosswise to the track. - Page 39 ACCESSORIES PUSH BAR To use the Pushbar Crosswise to the track you To use the extention you have to open it by can reposition it by plugging it in on the side turning the left and right side contrariwise of the dolly. and the spread it into the Push Bar.
-
Page 40: Platform Set
PLATFORM SET Platform Set The S-Type Dolly needs only one Platform Set (302583) because we designed the platforms to be used as high and low platform. The set consists of 3 platforms, 2 holders and 2 filling plates. Middle Platform... - Page 41 ACCESSORIES PLATFORM SET How to mount the platforms Mounting the S-Type platforms is done completely tool-free. You can use one set in high or in low mode - depending on your requirements. The following steps are starting with the high mode. To mount the Middle Platform you have to Mount the Middle Platform on the front side attach the two holders by fastening the black...
- Page 42 ACCESSORIES PLATFORM SET Now you can take the Side Platform to mount Make sure to fasten the black knobs on the it the same way you did with the Middle Side Platform as well. Platform. If necessary you can now take the filling plate to build one flat surface.
- Page 43 ACCESSORIES PLATFORM SET Open the Side Platform and pull it out Open the Middle Platform the same way and a little bit by turning the black knobs pull it completely out. counterclockwise. Open the two holders and turn it around 180°. Fasten the black knobs on both sides.
- Page 44 ACCESSORIES PLATFORM SET Pull the Side Platform a little bit out of the Now you should have a gap between Platform two integrated holders by holding them. and holders as shown in the picture. Swivel down the Side Platform. Push back the Side Platform into all holders, and the two integrated holders into the dolly.
- Page 45 ACCESSORIES PLATFORM SET Even in low mode you are completely free with your wheels. You don‘t have to worry about crashing the platforms while you are moving the dolly. Attention If you want to use only the left or right Side Platform you additionally need the holders on the front for stability.
-
Page 46: High Platform
ACCESSORIES HIGH PLATFORM High Platform To allow the cameraman to stand on a higher level there is a height adjustable High Platform (310810) available. It can be mounted toolfree directly onto the dolly. Top View Push the High Platform‘s legs into the holes of the dolly (see picture on the right). -
Page 47: Flex Arm
ACCESSORIES FLEX ARM Flex Arm for Wireless Handset If you want to be more flexible with the positioning of the Wireless Handset there is a Flex Arm available. This is what you need: - Handset Adapter 18mm (311567) - Adapter 3/8“ (310487) - Flex Arm 3/8“... - Page 48 ACCESSORIES FLEX ARM Attach the Wireless Handset to the Flex Arm Start positioning the Wireless Handset by as shown in the picture and fix it with the opening the Flex Arm‘s wing bolts and refix it black lever on the side. when you have reached the desired position.
-
Page 49: Counterweight
- Integrated Allen Key The Holder has to be mounted into the thread Use the integrated Allen Key to tighten the on the bottom-back side of the S-Type dolly Holder. (near to the integrated carrying bar). Mount the Counter Balance Rod tool-free... - Page 50 ACCESSORIES COUNTERWEIGHT Center of gravity of entire dolly system is moving forward by liftig up the arm DANGER! Keep in mind, that the center of gravity (weight on the Scissors-Arm) is moving forward by liftig the arm. Danger of tilting!
-
Page 51: Camera Mount
ACCESSORIES CAMERA MOUNT Camera Mount The S-Type Dolly comes with a 80mm Tube which allows a variety of different camera mounts and positions. You can use Bowls, Mitchell Plates and more to mount your 80mm Tube camera. Please take a look at out accessories program or contact us directly to get more information about it. - Page 52 ACCESSORIES CAMERA MOUNT Attention Always position the locking lever in a position without crashing the scissors-arm or any other obstacles. Centered Camera Position The length of the 80mm Tube is chosen to still let you center the camera in the middle of the dolly without crashing the arm with the camera mount - even on ground level position as you can see in the left picture.
- Page 53 ACCESSORIES CAMERA MOUNT To get more information about all types of Panther accessories you can take a look at our accessories brochure, visit our website at www.panther.tv or contact us directly.
-
Page 54: Bumper
Bumper. To attach the Bumper to the S-Type dolly you first have to clean the surface of the back carbon cover. Remove the upper 4 screws of the back carbon The take the first velcro fastener strip and cover with a screwdriver. - Page 55 ACCESSORIES BUMPER When the strip is sticked on, take a cutter After cutting you can put the screws to the and make small slits into the velcro fastener upper side. (only where the carbon cover has holes for the screws). Repeat all steps for the bottom side.
-
Page 56: Transport
TRANSPORT REMOVE THE SCISSORS-ARM Remove the Scissors-Arm Removing facilitates easier transport. There are Carrying Rods (310120) available to take the arm out. The two Carrying Rods differ in one thing: one Take this one and mount it on the top side comes with additional holders. - Page 57 TRANSPORT REMOVE THE SCISSORS-ARM Disconnect the red electricity knob by pulling Open the two screws on the left and right side it out. of the scissors-arm (front side of the dolly) with the integrated Allen Key. Swing out the screws from the upper part of Open the holder on both sides of the arm.
- Page 58 TRANSPORT REMOVE THE SCISSORS-ARM Now you need a second person. One person on each side of the dolly. You can take out the arm now by lifting both sides simultaneously. Remounting the Scissors-Arm is done by repeating all steps the other way: - Pull the Arm inside - Tighten the mechnical connection screw - Remove the Carrying Rod on the frontside...
-
Page 59: Carrying The Dolly
TRANSPORT CARRYING THE DOLLY Carrying the dolly The S-Type dolly comes with integrated carrying bars, one on each corner of the dolly (4 in total). Extention As an option there are Extentions (302783) for the carrying bars available. They are used by plug & play: press the red know and push it inside the hole of the integrated carrying bar. -
Page 60: Emergency Operation
Scissors-Arm. from the inside. Open the cover at the side of the Scissors-Arm Now you can manually move the arm upwards by turning counterclockwise. and downwards by using the wrench. Never use wrench when the S-Type Dolly is powered! -
Page 61: Notes
NOTES... - Page 62 NOTES...
- Page 63 NOTES...
- Page 64 FURTHER ASSISTANCE If you need any further assistance with this instructions (or also other questions) please contact our service department. SERVICE PHONE: SERVICE MAIL: (+49) 8095 71230 - 05 eric.suchetet@panther.tv ADDRESS PHONE / FAX ONLINE Phone: Am Bahnhof 19 (+49) 8095 71230 - 00 contact@panther.tv...
Need help?
Do you have a question about the S-TYPE DOLLY and is the answer not in the manual?
Questions and answers