Sign In
Upload
Download
Table of Contents
Contents
Add to my manuals
Delete from my manuals
Share
URL of this page:
HTML Link:
Bookmark this page
Add
Manual will be automatically added to "My Manuals"
Print this page
×
Bookmark added
×
Added to my manuals
Manuals
Brands
Amazone Manuals
Paint Sprayer
UF 901
Operating manual
Amazone UF 901 Operating Manual
Mounted field sprayer
Hide thumbs
1
2
3
4
Table Of Contents
5
6
7
8
9
10
11
12
13
14
15
16
17
18
19
20
21
22
23
24
25
26
27
28
29
30
31
32
33
34
35
36
37
38
39
40
41
42
43
44
45
46
47
48
49
50
51
52
53
54
55
56
57
58
59
60
61
62
63
64
65
66
67
68
69
70
71
72
73
74
75
76
77
78
79
80
81
82
83
84
85
86
87
88
89
90
91
92
93
94
95
96
97
98
99
100
101
102
103
104
105
106
107
108
109
110
111
112
113
114
115
116
117
118
119
120
121
122
123
124
125
126
127
128
129
130
131
132
133
134
135
136
137
138
139
140
141
142
143
144
145
146
147
148
149
150
151
152
153
154
155
156
157
158
159
160
161
162
163
164
165
166
167
168
169
170
171
172
173
174
175
176
177
178
179
180
181
182
183
184
185
186
187
188
189
190
191
192
193
194
195
196
197
198
199
200
201
202
203
204
205
206
207
208
209
210
211
212
213
214
215
216
217
218
219
220
page
of
220
Go
/
220
Contents
Table of Contents
Bookmarks
Table of Contents
Table of Contents
1 User Information
Purpose of the Document
Locations in the Operating Manual
Diagrams
2 General Safety Instructions
Obligations and Liability
Representation of Safety Symbols
Organisational Measures
Safety and Protection Equipment
Informal Safety Measures
User Training
Safety Measures in Normal Operation
Danger from Residual Energy
Maintenance and Repair Work, Fault Elimination
Design Changes
Spare and Wear Parts and Aids
Cleaning and Disposal
User Workstation
Warning Symbols and Other Signs on the Machine
Positions of Warning Symbols and Other Labels
Dangers if the Safety Information Is Not Observed
Safety-Conscious Working
Safety Information for Users
General Safety and Accident Prevention Information
Hydraulic System
Electrical System
Universal Joint Shaft Operation
Field Sprayer Operation
Cleaning, Maintenance and Repairs
3 Loading and Unloading
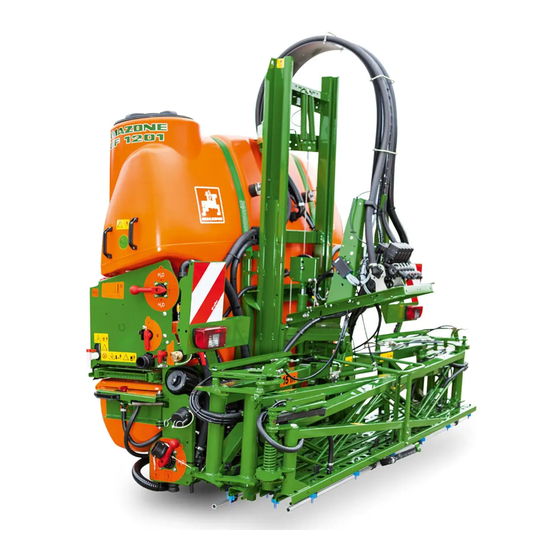
4 Product Description
Overview of the Assemblies
Safety and Protection Equipment
Supply Hoses between the Tractor and the Machine
Transportation Equipment
Intended Use
Device Inspections
Consequences of Using Certain Crop Protection Agents
Danger Areas and Danger Points
Rating Plate and CE Mark
Conformity
Technically Possible Maximum Application Rate
Maximum Permissible Application Rate
Technical Data
Basic Machine
Payload
Spraying Technology
Residual Amounts
Required Tractor Equipment
Noise Emissions Data
5 Construction and Function of the Basic Machine
Function
Control Panel
Switch Tap on the Control Terminal
Parking Supports
Three-Point Attachment Frame
PTO Shaft
Coupling the PTO Shaft
Uncoupling the PTO Shaft
Hydraulic Connections
Coupling the Hydraulic Hose Lines
Uncoupling the Hydraulic Hose Lines
Operating Terminal or Manual Operation
Control Terminal
Amaspray
Amaset
HB Manual Operation
Spray Liquid Tank
Hinged/Screw Lid for the Filling Opening
Filling the Spray Liquid Tank (Optional)
Fill Level Indicator
Step
Agitator
Suction Port for Filling the Spray Liquid Tank (Optional)
Flushing Water Tank
Fresh Water Tank
Induction Bowl with Injector and Canister Flushing
Pump Equipment
Filter Equipment
Filling Sieve
Bottom Sieve in the Induction Bowl
Suction Filter
Self Cleaning Pressure Filter
Nozzle Filters
Quick Coupling System (Optional)
Removable Transportation Device (Optional)
Exterior Wash down Kit (Optional)
Secure Container for Protective Clothing (Optional)
Work Lights
FT 1001 Front Tank (Optional)
Camera System
Comfort Equipment (Optional)
6 Construction and Function of the Sprayer Boom
Q-Plus Boom
Unlocking and Locking the Transport Safety Catch
Q-Plus Boom Manually Folded
Q-Plus Boom, Folding Via the Tractor Control Unit
Working on One Side Using the Right-Hand Boom
Super-S Boom
Unlocking and Locking the Transport Safety Catch
Super-S Boom, Folding Via the Tractor Control Unit
Reduction Joint on the Outer Boom (Optional)
Boom Width Reduction (Option)
Boom Extension (Option)
Hydraulic Tilt Adjustment (Optional)
Distance Control (Optional)
Spray Lines
Nozzles
Multiple Nozzles
Edge Nozzle
Automatic Single Nozzle Control (Optional)
Single Nozzle Control Amaswitch
4-Way Amaselect Single Nozzle Control
Special Optional Equipment for Liquid Fertiliser
Three-Ray Nozzles
Hole Nozzles / FD- Nozzles (Optional)
Drag Hose Unit for Liquid Fertiliser (Optional)
Foam Marker (Optional)
7 Commissioning
Checking the Suitability of the Tractor
Calculating the Actual Values for the Total Tractor Weight, Tractor Axle Loads and Tyre Load Capacities, as Well as the Minimum Ballast
Installing the PTO Shaft
Adjusting the Length of the PTO Shaft to the Tractor
Securing the Tractor / Machine against Unintentional Start-Up and Rolling
Installing Sensor "X" (Cardan Shaft / Wheel) for Determining the Distance Travelled and Operational Speed
Installation on a Tractor Without All-Wheel Drive
Installation on a Tractor with All-Wheel Drive or an Mb-Trac
Adjusting the Hydraulic System with the System Setting Screw
8 Coupling and Uncoupling the Machine
Coupling the Machine
Uncoupling the Machine
9 Adjustments
Positions of the Control Elements for the Different Operation Modes
10 Transportation
11 Using the Machine
Preparing for Spraying Operation
Preparing the Spray Liquid
Calculating the Filling and Re-Fill Quantity
Filling Table for Remaining Spray Area
Filling with Water
Filling the Spray Liquid Tank Via the Filling Opening
Filling the Spray Liquid Tank Via the Suction Port on the Control Terminal
Filling the Spray Liquid Tank / Flushing Water Tank through the Pressure Connection
Filling the Fresh Water Tank
Inducting Agents
Clean the Spray Agent Canister and Induction Bowl
Ecofill
Spraying Operation
Applying the Spray Liquid
Drift Reduction Measures
Dilute the Spray Liquid with Flushing Water
Residues
Diluting the Residue in the Spray Liquid Tank and Spraying the Diluted Residue at the End of Spraying Operation
Draining the Spray Liquid Tank Using the Pump
Cleaning the Field Sprayer
Cleaning the Sprayer with the Tank Empty
Draining the Final Residues
Cleaning the Suction Filter
Cleaning the Suction Filter When Tank Is Full
Cleaning the Pressure Filter When the Tank Is Empty
Cleaning the Pressure Filter When the Tank Is Full
External Cleaning
Cleaning the Sprayer During a Critical Agent Change
Cleaning the Sprayer with a Full Tank (Work Interruption)
12 Faults
13 Cleaning, Maintenance and Repairs
Cleaning
Winter Storage and Long Periods out of Operation
Lubrication Instructions
Maintenance Schedule - Overview
Hydraulic System
Labelling of Hydraulic Hose Lines
Maintenance Intervals
Inspection Criteria for Hydraulic Hose Lines
Installing and Removing Hydraulic Hose Lines
Fluid Filter
Cleaning the Solenoid Valves
Clean / Exchange the Filter in the Hydraulic Plug
Hydro-Pneumatic Pressure Reservoir
Adjusting the Hydraulic Throttle Valve
Q-Plus Boom
Super-S Boom
Settings on the Folded-Out Sprayer Boom
Pump
Checking the Oil Level
Changing the Oil
Checking and Replacing the Suction and Pressure-Side Valves
Checking and Replacing Piston Diaphragms (Workshop Work)
Calibrating the Field Sprayer
Determining the Actual Spray Rate by Driving a Calibration Distance
Setting the Volumetric Remote Control
Nozzles
Line Filter
Instructions on Testing the Field Sprayer
Electric Lighting System
Upper and Lower Link Pins
Screw Tightening Torques
Disposing of the Field Sprayer
14 Liquid Circuit
15 Spray Table
Spray Tables for Flat-Fan, Anti-Drift, Injector and Airmix Nozzles, Spraying Height 50 CM
Spraying Nozzles for Liquid Manure
Spray Table for Three-Ray Nozzles, Spraying Height 120 CM
Spray Table for 7-Hole Nozzles
Spray Table for FD- Nozzles
Spray Table for Drag Hose Unit
Conversion Table for Spraying Ammonium Nitrate / Urea Solution (AUS) Liquid Fertiliser
Advertisement
Quick Links
Download this manual
MG3168
BAG0012.11 04.19
Printed in Germany
en
Operating Manual
az
UF 901
UF 1201
UF 1501
UF 1801
Mounted field sprayer
Please read this operating
manual before commissioning.
Keep it in a safe place for
future use.
Table of
Contents
Previous
Page
Next
Page
1
2
3
4
5
Advertisement
Table of Contents
Need help?
Do you have a question about the UF 901 and is the answer not in the manual?
Ask a question
Questions and answers
Related Manuals for Amazone UF 901
Paint Sprayer Amazone UF 01 Instruction Manual
Mounted sprayer (228 pages)
Paint Sprayer Amazone UF 1201 Operating Manual
Mounted field sprayer (220 pages)
Paint Sprayer Amazone UX 3200 Super Operating Manual
Trailed field sprayer (242 pages)
Paint Sprayer Amazone UX 4200 Super Operating Manual
Trailed field sprayer (242 pages)
Paint Sprayer Amazone UX 5200 Super Operating Manual
Trailed field sprayer (242 pages)
Paint Sprayer Amazone UX 6200 Super Operating Manual
Trailed field sprayer (242 pages)
Paint Sprayer Amazone UX 11200 Operating Manual
Trailed field sprayer (242 pages)
Paint Sprayer Amazone UF 02 Series Operating Manual
Isobus software field sprayer (120 pages)
Paint Sprayer Amazone UF 1002 Operating Manual
Mounted field sprayer with comfort package cp (232 pages)
Paint Sprayer Amazone UG 2200 Nova Instruction Manual
Trailed sprayer (188 pages)
Paint Sprayer Amazone UG 3000 Nova Instruction Manual
Trailed sprayer (188 pages)
Paint Sprayer Amazone UG 4500 Nova Instruction Manual
Trailed sprayer (188 pages)
Paint Sprayer Amazone US 605 Instruction Manual
Mounted sprayer (136 pages)
Paint Sprayer Amazone US 805 Instruction Manual
Mounted sprayer (136 pages)
Paint Sprayer Amazone US 1005 Instruction Manual
Mounted sprayer (136 pages)
Paint Sprayer Amazone FT 1001 Operating Manual
Front tank for mounted field sprayer (60 pages)
This manual is also suitable for:
Uf 1201
Uf 1501
Uf 1801
Table of Contents
Print
Rename the bookmark
Delete bookmark?
Delete from my manuals?
Login
Sign In
OR
Sign in with Facebook
Sign in with Google
Upload manual
Upload from disk
Upload from URL


Need help?
Do you have a question about the UF 901 and is the answer not in the manual?
Questions and answers