
Related Manuals for Cyber Power OLS1000ERT2Ua


Summary of Contents for Cyber Power OLS1000ERT2Ua
- Page 1 User’s Manual OLS1000ERT2Ua OLS2000ERT2Ua OLS3000ERT2Ua Cyber Power Systems, Inc. K01-C000603-00 www.cyberpower.com...
-
Page 2: Table Of Contents
TABLE OF CONTENTS IMPORTANT SAFETY INSTRUCTIONS ....................3 UNPACKING ............................5 HARDWARE INSTALLATION ......................6 RACKMOUNT INSTALLATION ........................6 VERTICAL/TOWER INSTALLATION ......................7 SAFETY PRECAUTIONS ............................ 8 INSTALLING YOUR UPS SYSTEM .......................9 SYSTEM BLOCK DIAGRAM ..........................9 HARDWARE INSTALLATION GUIDE ......................9 OVERVIEW ............................1 1 POWER MODULE FRONT/REAR PANEL DESCRIPTION .............. -
Page 3: Important Safety Instructions
IMPORTANT SAFETY INSTRUCTIONS This manual contains important instructions. Please read and follow all instructions carefully during installation and operation of the unit. Read this manual thoroughly before attempting to unpack, install, or operate the UPS. CAUTION! The UPS must be connected to a grounded AC power outlet with fuse or circuit breaker protection. - Page 4 IMPORTANT SAFETY INSTRUCTIONS CAUTION! DO NOT USE FOR MEDICAL OR LIFE SUPPORT EQUIPMENT! Under no circumstances this unit should be used for medical applications involving life support equipment and/or patient care. CAUTION! DO NOT USE WITH OR NEAR AQUARIUMS! To reduce the risk of fire, do not use with or near aquariums.
-
Page 5: Unpacking
UNPACKING Rackmount rails (2) User’s manual Input power cord Output power cord(s) USB communication cable Flat head screws: Pan head screws: Plastic washers (8) Screw hole dust Rackmount ears M4X8L (8) M5X12L (12) covers (8) (Stands) (2) PowerPanel® Business software is available on our website. Please visit www.cyberpower.com and go to the Software Section for free download. -
Page 6: Hardware Installation
HARDWARE INSTALLATION HARDWARE INSTALLATION These versatile UPS systems can be mounted in a rackmount or vertical tower orientation. This versatility is especially important to growing organizations with changing needs that value having the option to position a UPS on a floor or in a rackmount system. Please follow the instructions below for the respective mounting methods. -
Page 7: Vertical/Tower Installation
HARDWARE INSTALLATION Step 3: Install the UPS on the rack Place the UPS onto the rackmount rails with the front of the unit facing you. Secure the UPS to your rack with four M5X12L screws at the front of the rack. (Located in position 2 & position 5). position 5 position 3 position 2... -
Page 8: Safety Precautions
HARDWARE INSTALLATION SAFETY PRECAUTIONS CAUTION! Installation environment should be in a temperature and humidity controlled indoor area free of conductive contaminants. Do not install this UPS where excessive moisture or heat is present (Please see specifications for acceptable temperature and humidity range). CAUTION! Never install a UPS, or associated wiring or equipment, during a lightning storm. -
Page 9: Installing Your Ups System
INSTALLING YOUR UPS SYSTEM SYSTEM BLOCK DIAGRAM BYPASS Input Inverter Output Input Output AC/DC Filter DC/AC Filter Charger Battery DC/DC AC/DC Module Control & USB&DB9 Monitoring SNMP Slot Line Mode Battery Mode Bypass Mode Control Signal HARDWARE INSTALLATION GUIDE 1. Battery charge loss may occur during shipping and storage. Before using the UPS, it’s strongly recommended to charge batteries for five hours to ensure the batteries’... - Page 10 INSTALLING YOUR UPS SYSTEM 7. To maintain an optimal battery charge, leave the UPS connected to AC electrical service at all times. 8. Before storing the UPS for an extended period of time, turn the unit OFF. Then cover it and store it with the batteries fully charged.
-
Page 11: Overview
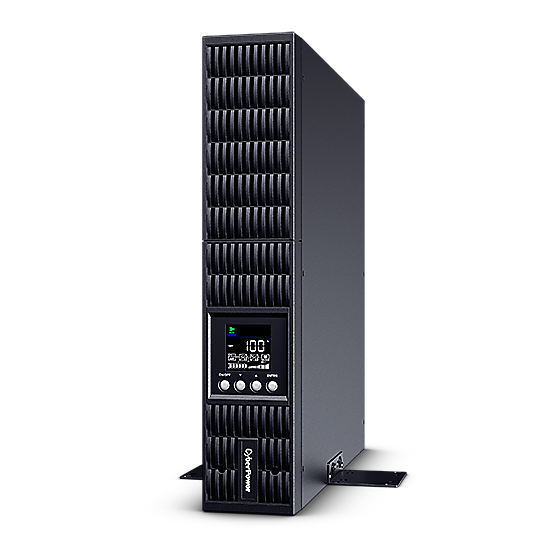
OVERVIEW POWER MODULE FRONT/REAR PANEL DESCRIPTION OLS1000ERT2Ua/OLS2000ERT2Ua/OLS3000ERT2Ua OLS1000ERT2Ua/OLS2000ERT2Ua OLS3000ERT2Ua 1. Power On/Off Button Master ON/OFF switch for the UPS. 2. Function Buttons Scroll DOWN, scroll UP, and ENTER. 3. UPS Status / Multifunction LCD Readout Shows UPS status, information, settings and events. - Page 12 OVERVIEW 9. EPO (Emergency Power Off) Connector Enables an emergency UPS power-off from a remote location. 10. Surge Protected Communication Ports RJ-45/RJ-11 These ports are used to protect standard RJ-45/RJ-11 based products (ADSL, LAN, Phone/ Modem-Lines) and cabling systems from surges. 11.
-
Page 13: Battery Module Front/Rear Panel Description
OVERVIEW BATTERY MODULE FRONT/REAR PANEL DESCRIPTION BPSE24V40ART2U/BPSE48V40ART2U/BPSE72V40ART2U 1. Input Connector Use this input Connector to connect the Battery module to the Power module or to the next Battery module. 2. On-board Replaceable Fuse Cover Replaceable fuse is accessible from the rear panel. It must be done by qualified personnel. 3. -
Page 14: Ups System Startup
UPS SYSTEM STARTUP After completing the hardware installation of the UPS, you are now ready to connect the UPS and connect your equipment. To start the UPS: 1. Verify that the UPS input cable or terminal blocks are connected to AC source. 2. -
Page 15: Using The Ups System
USING THE UPS SYSTEM LCD PANEL ITEM BUTTON FUNCTION DESCRIPTION Press this button for at least 3 seconds to turn ON/OFF on or turn off UPS. DOWN Press this button to scroll down in the LCD menu. Press this button to scroll up in the LCD menu. ENTER Press this button to select an option. -
Page 16: Icon Description
USING THE UPS SYSTEM LCD SCREEN – ICON DESCRIPTION UPS MODE MODE DESCRIPTION UPS TOPOLOGY: MODE DISPLAY Line Mode UPS is operating in Line Mode. The UPS is operating and protecting the equipment normally. Battery Mode UPS is operating in Battery Mode.A utility power failure has occurred. -
Page 17: Function Tree
USING THE UPS SYSTEM FUNCTION TREE Menu Status Setup Event Logs Information Output Voltage Output Voltage Log Item 1 EBM Number Sync Frequency Window Log Item 2 UPS Rating Output Frequency Bypass V Window Log Item 3 MCU Version Input Voltage Bypass Condition Log Item 4 Model Name... -
Page 18: Main Menu: Function Select
USING THE UPS SYSTEM MAIN MENU: FUNCTION SELECT The Main Menu has 4 icons of different function listed in the table below. FUNCTION SELECT MENU ICON DESCRIPTION UPS STATUS Displays the UPS status. Displays the UPS Set Up items that can SET UP be configured by the user. - Page 19 USING THE UPS SYSTEM UPS STATUS ITEMS DATA DISPLAYED DESCRIPTION OUTPUT VA = XXXXVA Displays the Output VA Display UPS Load Energy Consumption. =[XXXWh]/ [XXXWh] represents the load energy < 1kWh. LOAD ENERGY [XXXXKWh]/ [XXXXKWh] represents the load energy [XXXXKKWh] >999Wh and <...
- Page 20 USING THE UPS SYSTEM (2) SET UP There are 32 UPS items that can be Set Up by the user. 1. Press the “UP” and “DOWN” buttons to select the “SETUP” ICON. 2. Press the “ENTER” button to enter the “SETUP” function. 3.
- Page 21 USING THE UPS SYSTEM DEFAULT INDEX SET UP ITEMS AVAILABLE SETTINGS SETTING [Disable] [Voltage= +/-15%] [Voltage = +/-10%] When ECO mode is enabled the UPS will check the following specifications of Bypass quality ECO Mode Disable (1) Bypass voltage is inside the [V Range= +/-10%] (default setting) or [V Range= +/-15%].
- Page 22 USING THE UPS SYSTEM DEFAULT INDEX SET UP ITEMS AVAILABLE SETTINGS SETTING [I/P Power Fail] [Battery Low] [Summary Alarm] Dry Relay I/P Power [UPS On Bypass] [UPS Fail] Function Fail Sets the Dry Relay Function output. Reset Replace [Clear] [Setup] None Battery Manually reset the Battery Replacement date.
- Page 23 USING THE UPS SYSTEM DEFAULT INDEX SET UP ITEMS AVAILABLE SETTINGS SETTING [0 Minute] [1 Minute] [2 Minutes] [3 Minutes] [4 Minutes] [5 Minutes] [6 Minutes] [7 Minutes] [8 Minutes] [9 Minutes] [10 Minutes] Startup Delay 0 Minute When the utility power restores, the UPS will delay the restoration of output power.
- Page 24 USING THE UPS SYSTEM (3) EVENT LOGS The UPS will record the 12 most recent system events in the Event Log. 1. Select “EVENT” Icons. 2. Press the “ENTER” button to enter the “Event Logs”. 3. Press the “UP” and “DOWN” buttons to scroll through the “Event Logs”. The UPS will record events listed in the table below.
- Page 25 USING THE UPS SYSTEM (4) INFORMATION There are 10 UPS Information items that can be tested by the user. 1. Select “INFO” Icons. 2. Press the “ENTER” button to enter the “INFO”. 3. Press the “UP” and “DOWN” buttons to scroll through the “INFO” items shown in the table below.
-
Page 26: Event Code List
USING THE UPS SYSTEM EVENT CODE LIST EVENT EVENT LCD DISPLAY DESCRIPTION CODE CONTENT The Battery has been charged too High Over Charge voltage. Charger The Battery Charger has malfunctioned. Failure Battery Low The Battery has been discharged to low level. Battery Failure The UPS has detected battery failure. - Page 27 USING THE UPS SYSTEM EVENT CODE LIST EVENT EVENT LCD DISPLAY DESCRIPTION CODE CONTENT Bus Fault The UPS has detected DC Bus too High or Low. Bus Fault The UPS has detected +DC Bus too High. +High Bus Fault The UPS has detected +DC Bus too Low. +Low Bus Fault The UPS has detected -DC Bus too High.
-
Page 28: Lcd Word Index
USING THE UPS SYSTEM LCD WORD INDEX WORD LCD DISPLAY DESCRIPTION NO Bypass/NO IP Address Enable Disable Activate SAVE Save Escape VOFE Bypass condition: Check Voltage and Frequency OLVO Bypass condition: Check only Voltage OLBL Buzzer enable only battery Low IPPF Dry relay function output: Input power fail BATL... - Page 29 USING THE UPS SYSTEM LCD WORD INDEX WORD LCD DISPLAY DESCRIPTION MANU IP address: Manual BATE Battery test ALTE Alarm test INTE Indicator test FATE Fan test NULL NULL...
-
Page 30: Troubleshooting
TROUBLESHOOTING LCD will use Red or Yellow color to indicate the Fault or Warning status and also connect the color frame with ICON which has the same color and locates on the left zone of the screen. EVENT WARNING ICON POSSIBLE CAUSE SOLUTION CODE... - Page 31 TROUBLESHOOTING EVENT WARNING ICON POSSIBLE CAUSE SOLUTION CODE Your attached equipment may Output Short Output short circuit. have problems, please remove them and check again. Your equipment requires more power than the UPS can provide. Shut off non-essential If the UPS is in equipment.
-
Page 32: Maintenance
Recharge the battery every three months to ensure battery life. Warning: High voltage – Risk of Electric Shock CAUTION! Only use replacement batteries that are certified by Cyber Power Systems. Use of incorrect battery type is an electrical hazard that could lead to explosion, fire, electric shock, or short circuit. - Page 33 MAINTENANCE Battery Installation and Replacement Step 1: (1) Remove the right front panel. (2) Remove the battery connector from the battery compartment cover and disconnect. (3) Loosen the three screws to remove the plastic sheet and the battery compartment cover. Step 2: Pull the battery trays out slowly and then put the new battery trays into the compartment.
-
Page 34: Technical Specifications
TECHNICAL SPECIFICATIONS Models OLS1000ERT2Ua OLS2000ERT2Ua OLS3000ERT2Ua Configuration Capacity (VA) 1000 2000 3000 Capacity (Watts) 1800 2700 Form Factor Rackmount/Tower Energy-saving Technology Yes, ECO Mode Efficiency ≧ 95% Input Input Voltage Range 80~ 300 Vac Input Frequency Range 40~70Hz ≧ 0.99... - Page 35 TECHNICAL SPECIFICATIONS Models OLS1000ERT2Ua OLS2000ERT2Ua OLS3000ERT2Ua Battery Specifications (2) 12V (4) 12V (6) 12V Recharge Time (Typically) 4 Hours Sealed, Maintenance Free Status Indicators LCD Screen Graphic LCD Battery Mode, Battery Test Fail, Battery Low, Overload, Audible Alarms UPS Fault, Over Charged, Fan Failure...
- Page 36 11F., No.26, Jinzhuang Rd., Neihu Dist., Taipei City 114, Taiwan Entire contents copyright © 2019 Cyber Power Systems, Inc., All rights reserved. Reproduction in whole or in part without permission is prohibited. PowerPanel® Business and PowerPanel® Personal are trademarks of...
Need help?
Do you have a question about the OLS1000ERT2Ua and is the answer not in the manual?
Questions and answers