
Subscribe to Our Youtube Channel
Related Manuals for Bailey NICS01


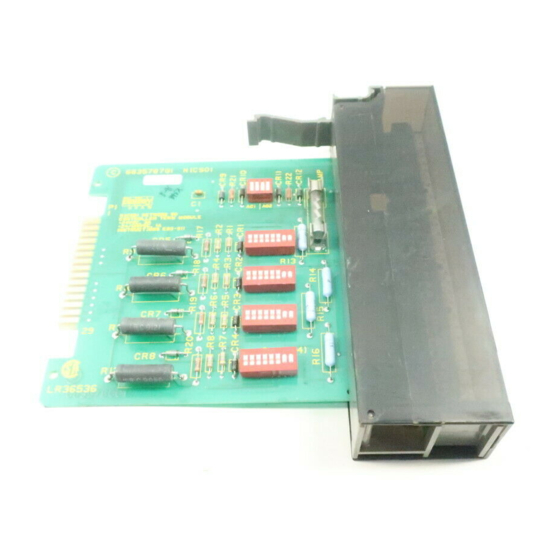
Summary of Contents for Bailey NICS01
- Page 1 E96-409 ® ® Controller/Station Termination Module (NICS01) Process Control and Automation Solutions from Elsag Bailey Group...
- Page 2 The information contained in this document is subject to change without notice. Elsag Bailey, its affiliates, employees, and agents, and the authors and contributors to this publication specif- ically disclaim all liabilities and warranties, express and implied (including warranties of merchantability and...
- Page 3 Preface The NICS01 Controller/Station Termination Module termi- nates and provides for: • Field wiring when IMCIS02 and IMQRS02 Slave Modules are used to supply analog and digital field I/O. • Digital control stations and digital indicator stations. • Interconnecting digital control stations and digital indica- tor stations using the NIDS01 Termination Module.
- Page 4 ® List of Effective Pages Total number of pages in this manual is 41, consisting of the following: Page No. Change Date Preface Original List of Effective Pages Original iii through vii Original 1-1 through 1-4 Original 2-1 through 2-9 Original Original 4-1 through 4-2...
- Page 5 ® Safety Summary GENERAL Equipment Environment WARNINGS All components, whether in transportation, operation or storage must be in a noncorrosive environment. Electrical Shock Hazard During Maintenance Disconnect power or take precautions to insure that contact with energized parts is avoided when servicing. SPECIFIC If input or output circuits are a shock hazard after disconnecting sys- WARNINGS...
- Page 6 Sommaire de Sécurité AVERTISSEMENTS Environment de l'equipement D’ORDRE Nes pas soumettre les composantes a une atmosphere corrosive GÉNÉRAL lors du transport, de l'entreposage ou de l'utilisation. Risques de chocs electriques lor de l'entretien S'assurer de debrancher l'alimentation ou de prende les precau- tions necessaires a eviter tout contact avec des composants sours tension lors de l'entretien.
-
Page 7: Table Of Contents
Table of Contents Page SECTION 1 - INTRODUCTION ....................1-1 OVERVIEW ........................1-1 INTENDED USER ......................1-2 INSTRUCTION CONTENT .....................1-2 HOW TO USE THIS MANUAL ..................1-2 GLOSSARY OF TERMS AND ABBREVIATIONS .............1-2 SPECIFICATIONS ......................1-3 REFERENCE DOCUMENTS..................1-4 NOMENCLATURE ......................1-4 SECTION 2 - INSTALLATION .....................2-1 INTRODUCTION......................2-1 SPECIAL HANDLING ....................2-1 UNPACKING AND INSPECTION ..................2-2... - Page 8 NICS01 Cable Connections to One Station ............. 2-3 2-3. NICS01 Cable Connection to NIDS01 Termination Module ........2-4 2-4. NICS01 Cable Connections to Multiple Stations and Serial Links ......2-4 2-5. Termination Module Installation ................2-7 2-6. NICS01 Terminal Strip Assignments ..............2-9 2-7.
- Page 9 Reference Documents ....................1-4 1-4. Nomenclature ......................1-4 2-1. Switch S1, S2, S3 and S4 Settings .................2-3 2-2. Switch S5 Settings ....................2-3 2-3. NICS01 Cable Applications..................2-5 3-1. Maintenance Schedule ...................3-1 5-1. Spare Parts List .....................5-1 A-1. Example Switch S1 Settings .................. A-1 A-2.
-
Page 10: Section 1 - Introduction
SECTION 1 - INTRODUCTION OVERVIEW The NICS01 Controller/Station Termination Module provides I/O connections for IMQRS02 and IMCIS02 Slave Modules, IMCOM03 and IMCOM04 Controller Modules and IMQRC01 Quick Response Controllers. Also provided are connections for control stations (no analog output bypass capability), digital... -
Page 11: Intended User
INTRODUCTION ® INTENDED USER System engineers and technicians should read this manual before installing and placing the NICS01 Termination Module into operation. Do not put the ICS termination module into operation until this instruction is read and understood. INSTRUCTION CONTENT... -
Page 12: Specifications
Wire seven strands of 30 gauge wire. This twisted pair is shielded with a 36 gauge woven shield drain wire. Bailey raw material P/N R2041-0397. Analog control station. Provides monitoring and allows manipulation of a single process control loop and communicates with the MFC, MFP and COM modules. It has front panel LED bar graphs that display set point, process variable and control output values. -
Page 13: Reference Documents
Serial link wire. R2041-0397 258436_1 Cable retaining kit used when at least one round cable is connected to the TMU. 6634408_2 Ribbon cable from J1 connector of NICS01 module to J1 connector of NIDS01 module. REFERENCE DOCUMENTS 1 - 4 I-E96-409A... -
Page 14: Section 2 - Installation
SECTION 2 - INSTALLATION INTRODUCTION This section explains how to configure and install the NICS01 Controller/Station Termination Module. Read, understand and complete the steps in the order they appear before using the ICS module. SPECIAL HANDLING Observe these steps when handling electronic circuitry:... -
Page 15: Unpacking And Inspection
® UNPACKING AND INSPECTION 1. Examine the hardware immediately for shipping damage. 2. Notify the nearest Bailey Controls sales office of any such damage. 3. File a claim for any damage with the transportation com- pany that handled the shipment. -
Page 16: Configuring Dipswitches
P1, J1 and J2. NKTM01 NKTD02/12 IMCOM03/04 NKTU02/12 NDIS01 IMCIS02 NDCS03 IMQRC01 IISAC01 IMQRS02 NICS01 NO ANALOG OUTPUT BYPASS CAPABILITY T00498A Figure 2-2. NICS01 Cable Connections to One Station SETUP/PHYSICAL INSTALLATION I-E96-409A 2 - 3... -
Page 17: Nics01 Cable Connection To Nids01 Termination Module
BYPASS CAPABILITY) NKDS01/11 NIDS01 (ANALOG OUTPUT NKDS02/12 BYPASS CAPABILITY) NKTD01/11 NDIS01 NDCS03 IISAC01 NKDS03/13 (NO ANALOG OUTPUT NDIS01 BYPASS NDCS03 CAPABILITY) IISAC01 T00500A Figure 2-4. NICS01 Cable Connections to Multiple Stations and Serial Links SETUP/PHYSICAL INSTALLATION 2 - 4 I-E96-409A... -
Page 18: Cable Installation
INSTALLATION Table 2-3. NICS01 Cable Applications Nomenclature/ Max. Length Application Connections Description Meters (Feet) NKTU02 PVC Jacket Ter- Connects ICS module to P1 of ICS module to P3 of mination Cable master slave module master/slave module (200) NKTU12 non-PVC Jacket... -
Page 19: Nktd02, Nktd12
INSTALLATION ® 2. If round type cables are already installed in the termination mounting unit (TMU), remove the cable retaining bracket. 3. If the NKTU02 or NKTU12 cable is used, insert the J2 end of the cable into the MMU backplane slot assigned to the mas- ter/slave module. -
Page 20: 6634408_2 Ribbon Cable
See Figure for ICS terminal strip assign- ments. The serial link provides a communication path between a master module and stations. Serial link wiring should be Bailey serial link wire. See Figure for example input circuits. SETUP/PHYSICAL INSTALLATION... - Page 21 INSTALLATION ® WARNING If input or output circuits are a shock hazard after disconnect- ing system power at the power entry panel, then the door of the cabinet containing these externally powered circuits must be marked with a warning stating that multiple power sources exist.
-
Page 22: Nics01 Terminal Strip Assignments
INSTALLATION The NICS01 is ready for operation if: 1. The fuse is installed. 2. The dipswitches are configured for the types of inputs and outputs desired. 3. All required cables are installed and verified. 4. Power is connected and applied to the ICS module. -
Page 23: Section 3 - Maintenance
SECTION 3 - MAINTENANCE INTRODUCTION The controller/station termination module requires limited maintenance. This section contains a maintenance schedule. MAINTENANCE SCHEDULE Execute the tasks in Table at the specified intervals. Table 3-1. Maintenance Schedule Task Interval Clean and tighten all power and field wiring connections. -
Page 24: Section 4 - Repair/Replacement Procedures
SECTION 4 - REPAIR/REPLACEMENT PROCEDURES INTRODUCTION This section explains the replacement procedures for the con- troller/station termination module. MODULE REPLACEMENT PROCEDURES If an ICS module is faulty, replace it with a new one. To replace an ICS termination module: CAUTION It is strongly recommended that all power (cabinet, I/O, etc.) be turned off before doing any termination module wiring. -
Page 25: Fuse Replacement Procedures
REPAIR/REPLACEMENT PROCEDURES ® 10. Install the front cover on the replacement ICS module. 11. Apply power to the PCU containing the replacement ICS module. FUSE REPLACEMENT PROCEDURES If the fuse is faulty, replace it with a new one. To replace a fuse: CAUTION It is strongly recommended that all power (cabinet, I/O, etc.) be turned off before doing any termination module wiring. -
Page 26: Section 5 - Support Services
SECTION 5 - SUPPORT SERVICES INTRODUCTION Bailey Controls is ready to help in the use, application and repair of its products. Contact the nearest sales office to make requests for sales, applications, installation, repair, overhaul and maintenance contract services. REPLACEMENT PARTS AND ORDERING INFORMATION When making repairs, order replacement parts from a Bailey sales office. -
Page 27: Appendix A - Imcis02 Control I/O Slave Module Configuration
This information is provided as a quick reference guide for personnel installing the NICS01 module. Configura- tion consists of setting the slave module address (Switch S1), analog output default values (Switch S2), analog output mode (Switch S3), digital input voltage level (Jumpers J1 through J3), and DC voltage response time (Jumpers J4 through J6). -
Page 28: Jumpers J1 Through J6 Settings
IMCIS02 CONTROL I/O SLAVE MODULE CONFIGURATION ® Table A-2. Switch S2 Settings Time-out Option Power Up State Analog Go To Output Switch Hold Switch 100% Power Up NOTE: 0 represents the CLOSED or ON side of the switch. 1 represents the OPEN or OFF side of the switch. -
Page 29: Appendix B - Imcom03 And Imcom04 Controller Module Configuration
This information is provided as a quick reference guide for personnel installing the NICS01 module. Configura- tion consists of setting the analog output types and defaults (Switches S2 and S3), operating mode and module address (Switch S4), and digital input types (Jumpers J1 through J3). -
Page 30: Switch S4 Settings (Modes
IMCOM03 AND IMCOM04 CONTROLLER MODULE CONFIGURATION ® Table B-2. Switch S4 Settings (Modes) Switch Position Function Normal mode: Normal operation NVRAM initialization Configuration lockout NOTE: 0 represents the CLOSED or ON side of the switch. 1 represents the OPEN or OFF side of the switch. -
Page 31: Appendix C - Imqrc01 Quick Response Controller Module Configuration
This information is provided as a quick reference guide for personnel installing the NICS01 module. Configura- tion consists of setting the analog output types and defaults (Switches S2 and S3), operating mode and module address (Switch S4), and digital input types (Jumpers J1 through J3). -
Page 32: Introduction
IMQRC01 QUICK RESPONSE CONTROLLER MODULE CONFIGURATION ® Table C-2. Switch S4 Settings (Modes) Switch Position Function Normal mode: Normal operation NVRAM initialization Configuration lockout NOTE: 0 represents the CLOSED or ON side of the switch. 1 represents the OPEN or OFF side of the switch. -
Page 33: Appendix D - Imqrs02 Quick Response Slave Module Configuration
This information is provided as a quick reference guide for personnel installing the NICS01 module. Configura- tion consists of setting the slave module address (Switch S1), analog output default values (Switch S2), analog output mode (Switch S3), digital input voltage level (Jumpers J1 through J3), and DC voltage response time (Jumpers J4 through J6). -
Page 34: Introduction
IMQRS02 QUICK RESPONSE SLAVE MODULE CONFIGURATION ® Table D-2. Switch S2 Settings Time-out Option Power Up State Analog Go To Output Switch Hold Switch 100% Power Up NOTE: 0 represents the CLOSED or ON side of the switch. 1 represents the OPEN or OFF side of the switch. -
Page 35: Appendix E - Iisac01 Analog Control Station Configuration
This information is provided as a quick reference guide for personnel installing the NICS01 module. Configura- tion consists of setting the operating mode, communications rate and station address (Switch S1). The auto bypass, output and electric drive options (Switch S2) along with the bar graph display option (Switches S3 and S4) must be set. -
Page 36: Introduction
IISAC01 ANALOG CONTROL STATION CONFIGURATION ® Table E-1. Switch S1 Settings (continued) Switch Position Address Example Binary Value 32 16 NOTE: 0 represents the CLOSED or ON side of the switch. 1 represents the OPEN or OFF side of the switch. Table E-2. -
Page 37: Switch S4 Settings
IISAC01 ANALOG CONTROL STATION CONFIGURATION Table E-4. Switch S4 Settings Switch Function Position Enables square root of AI2. Disables square root of AI2. Bar Graph Display Options Switch Alphanumeric (Normal Mode) Position Display PV, CO, SP PV, CO, SP Blank PV, CO, SP All On PV, CO, SP... -
Page 38: Electric Drive Mode Display Options
IISAC01 ANALOG CONTROL STATION CONFIGURATION ® Table E-6. Electric Drive Mode Display Options Standalone Display Mode Bypass Display Mode Bar Graph Action on (Switch S3 Positions) (Switch S4 Positions) Control Output Blank AI1 to CO AI1 to CO AI2 to CO NOTE: 0 represents the CLOSED or ON side of the switch. -
Page 39: Appendix F - Ndcs03 Digital Control Station Configuration
This information is provided as a quick reference guide for personnel installing the NICS01 module. Configuration consists of setting the analog input type (Dipshunt XU16) and control output type (Jumpers J1 and J2) on the bypass board. Setting the station address (Switch S1) and options (Jumpers JP1 through JP5) on the sta- tion board is also required. -
Page 40: Digital Control Station Board
NDCS03 DIGITAL CONTROL STATION CONFIGURATION ® OPEN STATION ADDRESS OPTION SWITCH JUMPERS T00506A Figure F-2. Digital Control Station Board Table F-1. Dipshunt XU16 Settings Strap Numbers Function 1 2 3 4 5 6 7 8 0 0 1 1 0 0 1 1 4 to 20 mA analog input 1 1 0 0 1 1 0 0 Universal actuator analog input. -
Page 41: Switch S1 Settings
NDCS03 DIGITAL CONTROL STATION CONFIGURATION Table F-3. Switch S1 Settings Station Switch Position Address NOTE: 0 represents the CLOSED or ON side of the switch. 1 represents the OPEN or OFF side of the switch. Table F-4. Jumpers J1 through J5 Settings Jumper Jumper Function... -
Page 42: Appendix G - Ndis01 Digital Indicator Station Configuration
This information is provided as a quick reference guide for person- nel installing the NICS01 module. Configuration consists of setting the station address (Switch S1) and display brightness (Jumper JP1). Refer to the Digital Indicator Station (NDIS01) instruction manual for detailed instructions. - Page 43 Index Cables ..............1-4, 2-3 NDCS03 configuration ..........F-1 Configuring dipswitches ..........2-3 NDIS01 configuration..........G-1 Fuse replacement procedures........4-2 Overview ..............1-1 Fuses................2-2 References..............1-4 Glossary ..............1-2 Related equipment............1-4 Replacement parts/ordering information.....5-1 I/O, power, and serial link wiring......... 2-7 IISAC01 configuration ..........E-1 Setup................2-2 IMCIS02 configuration ..........
- Page 44 Telefax 39-10-6582-941 Telephone 49-69-799-0 Telefax 65-292-9011 Telefax 49-69-799-2406 Form I-E96-409A Litho in U.S.A. 992 Copyright © 1992 by Elsag Bailey Process Automation, As An Unpublished Work ® Registered Trademark of Elsag Bailey Process Automation ™ Trademark of Elsag Bailey Process Automation...
Need help?
Do you have a question about the NICS01 and is the answer not in the manual?
Questions and answers