Table of Contents
Advertisement
Advertisement
Table of Contents

Related Manuals for Ferno POWERFlexx


Summary of Contents for Ferno POWERFlexx
- Page 1 Users’ Manual ™ POWERFlexx Hydraulic Cot May 2005 GLO Pub. No. 234-3310-01...
- Page 2 Additional free copies are available upon request from Customer Relations. Proprietary Notice The information disclosed in this manual is the property of Ferno- Washington, Inc., Wilmington, Ohio, USA. Ferno-Washington, Inc. reserves all patent rights, proprietary design rights, manufacturing...
-
Page 3: Table Of Contents
11 - Accessories and Related Products ......40 Adjustable Foot-End Lift Bar ......21 12 - Limited Warranty ..........41 Lead Handle ........... 22 13 - Ferno Customer Relations ........41 Wheel Locks ........... 22 Training Record ............. 42 Patient Restraints ..........23 Maintenance Record ............. - Page 4 Figure 23 - Foot-End Lift Bar Positions ......21 Parts Diagrams ..............39 Figure 24 - Adjusting the Foot-End Hinges ....21 Serial Number Location ..........41 Figure 25 - Using the Lead Handle ........ 22 © Ferno-Washington, Inc. 234-3310-01 May 2005...
-
Page 5: Safety Information
“mixed-component” cot/cot fastener system can Improper maintenance can cause injury. increase the users’ risk of injury and damage. Ferno- Maintain the cot only as described in this Washington, Inc. strongly recommends that only Ferno- manual. -
Page 6: Safety And Instruction Labels
Label D (1) - Indicates Power Pack Label C (1) - Indicates where to connect contents and specifies service personnel. the charging cable to the power pack. © Ferno-Washington, Inc. 234-3310-01 May 2005... -
Page 7: Operator Skills And Training
For additional free users’ record their training information. A sample manuals, contact your Ferno distributor or Ferno training record sheet is provided on page 42. Customer Relations (page 41). -
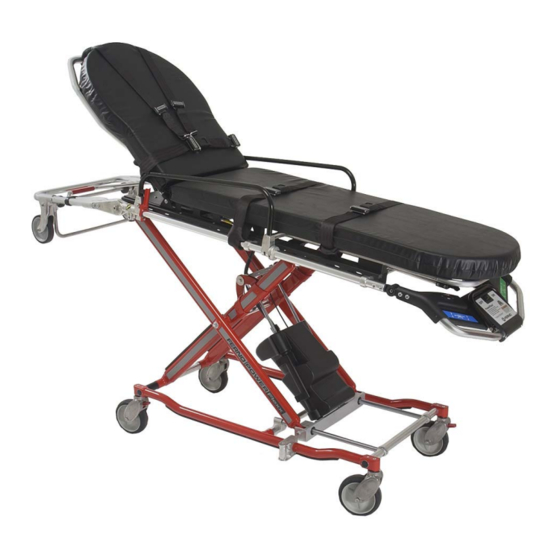
Page 8: About The Cot
Bed Height Range* ....13-41 in/33-104 cm The cot is for professional use by a minimum of two Maximum Loading Height ....33 in (84 cm) trained operators. It is designed for use with Ferno’s Length Model 175 Series cot fasteners (not included). -
Page 9: Components
• Low-Profile Mounting Block Control Panel - Top • Short Turn-Knob • Users’ Manual • Set of Restraints • Mattress Manual Mode Handle Release for Manual Mode Handle Control Panel - Bottom Battery Charger © Ferno-Washington, Inc. 234-3310-01 May 2005... -
Page 10: Cot Height
Fully fold the cot to place it in an ambulance or to transfer a patient from the ground onto the cot. The cot can also be rolled in the fully folded position if needed. 12" (30 cm) © Ferno-Washington, Inc. 234-3310-01 May 2005... -
Page 11: Setup And Installation
Before placing the cot in service, attach the mattress and restraints (see page 23). Also see the restraint users’ manuals provided with the restraints. Keep the restraint instructions with this manual for future reference. For additional, free manuals, contact Ferno Customer Relations (page 41). 4.2 Install the Safety Hook... -
Page 12: Figure 3 - Safety Hook Placement
4. Test the hook by loading and unloading the cot. Rear Edge Flat-Head Verify that there is no interference with folding Machine Screw Hook or unfolding the legs. Floor Flat Washer Lock Washer Figure 4 - Installing the Safety Hook © Ferno-Washington, Inc. 234-3310-01 May 2005... -
Page 13: Update Your Model 175 Fastener
Model 175 fasteners with removable antler mounts and serial numbers lower than L-612245 must be updated to function properly with current Ferno cots. (The serial number is located on the rail portion of the fastener). The cot is shipped with parts to update one fastener: one low-profile mounting block and one short turn knob. -
Page 14: Using The Hydraulic Power System
Turn the switch ON to use the cot in its powered mode. A green lamp in the switch is lit when the rocker switch is set to ON. Figure 8 - Main Power Switch © Ferno-Washington, Inc. 234-3310-01 May 2005... -
Page 15: Touch Pad Controls
Recharge the batteries as often as possible. Figure 11 - Battery Charge Indicator To recharge the batteries, see Battery Charger, page 17, or Charging the Batteries, page 36. © Ferno-Washington, Inc. 234-3310-01 May 2005... -
Page 16: Manual Mode
1. Lift Yellow Retaining Lever the cot to settle. Support the weight for 2 seconds, 2. Gently Squeeze Red Handle or briefly touch the UP button, to eliminate settling. Figure 13 - Using the Manual Mode Handle © Ferno-Washington, Inc. 234-3310-01 May 2005... -
Page 17: Battery Charger
5. Test the cot by raising and lowering it to verify the power pack is providing power to the unit. Check the battery charge indicator and charge the batteries if needed. Figure 16 - Removing Power Pack Module © Ferno-Washington, Inc. 234-3310-01 May 2005... -
Page 18: Cot Features
Note: You do not need to squeeze the release bar when lifting the drop frame from the folded to the middle position. Figure 18 - Adjusting the Drop Frame © Ferno-Washington, Inc. 234-3310-01 May 2005... -
Page 19: Safety Bar Release Handle
4. Fasten and adjust the torso restraint. Note: The backrest gas spring is under pressure to ease raising and lowering. Control the upward movement Figure 20 - Using the Backrest of the backrest so it does not move too quickly. © Ferno-Washington, Inc. 234-3310-01 May 2005... -
Page 20: Sidearms
The sidearms have an intermediate stop. When used with Ferno’s optional sidearm cover, this provides a flat surface to support small items weighing less than 10 lb (4.5 kg), or the patient’s arm. -
Page 21: Adjustable Foot-End Lift Bar
24), then rotate the lift bar to a new locking position. Verify that the lift bar is locked before lifting the cot. Figure 23 - Foot-End Lift Bar Positions Figure 24 - Adjusting the Foot-End Hinges © Ferno-Washington, Inc. 234-3310-01 May 2005... -
Page 22: Lead Handle
Do not leave the cot or a patient unattended. To engage a wheel lock, press the lock lever down with your toe (Figure 26). Figure 26 - Wheel Lock To disengage a wheel lock, lift the lock lever up with your toe. © Ferno-Washington, Inc. 234-3310-01 May 2005... -
Page 23: Patient Restraints
To attach, use, and maintain restraints, see the restraint users’ manuals (supplied). Additional free manuals are available from Ferno Customer Relations (page 41). 6.10 Locking Mattress The five hooks on the bottom of the mattress are used to anchor the mattress to the cot and limit its movement. -
Page 24: Using The Cot
Roll the cot only when the patient surface is level. seconds, or briefly touch the UP button, to Rolling it when the patient surface is in loading eliminate settling. attitude (tilted) can increase the chance that the cot could become unbalanced and tip. © Ferno-Washington, Inc. 234-3310-01 May 2005... -
Page 25: Changing Cot Height
4. Both Operators: Raise or lower the cot. 5. Control Operator: Release the manual mode handle to lock the cot at the desired height. Figure 30 - Short Operators Using Lower Lifting Positions © Ferno-Washington, Inc. 234-3310-01 May 2005... -
Page 26: Transferring The Patient
7. Before moving the cot or changing its position, make sure sheets and other articles will not interfere with cot operation. 8. Lift only the weight you can safely handle. Use help as needed (See Using Additional Help, page 28). © Ferno-Washington, Inc. 234-3310-01 May 2005... -
Page 27: Rolling The Cot
If the load (patient and equipment) exceeds the Load Limit, the automatic safety bleed-down system will allow the cot to settle to its lowest position. If this occurs, roll the cot in its folded position. Figure 33 - Rolling the Cot © Ferno-Washington, Inc. 234-3310-01 May 2005... -
Page 28: Using Additional Help
(patient plus equipment) or when operating the cot manually. Operators should maintain control of the cot, operate the controls, and direct all helpers. Ferno recommends that helpers work in pairs to help maintain cot balance. The chart below shows suggested placement for operators and helpers. -
Page 29: Loading And Unloading The Cot
(See Setup and Installation, pages 11-13). Using the cot with a patient requires a minimum of two trained operators working together. Use additional help as needed when working with heavy patients (See Using Additional Help, page 28). © Ferno-Washington, Inc. 234-3310-01 May 2005... -
Page 30: Loading The Cot
(and any helpers) may need to lift the cot higher than normal to allow Figure 36 - Raising and Folding the Cot the legs to extend fully. Figure 37 - Loading the Cot © Ferno-Washington, Inc. 234-3310-01 May 2005... -
Page 31: Unloading The Cot
If local protocols permit, an empty cot may be loaded and unloaded from the ambulance by one trained operator (Figure 40). Follow the instructions in Loading the Cot or Unloading the Cot. Figure 40 - One Operator With Empty Cot © Ferno-Washington, Inc. 234-3310-01 May 2005... -
Page 32: Non-Powered Loading And Unloading
4. Assisting Operator: Raise or lower the undercarriage. Figure 41 - Manual Mode: Non-Powered 5. Control Operator: Release the manual mode Loading or Unloading the Cot handle to allow the undercarriage to lock. © Ferno-Washington, Inc. 234-3310-01 May 2005... -
Page 33: Maintenance
Cleaning (pages 33-34) manufacturers’ directions and read the manufacturers’ • Waxing (page 34) material safety data sheets. You can purchase a • recommended disinfectant from your Ferno distributor • Inspecting (page 34) or Ferno Customer Relations (page 41). • Lubricating (page 35) Charging Batteries (page 36) •... -
Page 34: Cleaning The Cot
If inspection shows damage or excessive wear, remove the cot from service until repair is made. © Ferno-Washington, Inc. 234-3310-01 May 2005... -
Page 35: Lubricating The Cot
The manual mode handle and cable will rarely require lubrication. Inspect every three months and use a very small *Note: amount of lubricant if needed. **Note: Do not lubricate the upper or lower slider tubes. Clean the tubes with soap and water only. Rinse well to remove any soap residue. © Ferno-Washington, Inc. 234-3310-01 May 2005... -
Page 36: Charging The Batteries
Important Disconnect the charger before using the cot. Failure to disconnect the charger can damage the charging cord, charger, or power pack. Figure 44 - Charger Connected to Power Pack © Ferno-Washington, Inc. 234-3310-01 May 2005... -
Page 37: Adjusting The Tension Of The Manual Mode Cable
Adjustment functions properly. Then return the cot to service. Nuts If the cable cannot be adjusted satisfactorily, replace Figure 47 - Manual Mode Adjustment Nuts the manual cable (see Parts and Service, pages 38-39). © Ferno-Washington, Inc. 234-3310-01 May 2005... -
Page 38: Parts And Service
In the United States, to order parts or for professional cot repair, contact EMSAR - the only agent authorized ® by Ferno to manage, service, and repair Ferno products. EMSAR factory-trained technicians use Ferno- approved parts and repair procedures. EMSAR has a WARNING franchise location serving you. -
Page 39: Parts Diagrams
Lower frame side rail (fastener post side) Red ............190-1470 Orange ...........190-1471 Not Shown: Green .............190-1472 Blue ............190-1473 Platinum ..........190-1474 Lower frame side rail (non-fastener post side) Red ............190-1475 Orange ...........190-1476 Green .............190-1477 Blue ............190-1478 Platinum ..........190-1479 © Ferno-Washington, Inc. 234-3310-01 May 2005... -
Page 40: Accessories And Related Products
Accessories and Related Products POWERFlexx ™ 11 - ACCESSORIES AND RELATED PRODUCTS Ferno offers a full line of accessories (fasteners, IV WARNING poles, immobilizers, blankets, etc.) approved for use with the cot. Always follow the instructions packed with Attaching improper items to the cot can accessories. -
Page 41: Limited Warranty
Limited Warranty Obligation If a product is proven defective, Ferno will repair or replace it, or, at our option, refund the item’s purchase price. In no event is Ferno liable for more than the selling price of the product. The purchaser accepts these terms in lieu of all damages. -
Page 42: Training Record
POWERFlexx ™ TRAINING RECORD Date Name Training Method © Ferno-Washington, Inc. 234-3310-01 May 2005... -
Page 43: Maintenance Record
POWERFlexx ™ MAINTENANCE RECORD Maintenance Performed Date © Ferno-Washington, Inc. 234-3310-01 May 2005...
Need help?
Do you have a question about the POWERFlexx and is the answer not in the manual?
Questions and answers