Table of Contents
Advertisement
Advertisement
Table of Contents

Related Manuals for Ferno Stretcher Series


Summary of Contents for Ferno Stretcher Series
- Page 1 Users’ Manual Scoop EXL Stretcher Series May 2006 GLO Pub. No. 234-2125-05...
- Page 2 Additional free copies are available upon request from Customer Service. Proprietary Notice The information disclosed in this manual is the property of Ferno- Washington, Inc., Wilmington, Ohio, USA. Ferno-Washington, Inc., reserves all patent rights, proprietary design rights, manufacturing...
-
Page 3: Table Of Contents
5.6 Lubricating the Stretcher ........15 5.7 Checking/Securing Pins in the Couplings ..15, 16 3 - About the Stretcher ..........6, 7 3.1 Scoop EXL Stretcher Series Description .... 6 6 - Stretcher Setup ........... 17, 18 3.2 General Specifications ......... 6 6.1 Attaching Restraints to the Scoop EXL and Scoop... -
Page 4: Safety Information
Maintain the stretcher only as described in this manual. Improper parts and service can cause injury. Use only Ferno parts and Ferno-approved service on the stretcher. Modifying the stretcher can cause injury and damage. Use the stretcher only as designed by Ferno. -
Page 5: Operator Skills And Training
A sample read this manual. For additional free users’ training record sheet is provided on page 22. manuals, contact your Ferno distributor or Ferno Customer Relations (page 21). © Ferno-Washington, Inc. 234-2125-05 May 2006... -
Page 6: About The Stretcher
The stretcher may also be information, contact Ferno Customer Relations (page uncoupled at only the foot end and opened into a “V” 21) or your Ferno distributor. Ferno reserves the right configuration to “scoop” the patient or body. Other to change specifications without notice. -
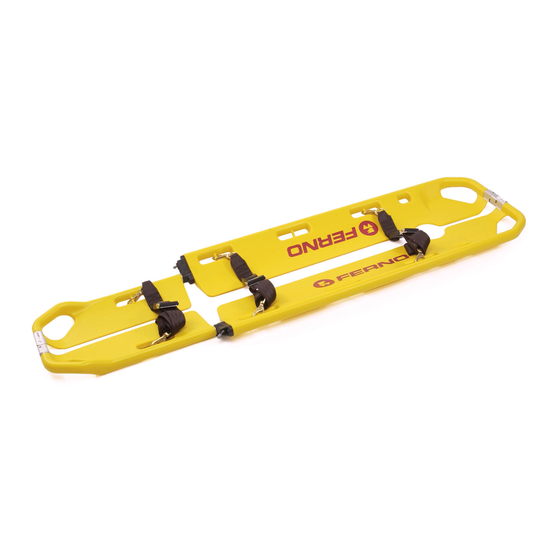
Page 7: Stretcher Components
(4 per side) (Foot End) Restraint SCOOP EXL WITH PINS MORTUARY SCOOP EXL To request additional free users’ manuals, contact your Ferno distributor or call Ferno USERS’ Customer Relations at 1.877.733.0911 (toll MANUAL free) or 1.937.382.1451. © Ferno-Washington, Inc. 234-2125-05 May 2006... -
Page 8: Using The Stretcher
To unfold the stretcher: lay the stretcher flat on the floor or ground. Lift the foot section off the torso panel and unfold until it lies flat, then follow instructions in Adjusting the Stretcher Length, page 9. © Ferno-Washington, Inc. 234-2125-05 May 2006... -
Page 9: Adjusting The Stretcher Length
3. Return both lock-pin levers to the locked position (Figure 3). 4. Push or pull the foot section a little until it locks into place. Unlocked Locked 5. Make sure both sides are securely locked. Figure 3 - Using the Lock-Pin Lever © Ferno-Washington, Inc. 234-2125-05 May 2006... -
Page 10: Applying The Stretcher
The couplings will remain securely joined if the locks are fully engaged. 9. Fasten and tighten all patient restraints (Figure 7). Figure 7 - Fastening Restraints © Ferno-Washington, Inc. 234-2125-05 May 2006... -
Page 11: Applying The Stretcher In A "V" Configuration
To test for proper lock engagement, pull the coupling halves away from each other without pressing on the lock levers. The couplings will remain securely joined if the locks are fully engaged. 8. Fasten and tighten all patient restraints. © Ferno-Washington, Inc. 234-2125-05 May 2006... -
Page 12: Lifting And Carrying The Stretcher
Always lift and carry the stretcher by hand, grasping the handholds and main frame. In heavy rescue situations, secure the stretcher in a transport basket and attach lifting devices to the basket. © Ferno-Washington, Inc. 234-2125-05 May 2006... -
Page 13: Using Additional Help
Inspect the stretcher if the load limit has been exceeded (see Inspecting the Stretcher, page 15). WARNING Helpers can cause injury or be injured. Operate and maintain control of the stretcher and direct all helpers. © Ferno-Washington, Inc. 234-2125-05 May 2006... -
Page 14: Maintenance
Important Restraints may be damaged by improper maintenance. Follow the disinfecting and cleaning instructions in the restraint users’ manual packaged with the restraints. © Ferno-Washington, Inc. 234-2125-05 May 2006... -
Page 15: Inspecting The Stretcher
If inspection indicates damage or excessive wear to restraint(s), take restraint(s) out of service and destroy to prevent accidental use. For replacement restraints, contact your Ferno distributor or Ferno Customer Relations (page 21). Keep maintenance records. Figure 11 - Pin in Coupling Half... - Page 16 5. Insert the pin into the lock body and thread the pin in using the pliers. 6. Remove all excess threadlocker material. 7. Allow the threadlocker to cure for several hours before returning the stretcher to service. © Ferno-Washington, Inc. 234-2125-05 May 2006...
-
Page 17: Stretcher Setup
Figure 12 - Attaching a Two-Piece Restraint 5. Repeat Steps 2-4 to attach the other half of the restraint to opposite handhold. 6. Repeat Steps 1-5 to attach additional restraints. 7. Confirm that all restraints are securely fastened. © Ferno-Washington, Inc. 234-2125-05 May 2006... -
Page 18: Attaching Restraints To The Scoop Exl Stretcher
Scoop EXL Stretcher Series 6.2 Attaching Restraints to the Scoop EXL Stretcher with Pins The Scoop EXL Stretcher with Pins requires restraints fitted with speed clips. Ferno recommends using five- or seven-foot, two-piece restraints. Important Restraints fitted with plastic buckles (Model 773-P) are secondary restraints. -
Page 19: Parts And Service
To order Ferno parts and for professional stretcher damage. Use the stretcher only as designed repair, contact your Ferno distributor. Your distributor by Ferno. is the only agent authorized by Ferno to manage, service, and repair Ferno products. 7.3 Parts List Yellow Gray Ref.#... -
Page 20: Accessories And Related Products
8 - ACCESSORIES AND RELATED PRODUCTS The Ferno accessories listed here are approved for use Part Description with the stretcher. Ferno also has a full line of 430 Restraint (nylon webbing, metal buckle) emergency products for the EMS professional. 1-pc., 7-ft. maroon .........031-2600 2-pc., 5-ft. -
Page 21: Limited Warranty
Limited Warranty Obligation If a product is proven defective, Ferno will repair or replace it, or, at our option, refund the item’s purchase price. In no event is Ferno liable for more than the selling price of the product. The purchaser accepts these terms in lieu of all damages. -
Page 22: Training Record
Scoop EXL Stretcher Series TRAINING RECORD Date Name Training Method © Ferno-Washington, Inc. 234-2125-05 May 2006... -
Page 23: Maintenance Record
Scoop EXL Stretcher Series MAINTENANCE RECORD Maintenance Performed Date © Ferno-Washington, Inc. 234-2125-05 May 2006...
Need help?
Do you have a question about the Stretcher Series and is the answer not in the manual?
Questions and answers