Table of Contents
Advertisement
Quick Links
GB
www.lehmann-locks.com
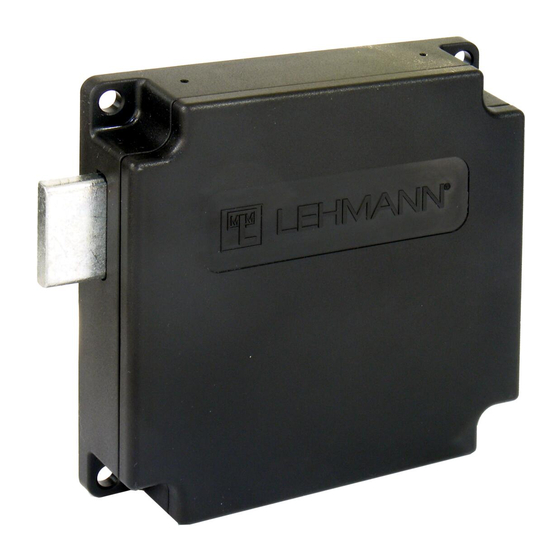
Locker lock M610 with keypad
(M610 TA03)
Operating Instructions
Content
Page
General system description / Operating description ....................................................... 2
Safety precautions / Care & maintenance / Technical specifications .............................. 3
System components & package contents ........................................................................ 4
Dimensions ...................................................................................................................... 5
Getting started & changing batteries .............................................................................. 6
Emergency power supply ................................................................................................ 7
Installing the labeling clip / Mounting the locking system... ........................................... 8
Structure of the keypad TA03 / Bolt end position scan function ................................... 10
Factory settings / Opening & closing in Free Code mode. ............................................. 11
Switching to Fixed Code mode / Opening and closing in Fixed Code mode .................. 12
User changes the Fixed Code ........................................................................................ 13
Switching to Free Code mode........................................................................................ 14
Changing the master code ............................................................................................. 15
Changing the emergency opening code ........................................................................ 16
Emergency opening / Reset to factory settings ............................................................. 17
Automatic locking in Fixed Code mode... ...................................................................... 18
Automatic opening in Free Code mode ......................................................................... 19
Battery warning / Firmware update / Disposal ............................................................. 20
Advertisement
Table of Contents

Subscribe to Our Youtube Channel
Related Manuals for LEHMANN M610


Summary of Contents for LEHMANN M610
-
Page 1: Table Of Contents
Locker lock M610 with keypad (M610 TA03) Operating Instructions Content Page General system description / Operating description ............2 Safety precautions / Care & maintenance / Technical specifications ......3 System components & package contents ................ 4 Dimensions ........................5 Getting started &... -
Page 2: General System Description / Operating Description
GENERAL SYSTEM DESCRIPTION The M610 TA03 (keypad) locking system is a locker lock with a motor-driven locking bolt intended for use in the home and office. This manual gives you information in order to install and operate the locking system correctly. Keep the operating instructions in an easily accessible place. -
Page 3: Safety Precautions / Care & Maintenance / Technical Specifications
Replace the batteries in good time, but at the latest when the visual battery warning on the keypad lights up. TECHNICAL SPECIFICATIONS Power supply Battery type: 2 x CR123A Operating temperature -5 °C to +60 °C Storage temparature -25 °C to +70 °C Type designation Locker Lock M610: SLI2CBM6 Keypad TA03: MAIIC3M6... -
Page 4: System Components & Package Contents
7. Keypad TA03 2. 4 x pan-head screw (4,5 x 16 mm) 8. Cover of keypad TA03 3. Cable 9. 4 x flat headed screw (3,0 x 15 mm) 4. 2 x battery (CR123A) 10. Pin 5. Battery cover for M610... -
Page 5: Dimensions
DIMENSIONS Locker lock M610 (M610 for right hand doors) (M610 for left hand doors) Striker plate 4516 15,5 15,5 Keypad TA03 without labeling clip For Ø19 x 16 Für Stanzbild ø19 x 16 15,9 All figures in mm. -
Page 6: Getting Started & Changing Batteries
Keypad TA03 with optional labeling clip GETTING STARTED / CHANGING BATTERIES Make sure that the lock and keypad are correctly connected to each other by the connection cable. Pay attention to the correct connection of the plugs and sockets. IMPORTANT: Only use two CR123A primary batteries! Open the battery compartment cover by inserting the pin into the small holes and releasing the cover. -
Page 7: Emergency Power Supply
EMERGENCY POWER SUPPLY The locking system has the option of an emergency power supply in case of empty batteries. Hold a 9V battery to the Insert the two guide lugs of the contacts at the keypad cover into the recesses. Press while entering the code or the cover until it clicks into Insert the pin into the hole... -
Page 8: Installing The Labeling Clip / Mounting The Locking System
INSTALLING THE LOCKING SYSTEM Mounting position of lock M610 Mounting position of keypad TA03 Door Door Exemplary for a right door. Mounting position of striker plate 4516 Door Sidewall Door X + 36,5* 36,5** Inlay doors * Overlay doors ** X = Door thickness All figures in mm. - Page 9 • A splash water and dust protection can only be ensured if the lock and the keypad lie completely on the door surface (except Omega-profiles). • The locker lock M610 is available in two versions (right or left mounting). • Please ensure the correct installation position of the lock and the keypad.
-
Page 10: Structure Of The Keypad Ta03 / Bolt End Position Scan Function
STRUCTURE OF THE KEYPAD TA03 LED display Numbers 0-9 Cancel Enter Trip point for removing the cover for emergency power supply You can cancel any operation at any time by pressing the cancel button . When the cancel button is pressed, there is one short red flashing. -
Page 11: Factory Settings / Opening & Closing In Free Code Mode
FACTORY SETTINGS The following settings apply for the locking system as delivered from the factory: Free Code mode The lock is in open position Master code: 9-0-8-0-7-0-5-5-5-5 Emergency opening code: 1-0-1-0-5 Automatic locking is deactivated Automatic opening is deactivated ATTENTION: It is highly recommended to change the factory set master code and factory set emergency opening code! OPENING &... -
Page 12: Switching To Fixed Code Mode / Opening And Closing In Fixed Code Mode
SWITCHING TO FIXED CODE MODE The lock must be in open position. There must be no battery warning. The fixed code must be 3 to 10 digits. If you have already changed the default master code, enter your valid master code here. In order to confirm the master code, press the keys simultaneously. -
Page 13: User Changes The Fixed Code
USER CHANGES THE FIXED CODE The lock must be in open position. There must be no battery warning. The fixed code must be 3 to 10 digits. If you have already changed the default fixed code for the user, enter your valid code here. The previous code will be overwritten by entering the new code. -
Page 14: Switching To Free Code Mode
SWITCHING TO FREE CODE MODE The lock must be in open position. There must be no battery warning. If you have already changed the default master code, enter your valid master code here. In order to confirm the master code, press the keys simultaneously. -
Page 15: Changing The Master Code
CHANGING THE MASTER CODE It is highly recommended that you change the default master code and to choose the longest possible and secure master code. The lock must be in open position. There must be no battery warning. The master code must be 3 to 10 digits. If you have already changed the default master code, enter your valid master code here. -
Page 16: Changing The Emergency Opening Code
CHANGING THE EMERGENCY OPENING CODE It is highly recommended that you change the default emergency opening code and to choose the longest possible and secure emergency opening code. The lock must be in open position. There must be no battery warning. The emergency opening code must be 3 to 10 digits If you have already changed the default master code, enter your valid master code here. -
Page 17: Emergency Opening / Reset To Factory Settings
EMERGENCY OPENING If you have already changed the default emergency opening code, enter your valid emergency opening code here. Enter emergency opening code (example: Werkseinstellung) Keys Lock opens. Display After an emergency opening in the Fixed Code mode, the lock can be used again normally with the previously pro- grammed fixed code. -
Page 18: Automatic Locking In Fixed Code Mode
AUTOMATIC LOCKING IN FIXED CODE MODE The lock must be in open position. There must be no battery warning. This feature can only be activated in Fixed Code mode. If you have already changed the default master code, enter your valid master code here. In order to confirm the master code, press the keys simultaneously. -
Page 19: Automatic Opening In Free Code Mode
AUTOMATIC OPENING IN FREE CODE MODE The lock must be in open position. There must be no battery warning. This feature can only be activated in Free Code mode. If you have already changed the default master code, enter your valid master code here. In order to confirm the master code, press the keys simultaneously. -
Page 20: Battery Warning / Firmware Update / Disposal
(for example, technical need). To update the firmware you need the software LEHMANN Firmware Updater. The software can be found on the website www.lehmann-locks.com under Electronic Locking Systems and there under Software Solutions. The individual steps for updating the firmware are described in the software.
Need help?
Do you have a question about the M610 and is the answer not in the manual?
Questions and answers