Advertisement
Quick Links
DO NOT RETURN TO RETAILER
IF YOU HAVE ANY QUESTIONS OR CONCERNS
PLEASE VISIT OUR WEBSITE AT :
www.sunjoyonline.com
OR TOLL FREE AT:
1-866-578-6569
SUNJOY GROUP I NTER NA TI ONA L PTE LTD
619 Slack St reet
Steubenville, Ohio 43952 USA
Production Number:20193442
Advertisement

Related Manuals for Sunjoy L-GZ340PST-3A


Summary of Contents for Sunjoy L-GZ340PST-3A
- Page 1 DO NOT RETURN TO RETAILER IF YOU HAVE ANY QUESTIONS OR CONCERNS PLEASE VISIT OUR WEBSITE AT : www.sunjoyonline.com OR TOLL FREE AT: 1-866-578-6569 SUNJOY GROUP I NTER NA TI ONA L PTE LTD 619 Slack St reet Steubenville, Ohio 43952 USA Production Number:20193442...
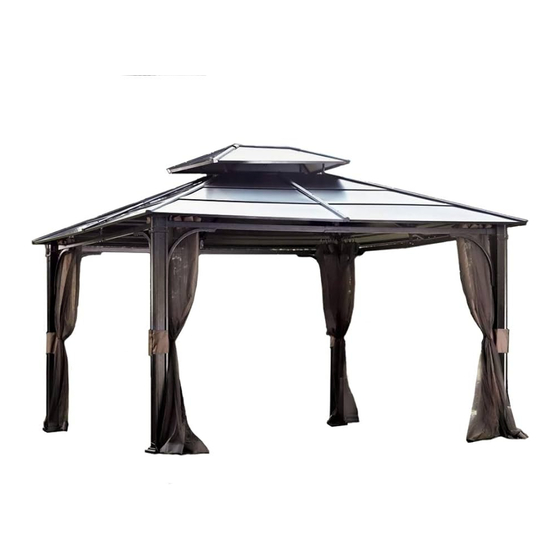
- Page 2 ASSEMBLY INSTRUCTIONS ITEM# L-GZ340PST-3A SKU# 108718 THIS UNIT IS HEAVY! CHATHAM HARDTOP GAZEBO 10’x12’ WARNING: In order to reduce the risk of personal injury and damage to equipment, basic safety precautions should always be followed when assembling and using this product. Read all instructions carefully before assembly and use.
- Page 3 structure can simply be left in tact until warmer conditions return. Parts List Part Description Big CS NO Image Top Frame P10161A01131 Big Top Bar P10162A01131 Small Top Support Beam P10227A01131 P10183B01131 Small top connector Hook P12601C01131 Top Roof Small Panel P11971C05131 Top Roof Long Panel P11972C05131...
- Page 4 Short Pipe 1 P12138A01131 P12139A01131 Short Pipe 2 Top Slanting Bar P10364B05131 P10445A01131 Top Beam Long side left roof panel 1 P11982C05131 P11983C05131 Long side right roof panel 1 Long side left roof panel 2 P11980C05131 P11981C05131 Long side right roof panel 2 Long side left roof panel 3 P11978C05131 Long side right roof panel 3...
- Page 5 Mosquito netting P00324B01902 Vented roof netting P00325B01902 P92001A01001 Magnet Hardware Pack 1 Bolt M6*20 H02020C11 48 PCS Flat Washer M6(Large) H19001C11 112 PCS Nut M6 16 PCS H14001C11 Bolt M6*65 H02065C11 16 PCS Bolt M6*45 32 PCS H02045C11 Spring Washer M6 56 PCS H13001C11 Wrench M6...
- Page 6 Fig.1 Fig.2 Fig.3 O2(P2) O2(P2) AA BB Fig.4 Fig.5 O2(P2) BB HH O2(P2) Fig. 1: Fit Base cover (D2) to Post ( B2), attach Post base (E2) to Post (B2) by using bolt (AA) and washer (BB). Fig.2: Attach Slanting bar connector (N2) to Post (B2) by using bolt (AA) and washer (BB). Fig.3: Attach Middle beam connector (G2, H2) to Long beam (P2)/short beam(O2) by using bolt (FF), washer (BB) and nut (DD).
- Page 7 Step 2 Fig.14 Fig.13 Fig.9-11 Fig.12 Fig.6 Fig.15 Fig.8-1 Fig.7-1 Fig.16 Fig.18 Fig.17 Fig.8-2 Fig.7-2 Fig.7-1 Fig.6 Fig.7-2 P3 Fig.8-2 Fig.8-1 Fi g.6 Connect Short big top frame bar (A1) and Long big top frame bar (B1) by using bolt (AA) and washer ( BB).
- Page 8 Fig.9 Fig.10 Fig.11 Fig.10 Fig.9 Fig.11 Fig.9: Connect Small top slanting bar (C1) and Small top connector (D1) by using bolt (CC), washer (BB) and nut (DD).tighten all the bolts by wrench. Fig.10: Screw the Hook (E1) to Small top connector (D1). Fig.11: Attach Small top slanting bar (C1) to Short big top frame bar (A1) by using bolt (AA) and washer (BB).
- Page 9 Hardware Pack 3 Bolt M6*20 44 PCS H02020C11 Flat Washer M6 (Large) 60 PCS H19001C11 Bolt M6*35 H02035C11 16 PCS Step 3 Fig. 21-1 Fig. 21-2 Fig. 20 Fig. 19 J3 K3 Fig. 22 Fig. 19 Fig. 20-1 Fig. 19: Attach downer roof panel to upper roof panel in this way . Fig.
- Page 10 Fig. 20-4 Fig. 20-4: Attach Long side left roof panel (C3/D3) to Big top slanting bar (P3) and Big top middle beam (B3) by using bolt (AA) and washer (BB). Fig. 20-5 Fig. 20-5: Attach Long side left roof panel (E3/F3) to Big top slanting bar (P3) and Big top middle beam (B3) by using bolt (AA) and washer (BB).
- Page 11 Hardware Pack 4 Stake ¢8*180 8 PCS P12401A01001 Plastic ring 52 PCS P90701A07001 Step 3 Fig. 24 Fig. 25 Fig. 23 Fig. 26 Fig. 27...
- Page 12 Fig. 23 Fig. 24 Fig. 25 Fig.17: Place the Magnet (T2) into the pockets of the vented roof netting (T1). Fig.18: Attach the magnet end of vented roof netting (T1) to the small top roof panel (F1 & G1). Fig.19 : Attach another velcro end of vented roof netting (T1) to the big top frame bar (A1 &...
Need help?
Do you have a question about the L-GZ340PST-3A and is the answer not in the manual?
Questions and answers