Sunjoy BARDINE L-GZ375PST Assembly Instructions Manual
Hide thumbs
Also See for BARDINE L-GZ375PST:
- Owner's manual (8 pages) ,
- Assembly instructions manual (8 pages)
Advertisement
Available languages
Available languages
Quick Links
Hardware Pack 1
8 pieces
(AA)1/4"-20*0.6 Bolt
(BB) 1/4"-20*1.18 Bolt
32pieces
(CC) 1/4"-20*1.4 Bolt
8pieces
(DD)1/4"-20 Flat Washer
56 pieces
(EE)1/4"-20Nut
8pieces
(FF)1/4"-20 Wrench
1 pieces
(GG)1/4"*10 Stake
8 pieces
(HH)Mosquito Netting Hook
32pieces
ASSEMBLY INSTRUCTIONS
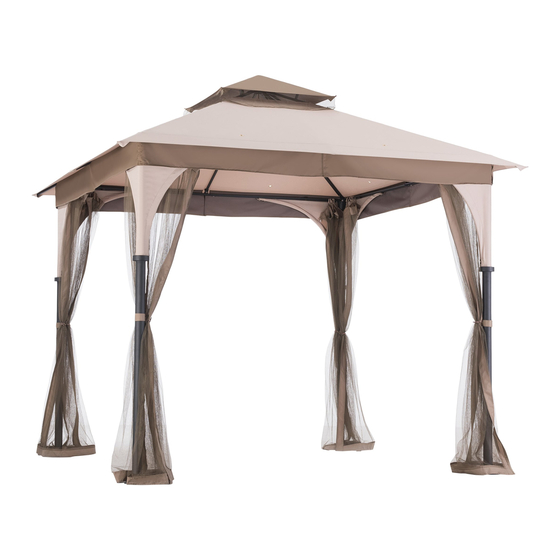
GAZEBO BARDINE
CODE RONA:38115035
ITEM# L-GZ375PST
Advertisement

Related Manuals for Sunjoy BARDINE L-GZ375PST


Summary of Contents for Sunjoy BARDINE L-GZ375PST
- Page 1 ASSEMBLY INSTRUCTIONS GAZEBO BARDINE CODE RONA:38115035 ITEM# L-GZ375PST Hardware Pack 1 8 pieces (AA)1/4”-20*0.6 Bolt (BB) 1/4”-20*1.18 Bolt 32pieces (CC) 1/4”-20*1.4 Bolt 8pieces (DD)1/4”-20 Flat Washer 56 pieces (EE)1/4”-20Nut 8pieces (FF)1/4”-20 Wrench 1 pieces (GG)1/4”*10 Stake 8 pieces (HH)Mosquito Netting Hook 32pieces...
-
Page 2: Parts List
Parts List Top connector Long oblique beam Short oblique beam Girder Horizontal beam 1 Horizontal beam 2 Connector Pole Stake connector Arc connector Hook Small canopy Big canopy Mosquito netting... - Page 3 Step1 Fig.4 Fig.5 Fig.6 Fig.3 Fig.1 Fig.2 Fig.1 Fig.3 Fig.2 DD EE Fig.6 Fig.4 Fig.5 Sept1: (1) Insert one side of horizontal beam 1(E) into horizontal beam 2(F) (Fig.1) (2) Insert another side of horizontal beam 1(E) and horizontal beam 2( F) into the hole of connector (G) (Fig.2), (3)...
- Page 4 Step2 Fig.7 Fig.9 Fig.10 Fig.8 Fig.8 Fig.9 AA DD Fig.10 Sept2: (7) Finish covering small canopy (L), cover big canopy (Q), do not fully cover.( Fig.7) (8) Attach stake connector (I) and pole (H) and tighten them by using bolt (AA), flat washer ( DD). (9)...
- Page 5 Step3 Fig.13 Fig.11 Fig.12 Fig.14 Fig.12 Fig.14 Fig.11 E(F) (HH) Sept3: (11) Using mosquito netting hook (HH) to hang mosquito netting (N) onto horizontal beam 1(E) and horizontal beam 2(F). (Fig.11) (12) (Fig.12) Make sure the mucosity tie of the m is properly sticked to the pole (H) osquito netting (N) (13)...
- Page 6 INSTRUCTIONS DE MONTAGE BELVÉDÈRE BARDINE CODE RONA:38115035 ARTICLE No. L-GZ375PST Sachet de Quincaillerie 1 Boulon (AA) 1/4”-20*0.6 8 pièces Boulon (BB) 1/4”-20*1.18 32 pièces Boulon (CC) 1/4”-20*1.4 8 pièces Rondelle Plate (DD) 1/4”-20 56 pièces Écrou (EE) 1/4”-20 8 pièces Clé...
-
Page 7: Liste De Pièces
Liste de Pièces Connexion du toit Poutre Oblique longue Poutre oblique courte Poutrelle Poutre horizontale 1 Poutre horizontale 2 Connexion Poteau Connexion du piquet Connexion arqué e Crochet Petit auvent Grand auvent Filet moustiquaire... - Page 8 Étape 1 Fig.4 Fig.5 Fig.6 Fig.3 Fig.1 Fig.2 Fig.1 Fig.3 Fig.2 DD EE Fig.6 Fig.4 Fig.5 Étape 1 Introduisez une extré mité de la poutre horizontale 1(E) dans la poutre horizontale 2(F) (Fig.1) Introduisez l’autre extré mité de la poutre horizontale 1(E) et la poutre horizontale 2(F) dans l’espace pourvu de la connexion (G) .(Fig.2) Connectez la poutre oblique courte (C), à...
- Page 9 Étape 2 Fig.7 Fig.9 Fig.10 Fig.8 Fig.8 Fig.9 AA DD Fig.10 Étape 2 Couvrez avec le petit Auvent (L), avec le grand auvent (Q), mais ne l’étendez pas tout à fait.( Fig.7) Assemblez la connexion des piquets (I) au poteau (H) et fixez avec boulon (AA), rondelle plate ( DD). Soulevez les piè...
- Page 10 Étape 3 Fig.13 Fig.11 Fig.12 Fig.14 Fig.12 Fig.14 Fig.11 E(F) (HH) Étape 3 Avec les anneaux du filet moustiquaire (HH), accrochez le filet moustiquaire (N) à la poutre horizontale 1(E) et a la poutre horizontale 2(F). (Fig.11) Attachez (N) au poteau (H). Assurez vous que l’attache du filet moustiquaire est bien attaché...
Need help?
Do you have a question about the BARDINE L-GZ375PST and is the answer not in the manual?
Questions and answers