Advertisement
Quick Links
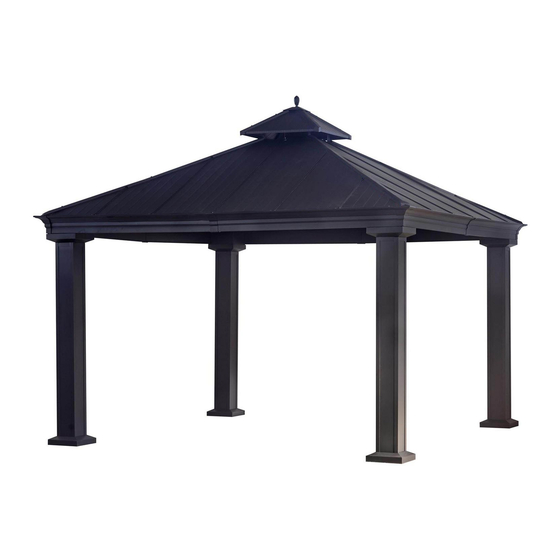
Congratulations on your purchase of our SUNJOY Royal Hardtop Gazebo. Our clear, easy to follow,
step-by-step instructions will guide you through the asse bly process from start to finish.
WARNING:
z
THIS UNIT IS HEAVY! For safety, DO NOT assemble this item alone. 6 to 8 people are recommended for safe
assembly.
z
Keep all children and pets away from assembly area. Children and pets should be supervised when they are in the
assembly area of the Gazebo.
z
Do not assemble less than 6 ft / 1.8 m from any obstruction such as a fence, garage, house, overhanging branches,
laundry line or electrical wires.
z
Some parts may contain sharp edges. Wear protective gloves.
z
When assembling and using this product, basic safety precautions should always be followed to reduce the risk of
personal injury and damage to equipment. Please read all instructions before assembly and usage.
z
For outdoor use only. Install on level ground.
z
Check all bolts for tightness before and during usage.
Please take time to read these instructions thoroughly and follow each step carefully for safe and easy
operation. Keep this manual for future reference.
For technical assistance on assembly or replacement parts, call Sunjoy Industries at 1-866-578-6569 from
8:30AM to 5:30PM EST, or email us at sams@sunjoygroup.com, or visit
assistance.
Royal Hardtop Gazebo
Item# L-GZ066PST
IMPORTANT
1
www.sunjoydirect.com
for
Advertisement

Summary of Contents for Sunjoy Royal Hardtop Gazebo
- Page 1 Royal Hardtop Gazebo Item# L-GZ066PST Congratulations on your purchase of our SUNJOY Royal Hardtop Gazebo. Our clear, easy to follow, step-by-step instructions will guide you through the asse bly process from start to finish. WARNING: THIS UNIT IS HEAVY! For safety, DO NOT assemble this item alone. 6 to 8 people are recommended for safe assembly.
-
Page 2: Parts List
Parts List NOTE: Please lay something underneath all the parts to avoid scratching. 1A (x4) Left Rain Gutter 1B (x4) Right Rain Gutter Straight Pole Tilting ole 1C (x4) 1D (x4) Connector Connector 2A (x4) Top Tilting Pole 2B (x4) Top Straight Pole Top Long Connector Top Long... - Page 3 Tools Required For Assembly (not included): ‰ Phillips screwdriver ‰ Hammer ‰ Drill ‰ Ladder (minimum 8.2 ft / 2.4 m) Item Identification For ease of identification, all parts are labeled to correspond to the step number in which the part is used. The Gazebo is designed to be constructed in 6 main steps as outlined below.
- Page 4 Connect Tilting Pole Connector (1D) with assembled Left Rain Gutter (1A) and Right Rain Gutter (1B), tighten with Screw (KK) and Flat Washer (BB).( Fig.3-1) STEP #2 – LARGE TOP FRAME BB (x60) Flat Washer M6 KK (x48) Screw M6 x 15mm DD (x12) Screw M6 x 55mm EE (x12)
- Page 5 3. Connect Top Short Connectors Left (2E) and Right (2F),Top Long Connectors Left (2C) and Right (2D) to Top Straight Poles (2B) and Top Tilting Poles( 2A) by using Flat Washer (BB) and Screw (KK) (Fig 6.1,Fig 6.2) (Note: UP label should be facing up) STEP #3 –...
- Page 6 3. Place Small Top Roof Sheet (3C) to Small Top Frame, securing them with Screw (KK) and Flat Washer (BB ) (Fig.8.1).. 4. Place Small Top Corner Cover (3D) to Small Top Roof Sheet (3C), securing them with Screw (FF) and Flat Washer (BB) (Fig 8.2).
- Page 7 3. Attach assembled Column Top (6D) to Left Rain Gutter (1A) and Right Rain Gutter (1B), tighten with Bolt (AA) and Flat Washer (BB). (Fig 10.1) 4. Attach Tilting Pole Connector (1D) to Column Top (6D), tighten with Bolt (KK) and Flat Washer (BB). (Fig 10.2) 5.
- Page 8 1. Place Planter Hook (4L) to Hanger Pole (4K).(Fig 12.1) 2. Place Top Large Roof (4A) and Top Large Roof Sheet (4B) on Top Frame, fasten with Bolts (KK) and Flat Washer (BB). (Fig 12.2, Fig 12.3) Repeat for remaining sides. 3.
- Page 9 Limited Warranty: Sunjoy Industries warrants to the original purchaser that this item is free from defects in workmanship and materials for a period of 2 year from the date of purchase, provided the item was factory-sealed at the time of purchase and is maintained with care and used only for personal, residential purposes.


Need help?
Do you have a question about the Royal Hardtop Gazebo and is the answer not in the manual?
Questions and answers