Subscribe to Our Youtube Channel
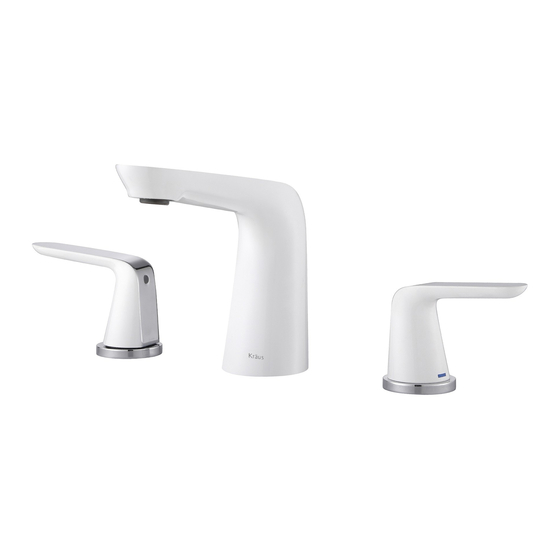
Summary of Contents for Kraus Seda FUS-1823
- Page 1 I N S TA L L AT I O N MA N UA L Seda™ 8” Widespread 2-Handle Faucet FUS-1823 www.kraususa.com I toll free: 1.800.775.0703 I © 2014-2015 Kraus USA Inc. I REV. August 16, 2016...
- Page 2 Thank you for your purchase We would like to take this opportunity to thank you for choosing Kraus. We hope that you are completely satisfied with your purchase, and enjoy it for years to come. If you have any questions, or require technical assistance, please contact us at 800.775.0703 and one of our representatives will be happy to help.
-
Page 3: Tools You Will Need
50mm) ∅ Make sure you have all necessary parts by checking the diagram and parts list. If any part is missing or damaged, please contact Kraus Customer Service at 800- 775-0703 for a replacement • Turn off the hot and cold water supply at the angle stops and turn on the old faucet to release any built up pressure. - Page 4 FUS-1823 Diagram and Parts List A. Hot Handle Valve E. Spout Mounting Hardware: B. Cold Handle Valve E1. Rubber & Metal U-Washer C. Hot & Cold Handle Mounting E2. Mounting Nut Hardware: F. T-Union C1. Rubber & Metal Washer G. Hot & Cold Waterlines C2.
- Page 5 Lift Rod Drain Diagram and Parts List and Dimensions a. Waste Stopper i. Top Hat Washer j. Drain Off Pole b. Drain c. Rubber Washer k. Washer d. Concave Washer l. Retaining Nut e. Plastic Washer m. Extender Rod f. Mounting Nut n.
-
Page 6: Faucet Dimensions
Faucet Dimensions 4.92” 4.92” 125mm 125mm 4.96” 1.8” 1.8” 2.24” 126mm 46mm 46mm 57mm 1 1/4-18UNF-2A 9/16”-18UNEF Step 1: Remove mounting hardware and T-union Remove T-union (F) and mounting hardware (E) from spout (D). Remove mounting hardware (C) from hot and cold handle valves (A &... - Page 7 1 1/4-18UNF-2A 9/16”-18UNEF 9/16”-18UNEF Step 2: Install & secure spout Install spout (D) through hole in countertop or sink. Attach rubber & metal U-washer (E1) and mounting nut (E2). Adjust spout (D) to proper position and tighten mounting nut (E2) with adjustable wrench.
- Page 8 Step 4: Connect waterlines to faucet and main valve Secure hot & cold waterlines (G) to hot and cold valves (A & B) (Hand- Tighten Only). Thread other end of waterlines to T-union (F). Attach 3/8 in. OD x 1/2 in. IPS waterlines (H) to copper pipe on valves A.
- Page 9 Step 5: Install Drain • Thread tailpipe (h) onto drain (b) and hand-tighten. Adjust tailpipe (h) so drain off pole opening is to the rear of the sink Installer Tip: Make sure tailpipe washer (g) is installed in tailpipe (h) •...
- Page 10 Step 5: Install Drain • Insert shortest end of drain off pole (j) into drain off pole opening of tailpipe (h). Make sure drain off pole (j) and slot on waste stopper (a) engage. Attach washer (k) and retaining nut (l) through drain off pole (j).
- Page 11 Replacement Part List - FVS-1823 1. Hot Handle 11. Rubber & Metal U Washer 2. Cold Handle 12. Mounting Nut 3. Set Screw 13. T-Union 4. Cover Button 14. Cold Cartridge 5. Hot Cartridge 15. Cold Valve 16. Hot & Cold Waterlines 6.
- Page 12 Replacement Part List - Lift Rod Drain 1. Waste Stopper 2. Drain 3. Rubber Washer 4. Concave Washer 5. Plastic Washer 6. Mounting Nut 7. Tailpipe Washer 8. Tailpipe 9. Top Hat Washer 10. Drain Off Pole 11. Washer 12. Retaining Nut 13.
-
Page 13: Troubleshooting
Trouble - Shooting If you have followed the instructions carefully and your faucet still does not work properly, take the following corrective steps: P R O B L E M C A U S E A C T I O N Leakage under the Hot or cold cartridge (5 Remove cover button... - Page 14 Kraus USA, Inc. 12 Harbor Park Drive Port Washington, NY 11050 Toll-free 800-775-0703 Customerservice@kraususa.com If you are a plumbing contractor or trade professional please contact a Kraus Pro Representative at: Kraus USA, Inc. 12 Harbor Park Drive Port Washington, NY 11050 516-801-8955 Proservice@kraususa.com...
-
Page 15: Care And Maintenance
Do not clean with soaps, acid, polish, abrasives, or harsh cleaners Do not use cloth with a coarse surface Unscrew the aerator and clean when necessary *This installation manual is subject to change without further notice. Download the Kraus Care & Maintenance Guide at: http://www.kraususa.com/care-and-maintenance.html www.kraususa.com... - Page 16 Please take a moment to share your experience. Visit http://www.kraususa.com/review to let us know what you think about your new Kraus product. Contact Us to Learn More 1.800.775.0703 / www.kraususa.com / customerservice@kraususa.com Like & Follow KrausUSA Download the Kraus Care & Maintenance Guide at: http://www.kraususa.com/maintenance www.kraususa.com...


Need help?
Do you have a question about the Seda FUS-1823 and is the answer not in the manual?
Questions and answers