Table of Contents
Advertisement
Quick Links
Advertisement
Table of Contents

Related Manuals for Kraus Allyn FF-102


Summary of Contents for Kraus Allyn FF-102
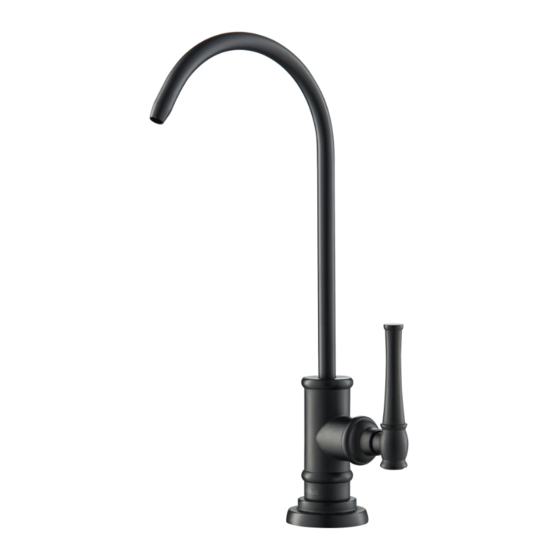
- Page 1 INSTALLATION GUIDE Allyn Transitional Stand Alone Filtration Faucet FF-102...
- Page 2 Prior to Installation: Make sure you have all necessary parts by checking the diagram and · parts list. If any part is missing or damaged, please contact Customer Service. · Turn off the hot and cold water supply at the angle stops and turn on the old faucet to release any built up pressure.
- Page 3 Diagram and Parts List A. Faucet Assembly B. Flange C. Rubber Washer D. Metal Washer Mounting Nut Connector 3/8" G. Connector 1/4"...
- Page 4 Faucet Dimensions 4 1/2” [115mm] 1 3/4” 2 3/8” [45mm] [61mm] Installer Tip: Shut off main water supply before installing new faucet.
- Page 5 Step 1: Preparing for installation Remove the rubber washer (C), metal washer (D), and mounting nut (E) from the end of the stud. Step 2. Installing the faucet assembly Place the faucet assembly (A) through the selected hole in the sink or countertop.
- Page 6 Step 3. Connecting the quick connect adaptor and water line Thread the quick connect adaptor (F) onto the end of the faucet assembly (A) stud, and tighten securely using a wrench. Connect the 3/8 in. water line from the filtration system by pushing the line into the connector (F).
- Page 7 Replacement Parts Replacement Parts List Finish/Color Part # 1. Locking Ring KP44046 2. O-Ring KP44047 KP44067 3. Cover Button SFS, MB, BG* KP44066 4. Handle SFS, MB, BG* KP44065 5. Cartridge Screw 6. Cartridge Cover SFS, MB, BG* KP44064 7. Cartridge KP44048 8.
- Page 8 Trouble-Shooting If you have followed the instructions carefully and your faucet still does not work properly, take the following corrective steps: PROBLEM CAUSE ACTION Leakage under faucet handle Cartridge has come loose Remove index and loosen set screw with hex wrench. Remove the handle. Tighten cartridge with an adjustable wrench.
Need help?
Do you have a question about the Allyn FF-102 and is the answer not in the manual?
Questions and answers