
Related Manuals for GAI-Tronics Commander SMART


Summary of Contents for GAI-Tronics Commander SMART
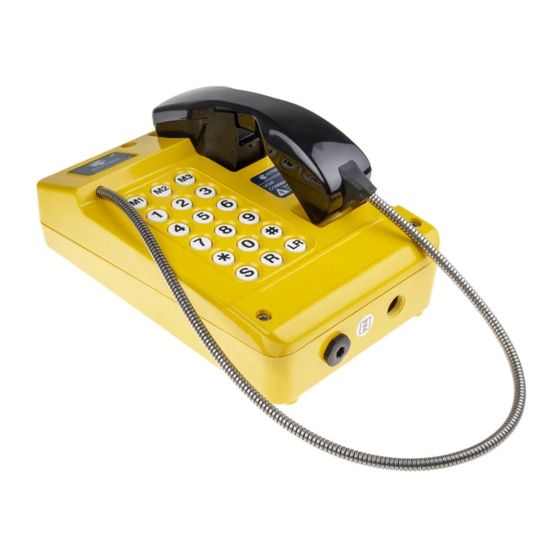
- Page 1 Titan Commander Installation and User Guide Titan Telephone (1088) Commander Telephone (1089) SMART models GAI-TRONICS Doc. No. 502-20-0114-001 Iss4. Sep 2016 (CN40153-001)
-
Page 2: Table Of Contents
CONTENTS Safety and Care Information ............... 4 Product Description ..................4 2.1. Changes from previous versions ..........5 2.2. Titan features ................5 2.3. Commander features ..............6 Operation / Testing ..................6 3.1. Making and Receiving calls ............6 3.2. - Page 3 Programming and Option Settings............21 8.1. Quick Programming Guide (using a tone phone)....... 21 8.2. Further programming options ............. 21 8.3. TMA.................... 23 Cleaning (Anti graffiti coating) ..............24 Aftercare ....................24 Technical Specifications ................25 CE Declaration ..................27 Titan, Commander, SMART...
-
Page 4: Safety And Care Information
Safety and Care Information The safety of the user/installer relies on the isolation of the telephone ▲ network and not on the earthing of the case The spring-loaded door (Titan models only, where fitted) can close ▲ sharply. Take care not to trap fingers etc., during installation and use. Please read these instructions thoroughly before starting installation. -
Page 5: Changes From Previous Versions
2.1. Changes from previous versions This manual describes an updated range of products introduced in June 2006. For those familiar with GAI-Tronics’ products, the list of new or changed features is as follows: New terminal layout (section 7.1). • Increased lightning protection (section 11). -
Page 6: Commander Features
2.3. Commander features Commander is a family of rugged, weather-resistant telephones manufactured from moulded glass-reinforced polyester. A range of handset types and keypad configurations are available. Operation / Testing Please note that, following its initial connection to the line (ie first installation), there may be a delay of up to 30s before the telephone can make an outgoing call. -
Page 7: Recall Function
These features are all available over standard, 2 wire telephone lines with no external power required at the phone. To use these features, GAI-Tronics provide a Telephone Management Application (TMA) available separately, see section 8.3. Called Party Answered signalling (CPA), ie a reversal of line polarity when an outgoing call is answered, is required to ensure accurate recognition of call connection and answer delay times. -
Page 8: Installation
PABX or telephone network to which the telephone is to be connected, and that installation is carried out by trained personnel. Contact GAI-Tronics if installation service is required. IMPORTANT Installation details differ between the TITAN and COMMANDER product ranges –please make sure you know which product you are installing... - Page 9 All connections are on the lower edge of the circuit board on the rear of the faceplate, except in encapsulated versions where the connections are on the lower face of the back box. The Titan telephone is intended for vertical installation to a wall or pole. Select the required mounting method (section 6) and mount the rear enclosure first where applicable.
-
Page 10: Commander
5.4. Commander All connections are on the circuit board housed in the front casing. Ringer Ringer connector Circuit board (PCB) HD3 - Aux. outputs (optional) TB2 - Additional hookswitch (Optional) HD14 - Aux. inputs CON1 - Main (optional) Terminal block To prepare for installation, undo the three retaining screws shown to remove the front casing from the rear. -
Page 11: Mounting Methods And Dimensions
Mounting methods and dimensions 6.1. General IMPORTANT Installation details differ between the TITAN and COMMANDER product ranges –please make sure you know which product you are installing and refer to the appropriate sections below. Before mounting the telephone, check the cable routing and requirements. If glands are required, fit them to the case as follows: 1. - Page 12 6.2.1 Wall mounting 1. Using a suitable tool, punch out 4 holes in the rear enclosure, taking care not to damage or dislodge the plastic bushes. Only four of the eight holes are required - the outer ones are recommended. The inner holes are provided to be compatible with older-style mounting posts, and should be left intact if not used.
- Page 13 6.2.2 Pole mounting Kit No 100-02-0208-001 This accessory is for mounting GAI-Tronics telephones on to the side of round poles of 100mm to 200mm diameter, or on to square or rectangular section uprights of 100mm to 150mm across the mounting surface.
- Page 14 3. Tighten nuts to a torque of 4.5Nm max. IMPORTANT: avoid the use of power tools. Spinning the nuts too quickly can cause a rapid increase in heat which can cause the nuts to seize as a result of galling or cold-welding. Note: only use the outer four holes, and ensure that the screws seat properly in the plastic bushes to avoid water ingress.
-
Page 15: Commander
To flush-mount the telephone to a wall: 1. Prepare a recess (at least 50mm deep) in the wall according to the dimensions shown. 2. Mark the wall with hole centres based on the dimensions shown (155 x 326mm). If necessary offer the faceplate up to the wall to check alignment. - Page 16 6.3.2 Pole mounting Kit No 100-02-0208-001 This accessory is for mounting GAI-Tronics telephones on to the side of round poles of 100mm to 200mm diameter, or on to square or rectangular section uprights of 100mm to 150mm across the mounting surface.
- Page 17 Banding straps (large scale worm-drive clamps) are not included in this kit and must be obtained separately. For details of where banding can be obtained, refer to GAI-Tronics. 1. Remove rubber feet from the Rear Casing if fitted. Attach the pole mounting clamp assemblies to the Rear Casing using the M6 x 25 screws provided.
-
Page 18: Connections
2. Rotate the Front Casing through 180° taking care not to trap any wires. 3. Continue the installation by making the appropriate connections (section 7). 4. Reconnect the ringer. Secure the telephone Front Casing to the Rear Casing. Connections If glands are used, insert the cable through the gland body and tighten the gland nut sufficiently to clamp the cable, making a seal. -
Page 19: Additional Hook Contact
7.3. Optional external inputs SMART products can be equipped with 4 external inputs, which can be used to generate call-in events or alarm reports (using TMA). Note – these optional connections are only available if specifically ordered. Contact GAI-Tronics for Titan Commander... -
Page 20: Optional Signal Outputs
Note – these optional connections are only available if Titan Commander specifically ordered (not field upgradeable). Contact GAI-Tronics for details. The additional outputs are provided on HD3 as shown and are isolated SELV outputs as defined by EN 60950-1. -
Page 21: Programming And Option Settings
Programming and option setting is done remotely by sending commands down the telephone line to the unit. This can be done by either using a tone phone, or by using GAI-Tronics TMA – a PC software application. 8.1. Quick Programming Guide (using a tone phone). - Page 22 8.2.1 Rings before and after auto-answer The number of rings before and after auto –answer can be adjusted to give the required behaviour. Rings before auto-answer – during this period the phone will ring for both voice calls and maintenance calls, and ring-activated devices such as beacons or sounders will operate during this period.
-
Page 23: Tma
GAI-Tronics TMA is a fully featured software application (Telephone Management Application) for Windows® , offering the facilities to program, maintain, monitor and report on all types of GAI-Tronics SMART products. Full details on the configuration and use of TMA are provided with the package itself. -
Page 24: Cleaning (Anti Graffiti Coating)
Other cleaners can be used but should be tested on a small area first. 10. Aftercare The purchase of your GAI-Tronics product does not end our commitment to you. In addition to our warranty obligations, GAI-Tronics are able to offer various levels of maintenance packages, installation and commissioning packages and technical support, from ad-hoc repairs to full maintenance contracts. -
Page 25: Technical Specifications
11. Technical Specifications Operational Requirements Systems. Analogue Public Switched Telephone Network (PSTN) • Private Automatic Branch Exchange (PABX) • Not suitable for Payphone extensions • connection to: Public Emergency Telephone System (PETS) • Telephone line Ring Voltage: 30V to 100V rms, 20Hz to 50Hz •... - Page 26 Parameters Autodial numbers - including time-switched alternate • configurable with numbers Speech receive level. • Rings before / after auto-answer • Time out (default 7 minutes) • Mute before dial • DTMF detection window • Monitoring Remote polling (initiated by TMA) •...
-
Page 27: Ce Declaration
ETSI TBR38 - Requirements for pan-European connection to telephone networks Lightning and ITU-T recommendation K.21 - Enhanced surge protection. transients 12. CE Declaration A copy of the current CE Declaration of Conformity is available from our website. www.gai-tronics.org/support/certificates-approvals/ Titan, Commander, SMART... - Page 28 Brunel Drive Stretton Park Burton on Trent DE13 0BZ England Tel: 01283 500500 Fax: 01283 500400 www.gai-tronics.co.uk The policy of GAI-Tronics is one of continuous improvement, therefore the Company reserves the right to change specifications without notice Titan, Commander, SMART...
Need help?
Do you have a question about the Commander SMART and is the answer not in the manual?
Questions and answers