
Related Manuals for Slinex Shan


Summary of Contents for Slinex Shan
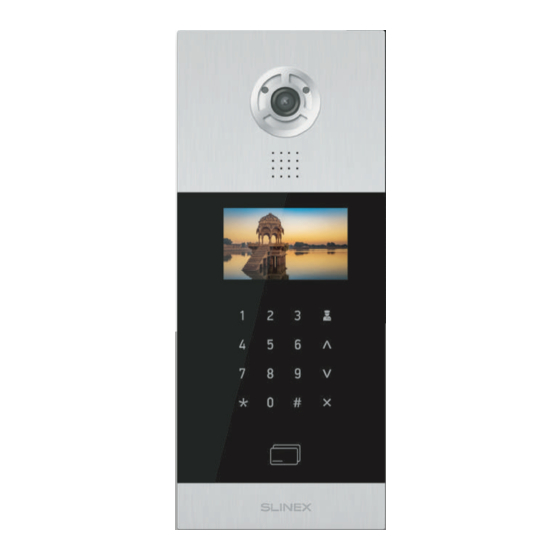
- Page 1 { Design. Uniqueness. Innovations } { Design. Uniqueness. Innovations } Shan Multi-apartment IP video outdoor station Technical support 720P Wireless (1 Mp) card reader User manual Thank you for choosing our equipment...
-
Page 2: Table Of Contents
This manual can contain some inaccuracy or misprint. The owner reserves the right to 3. Description....................................make corrections to the information described in the user manual and device package. 4. Installation....................................The last revision of this manual is available on www.slinex.com 4.1 Schematic diagrams..............................Safety instructions 4.2 Unit mount ................................. -
Page 3: Speci Cation
Shan 1. Package 3. Description Shan multi-apartment video outdoor station – 1 pc. Flush mount box – 1pc. Connection wires kit – 1 pkg. Wires cap – 1 pkg. Mounting screws – 1 pkg. User manual – 1 pc. 2. Speci cation 158 mm (6.22") -
Page 4: Installation
Shan 4. Installation Diagram 3. Basic network connection 4.1 Schematic diagrams Shan outdoor station Imani indoor monitor Diagram 1. Shan mechanical lock connection Power supply 12V, 2A +12V GND Mechanical Lock power lock supply Router with PoE Internet Diagram 2. Shan electromagnetic lock connection... -
Page 5: Unit Mount
Shan 5. Software setup 4.2 Unit mount Below you can see multi-apartment outdoor panel main screen: 1) Take a box from the kit and place it 150-160 cm (4.9-5.2 ft.) from the oor line. 2) Prepare space in the wall that will be used for box setup. Space dimensions are 141×359×58 mm (5.55×14.13×2.28") - Page 6 Shan 5.1. Device settings DHCP – enable or disable DHCP function; IP – door panel IP addres (192.168.1.90 or 192.168.1.91 by default); In outdoor panel settings choose «Device settings» menu by keys and press # to enter it: Mask – subnet mask;...
-
Page 7: About System
Shan RoomNum – apartment number for adding wireless card. Enter apartment number then touch wireless card near card reader to add the card for the current apartment number. Then you will hear sound signal and card number will be displayed in the «Card» field;... -
Page 8: Panel" Bookmark
Heartbeat to server – check management server connection. SIP settings Enable/Disable – enable/disable SIP function; Proxy – proxy server name (default value – sip:pbx.slinex.com ); Realm – authentication host (default value – pbx.slinex.com); STUN IP – STUN server name (default value – stun.I.google.com);... -
Page 9: Apartment" Bookmark
Shan Device settings Video quality – video resolution 320x240, 640x480 or 1280x720; RTP data profile – rtp stream data profile (default value – 102); Volume level – outdoor station volume level from 1 to 6; RTSP Username – username for accessing RTSP;... -
Page 10: Access Management" Bookmark
Shan Building – building number; Then you can add user cards by touching them near outdoor panel card reader one by one. You will hear Unit – unit number; sound signal confirmation and text message on the outdoor panel screen after each card adding. - Page 11 Shan Additional settings Floor number (elevator control) – specify floor number for elevator control; Monitor secure mode – disable individual monitor alarm when corresponding wireless identifier is detected. Server manage access Enable – enable/disable server management when all the identifiers are stored on the remote server and server manages all access requests from outdoor panel;...
-
Page 12: Forward" Bookmark
192.168.1.99 is a SIP client IP address (in case of using softphone, IP address of the softphone must be defined here). In case of SIP forwarding enter «sip:1013@pbx2.slinex.com» where 1013 is the number to forward to and «pbx2.slinex.com» is SIP server adress. -
Page 13: System" Bookmark
Shan 6.10. «System» bookmark 6.8. «Logs» bookmark Press «System» bookmark on the left side of the screen to enter system settings. Press «Logs» bookmark on the left side of the screen to enter logs list. Here you can find list of the actions performed on the outdoor panel. -
Page 14: Limited Warranty
Shan 7. Limited warranty Device language Language – choose outdoor panel user interface language (English, Spanish, Russian or Ukrainian); Manufacturer guarantees product normal functioning during the warranty period if the user keeps all safety instructions described in that manual. Warranty period is 12 months from the moment of the product purchasing (warranty period could be extended up to 24 months or more, depending on the local regulations).
Need help?
Do you have a question about the Shan and is the answer not in the manual?
Questions and answers