
Related Manuals for Slinex SL-07N Cloud


Summary of Contents for Slinex SL-07N Cloud
- Page 1 Design. Uniqueness. Innovations Design. Uniqueness. Innovations SL-07N Cloud Technical support Техническая поддержка User manual 1-34 Инструкция по эксплуатации 35-68...
-
Page 2: Table Of Contents
This manual can contain some inaccuracy or misprint. The owner reserves the right to 3. Description..................................... make corrections to the information described in the user manual and device package. 4. Installation....................................The last revision of this manual is available on www.slinex.com 4.1. Cable requirements............................. Safety instructions 4.2. Schematic diagrams............................ -
Page 3: Package
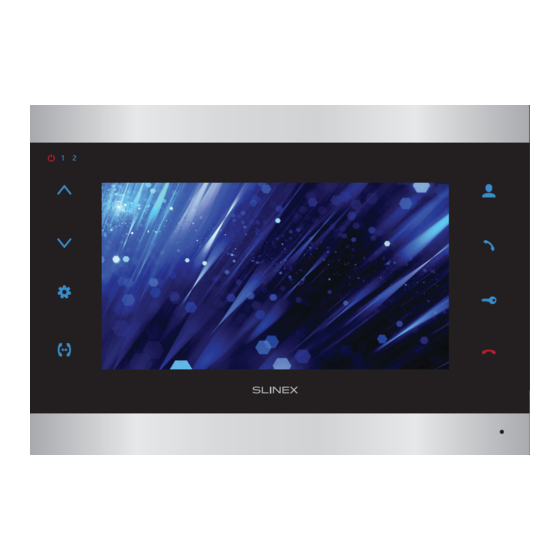
SL-07N Cloud 1. Package 3. Description SL-07N Cloud indoor monitor − 1 pc. External antenna− 1 pc. Wall mounting bracket − 1 pc. Connection wires kit − 1 pkg. Mounting screws and anchors kit − 1 pkg. User manual − 1 pc. -
Page 4: Cable Requirements
+13,5 V Power Power Network Ext. power RJ-45 connector Audio 262 - 328 ft. Audio 80 - 100 m SL-07N Cloud (Master) Ground Ground Lock power Lock Video Video supply RG-59 or RG-6 Video c) Shielded or non-shielded twisted pair (not recommended):... -
Page 5: Unit Mount
Door 2 CCTV 2 Output Door 2 Camera 2 Output Ext. power Sonik 7 (Slave) Network Ext. power SL-07N Cloud (Master) Door 1 CCTV 1 Input Door 2 CCTV 2 Output Ext. power Sonik 7 (Slave) Notes: Use «Power» plug to connect external power supply +13,5 V. While use external power supply please keep main power cord ~100-240 V disconnected from the outlet, otherwise it can damage monitor circuits. -
Page 6: Operation
SL-07N Cloud 5. Operation 5.2. Outdoor panel and camera monitoring 5.1. Incoming call Standby mode Standby mode Monitor will display Press «Monitor» the image from the Visitor presses call button Visitor presses call button button on the rst door panel... -
Page 7: Incoming Call Redirection
SL-07N Cloud Notes: 5.4. Intercom 1) If several monitors connected into one system, the user can view the image from door panels on any Two monitors are connected into one system. monitor inside this system. The image will be transferred from the «Master» monitor outdoor panels to the «Slave»... - Page 8 SL-07N Cloud Image monitoring screen has following elements: 06-10-2021 12 : 01 Decrease current Increase current Current video channel parameter value parameter value Door 1 Main menu Monitoring Intercom Records − Image and − volume settings bar − Settings At home Photo frame −...
-
Page 9: Settings
SL-07N Cloud 8. Settings Call records (11-1/2) Record 20210105061950_0010_DOOR2.mov playback Main menu 20210105061842_0002_DOOR1.mov 20210105061840_0000_DOOR1.mov 20210105061727_0001_DOOR1.mov 20210105061725_0001_DOOR1.jpg Main menu Records 20210105061724_0001_DOOR1.mov 20210105061549_0001_DOOR1.jpg System setting Door setting Camera setting 20210105061548_0001_DOOR1.jpg Call records Settings 20210105061546_0001_DOOR2.jpg Message records 20210105061544_0001_DOOR2.jpg Motion records Alarm records Network setting... -
Page 10: Door Settings
SL-07N Cloud Main menu → Settings → System Door 1 / Ring 1 Device ID − this monitor model can only be «Master» in the system; Ring 1 Main menu Schedule 06 : 00 - 12 : 00 Time − current date and time settings;... -
Page 11: Camera Settings
SL-07N Cloud 8.4. Camera settings 8.5. Network settings Press «Settings» icon in the main menu then press «Camera setting» icon to enter camera settings menu: Press «Settings» icon in the main menu then press «Network setting» icon to enter network settings menu:... -
Page 12: Service Settings
SL-07N Cloud 8.6. Service settings Information Press «Settings» icon in the main menu then press «Service» icon to enter service settings menu: Software version 3.0.0.1 Release date 2021-10-21 Service Main menu SD remain space 7.1G/7.2G UUID *04be4d97 Formatting SD disk... -
Page 13: Standby Clock
Switching time − photo switching interval, from 3 to 30 sec.; Background music − enable/disable background music playback in photo frame mode; Diagram 2. SL-07N Cloud wireless Wi-Fi network connection. Background volume − set background music volume in photo frame mode. -
Page 14: Software
SL-07N Cloud 13. Software Enter «Google Play» (for Android) or «Apple App Store» (for iOS) and search for «Smart Call» application, then install this application on your mobile device. 13.1. Creating new account 1) Start «Smart Call» application on your mobile device and press «SIgn up» button to create an account;... -
Page 15: Wireless Wi-Fi Network Connection Steps In "Ap Mode
SL-07N Cloud 13.3. Wireless Wi-Fi network connection steps in «AP mode» 1) Connect mobile device into the same Wi-Fi network you want to connect the monitor; 2) Disable 3G/4G internet connection on your mobile device; 3) Press «Add device» button and choose device model for connection;... -
Page 16: Operation
SL-07N Cloud button in the application; 6) Enable «Next step» switch then press «Next» button; Outdoor panel 1 7) Enter Wi-Fi network name, the monitor will be conected to, and network password. Then press «Next» Outdoor panel 2 button to go to the next step;... -
Page 17: Sharing With The Other Devices
SL-07N Cloud 13.6. Sharing with the other devices 13.7. Noti cation messages The account, device is added for the first time, is master account. This account has master permissions and Press «Me» bookmark on the bottom of the main screen, then press icon on the right upper corner of can change all the settings. -
Page 18: Limited Warranty
SL-07N Cloud 14. Limited warranty Manufacturer guarantees product normal functioning during the warranty period if the user keeps all safety instructions described in that manual. Warranty period is 12 months from the moment of the product purchasing (warranty period could be extended up to 24 months or more, depending on the local regulations). - Page 19 SL-07N Cloud ................................37 .................................. 37 ....................................38 -10 ˚C +55 ˚C....................................39 ................................ 39 ............................40 ..................................42 ..................................43 5.1..........................43 5.2..........................44 5.3............................ 45 5.4..............................46 ..................................46 ................................48 ..................................... 50 8.1.
- Page 20 SL-07N Cloud SL-07N Cloud − 1 Wi-Fi − 1 − 1 − 1 − 1 − 1 230 мм мм « » – 7”, « » – 1024×600 « »: • PAL/NTSC/AHD, TVI, CVI (720p,1080p) , ~100-240 • • «...
- Page 21 • 0,75 0 - 50 50 - 80 Вызывная панель 1 0,75 RG-59 RG-6 +13,5 RJ-45 Замок Адаптер питания 80-100 SL-07N Cloud (Основной) замка RG-59 RG-6 Камера 2 Датчик Адаптер • движения питания камеры • Вызывная 0 - 20 панель 2 Камера...
- Page 22 SL-07N Cloud 4.3. SL-07IN Cloud Sonik 7. 150-160 Sonik 7 (Дополнительный) SL-07N Cloud (Основной) Sonik 7 (Дополнительный) « » +13,5 . ~100-240...
- Page 23 SL-07N Cloud 5.2. 5.1. « » – 60 « » – 60 « » « », « » – 60 « » – 120 – 60 « » « », « » « », « »,...
- Page 24 SL-07N Cloud 5.4. « » « » « » 5.3. « », « » « » « » « », « »,...
- Page 25 SL-07N Cloud 06-10-2021 12 : 01 Панель 1 Главное Просмотр Интерком Записи меню − − − Система Режим сна Фоторамка − « » 1 − 2 − 1 − « », 2 − 06-10-2021 12 : 01 Главное меню Вызовы...
- Page 26 SL-07N Cloud (11-1/2) 20210105061950_0010_DOOR2.mov Главное 20210105061842_0002_DOOR1.mov меню 20210105061840_0000_DOOR1.mov 20210105061727_0001_DOOR1.mov 20210105061725_0001_DOOR1.jpg Главное Записи меню 20210105061724_0001_DOOR1.mov 20210105061549_0001_DOOR1.jpg Система Панель Камера 20210105061548_0001_DOOR1.jpg Вызовы Система 20210105061546_0001_DOOR2.jpg Сообщения 20210105061544_0001_DOOR2.jpg Деекция Тревога Сеть Сервис О системе − . .; 2019/09/18 15:40:42 − − − 20210105061950_0010_DOOR2.mov −...
- Page 27 SL-07N Cloud → → Главное − меню 06 : 00 - 12 : 00 − − − Система − − Панель − − Настройка мелодии 8.2. → → → « », « » − − Главное − « » - меню...
- Page 28 SL-07N Cloud 8.4. 8.5. C « », « » « », « » Главное Главное меню меню Wi-Fi SmartLife-b1e24f AHD1080 12345678 Система Система Камера Сеть → → → → − − − « AP» – « », Wi-Fi « », «...
- Page 29 SL-07N Cloud 8.6. C « », « » 3.0.0.1 2021-10-21 Главное меню 7.1G/7.2G UUID *04be4d97 Система Главное меню О системе Система Сеть → → − microSD − − Дома «update.ius» microSD − Не дома 8.7. Режим сна « », «...
- Page 30 SL-07N Cloud microSD « »: SL-07N Cloud Маршрутизатор Главное Интернет меню 3G / Wi-Fi Фоторамка Smart call SL-07N Cloud → ПК Android / iOS − − SL-07N Cloud Wi-Fi − − » → « Маршрутизатор « » « », Smart call Интернет...
- Page 31 SL-07N Cloud «Google Play» ( Android) «Apple App Store» iOS), «Smart Call» 13.1. «Smart Call» « » « », « » « » » → « « » « » « ». « » « »; « » « ».
- Page 32 SL-07N Cloud 13.3. Wi-Fi Wi-Fi 3G/4G « » « »; » → « « » « » « AP». « » « »; « » « »; 13.4. Wi-Fi Wi-Fi 3G/4G « » « »; » → « « »...
- Page 33 SL-07N Cloud Wi-Fi c « »; Wi-Fi, : 888888) 13.5.
- Page 34 SL-07N Cloud 13.6. 13.7. « » « ». «Smart Call» «Smart Call» « ». « ». « » « »...
- Page 35 SL-07N Cloud • • • . .; • • • . .,...
Need help?
Do you have a question about the SL-07N Cloud and is the answer not in the manual?
Questions and answers