Table of Contents
Advertisement
Quick Links
Advertisement
Table of Contents

Related Manuals for soundsation Pro-Lighting Sestetto 1018 Slim


Summary of Contents for soundsation Pro-Lighting Sestetto 1018 Slim
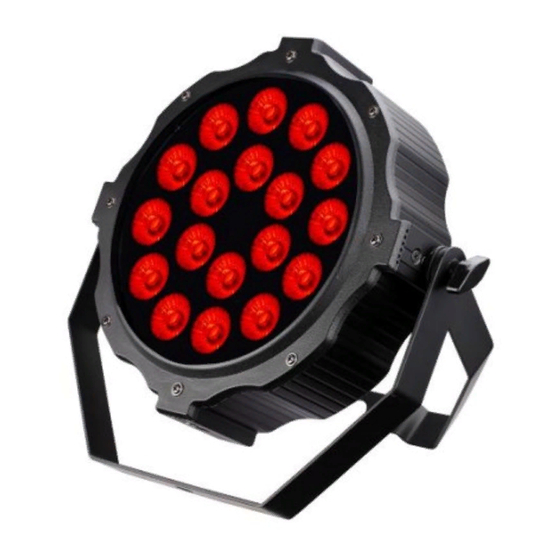
- Page 1 Sestetto 1018 Slim USER MANUAL PRO-LIGHTIN...
-
Page 2: Warranty And Service
Dear customer, Any accessories supplied with the product Improper use first of all thanks for purchasing a SOUNDSATION® product. Our Fault due to wear and tear mission is to satisfy all the possible needs of musical instrument and Any modification of the product effected by the user or a third... -
Page 3: General Warnings
In case of problems remember to give the serial number to the © SOUNDSATION 2012 – All rights reserved – All total or partial reproduction of this responsible of the technical assistance. - Page 4 Contents Section 1.Getting Started Temperature control: Unpacking ² when the temperature of light source reaches 80°, the maximum power reduces 50%, ² Safety Instruction when the temperature of light source goes down to 65°, the maximum power recovers to 100% Section 2.
-
Page 5: Specification
Section 1. Getting Started ² Unpacking Specification ² Safety Instruction Light source:18pcs x 10w Beam angel:25°(lens) Unpacking Strobe:0-20Hz Dimmer:standard mode + 4 types of dimmer curves 1pc Fixture 1pc User Manual Connection control:DMX512 1pc Power Cable /4 fixtures Channel:13/8(switchable) Built-in program: 5 strobes + 6 autos + 2 sound active 1pc Signal Cable... - Page 6 Ÿ The unit must be installed in a location with adequate ventilation, at least 50CM away from adjacent surfaces. Be sure that no ventilation slots are blocked. Ÿ Do not operate at ambient temperatures higher than 104℉(40℃). Ÿ Safe wire should be used to install machine. Bearing of safe wire should be 3 times of the machine weight.
-
Page 7: Section 2. Set Up
Section 2. Set Up ² Installation ² Controlling Board ² Machine Connection Installation This machine should be mounted through the screw holes of truss. Safety wire is a must to fix fixture well. Make sure truss and safety wire have strong load capacity to bear 3 times weight than fixture at least. - Page 8 3. DMX signal input Control model by DMX signal,please use 3pin XLR signal cable. 4. DMX Signal output Transfer DMX signal to next model, please use 3pin XLR signal cable. 5. Power output Connect to obtain power (attention:please use connect to stated voltage.) 6.Power input Connect to obtain power Machine Connection...
- Page 9 Color 0-5:N/A Preset 6-15: red 16-25: green 26-35 blue 36-45:light green 46-55:yellow green 56-65:yellow 66-75:tea red 76-85:light orange 86-95:rose red 96-105:pink 106-115:violet 116-125:light purple 126-135 : pink blue 136-145 : light blue 146-155:sky blue 156-165 : light cyan 166-175 : dark green 176-185:aqua 186-195 :...
- Page 10 (13CH ) CH 13 CH 13) DMX Protocol mode of dimmer is determined by Function Description Dimmer 0-255:RGBWA-UV linear dimmer, from dark to bright R Dimmer 0-255:Red linear dimmer, from dark to bright G Dimmer 0-255:Green linear dimmer, from dark to bright A word on termination: DMX is a resilient communication protocol, however errors still occasionally B Dimmer 0-255:Blue linear dimmer, from dark to bright...
-
Page 11: Section 3. Troubleshooting
Remark: Host mode(non DMX menu)of dimmer is determined by menu dr Section 3. Troubleshooting g--- g000-g255:G dimmer,from dark to bright b--- b000-b255: B dimmer,from dark to bright A--- A000-A255:white dimmer,from dark to bright Probable P--- P000to P255:blue dimmer,from dark to bright Remedy cause(s) n---... -
Page 12: Section 4. Reference
Random Colors cannot color Turn off random color mixing Section 4. Reference be mixed mixing is Electronic Fixture does ² Control Menu not reset Contact service technician ² DMX Protocol mechanical correctly failure ² Specification Lamp No light, lamp Pressing MENU will show 15 different menus, press ENTER to missing or Disconnect fixture and replace lamp cuts out...
Need help?
Do you have a question about the Pro-Lighting Sestetto 1018 Slim and is the answer not in the manual?
Questions and answers