Table of Contents
Advertisement
Quick Links
Advertisement
Table of Contents
Troubleshooting

Related Manuals for soundsation Sestetto 1007 Slim


Summary of Contents for soundsation Sestetto 1007 Slim
- Page 1 Sestetto 1007 Slim USER MANUAL PRO-LIGHTIN...
- Page 2 Take care! © SOUNDSATION 2012 – All rights reserved – All total or partial reproduction of this The SOUNDSATION Team manual by any other company or person without express authorization of...
- Page 3 If any foreign objects enter the instrument, please contact packaging if available. Alternatively you can send the product to SOUNDSATION SERVICE CENTER – Via Enzo Ferrari , 10 – 62017 your dealer or an authorized SOUNDSATION center. Porto Recanati - Italy . In order to send a product to service center you need an RMA number.
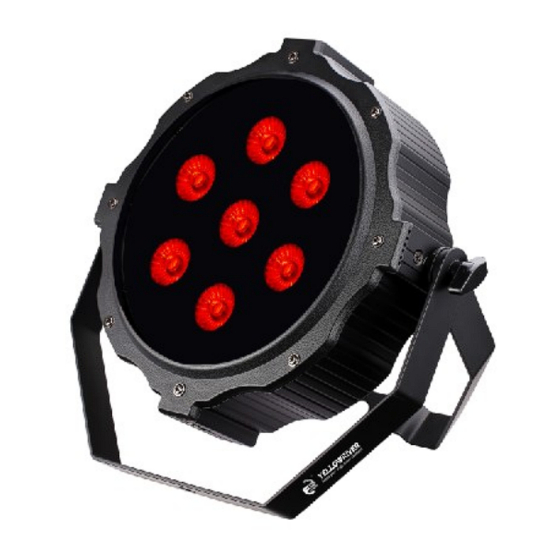
- Page 4 Specification: Contents Voltage:AC110V-240V Section 1.Getting Started Frequency:50/60Hz Rated Power:90W ² Unpacking LED: 10WX7 RGBWA+UV Safety Instruction ² Control:DMX512 25° Beam angle: Channel: 11/7 channels (switchable) Section 2. Set Up Control Mode: ² Installation DMX/sound active/auto/ master-slave/manual Level of Protection: IP20 ²...
-
Page 5: Safety Instruction
Section 1. Getting Started (7CH ) DMX Protocol Function Description ² Unpacking Dimmer RGBWA-UV linear dimmer, from dark to bright ² Safety Instruction R Dimmer Red linear dimmer, from dark to bright G Dimmer Green linear dimmer, from dark to bright Unpacking B Dimmer Blue linear dimmer, from dark to bright... - Page 6 ² Control Menu For your safety,please read this user manual carefully before ² DMX Protocol operation. The machine should be operated by qualified engineer! Ÿ Please conserve this manual as operation guidance. If you sell this product to ² Specification other user, please make sure that they also receive this user manual.
- Page 7 ² Installation Probable cause(s) Remedy ² Controlling Board No power to fixture Check power cables No response from ² Machine Connection Primary fuse blown Replace fuse fixture when power Secondary fuse is applies Replace fuse blown Installation Controller Connect controller This machine should be mounted through the screw holes of truss.
- Page 8 Front display panel Cable Connectors Cables must have a male XLR connector on one end and a female XLR connector on the other end. A word on termination: DMX is a resilient communication protocol, however errors still occasionally occur. Termination reduces signal errors, and therefore best 1.
Need help?
Do you have a question about the Sestetto 1007 Slim and is the answer not in the manual?
Questions and answers