dji P4 MULTISPECTRAL User Manual
Hide thumbs
Also See for P4 MULTISPECTRAL:
- Maintenance manual (11 pages) ,
- Quick start manual (82 pages) ,
- Quick start manual (28 pages)
Table of Contents
Advertisement
Advertisement
Table of Contents

Related Manuals for dji P4 MULTISPECTRAL


Summary of Contents for dji P4 MULTISPECTRAL
- Page 1 MULTISPECTRAL v1.0 User Manual 2019.09...
-
Page 2: Using This Manual
The latest version of DJI GS Pro is required when using with the P4 Multispectral. Search for DJI GS Pro in App Store or scan the QR code to download the app on your iPad. Visit the official DJI website for more information about DJI GS Pro. -
Page 3: Table Of Contents
Contents Using This Manual Legend Before Flight Video Tutorials Download DJI GS Pro App Download DJI Terra Product Profile Introduction Feature Highlights Preparing the Aircraft Activating the Aircraft Aircraft Overview Remote Controller Overview Aircraft Profile Flight Modes Aircraft Status Indicators... - Page 4 GEO (Geospatial Environment Online) System Flight Restrictions GEO Unlocking Preflight Checklist Calibrating the Compass Starting/Stopping the Motors Stopping Motors Mid-flight Flight Test DJI Assistant 2 for Phantom Installation and Launching Using DJI Assistant 2 for Phantom Appendix Specifications © 2019 DJI All Rights Reserved.
- Page 5 Product Profile This section introduces the P4 Multispectral and lists the components of the aircraft and remote controller. © 2019 DJI All Rights Reserved.
-
Page 6: Product Profile
(FCC-compliant version). Connect an iPad to the remote controller via the USB port to use DJI GS Pro app to plan and perform missions. Import the image data into DJI GS Pro or DJI Terra to generate multispectral index maps** and view the analysis. -
Page 7: Preparing The Aircraft
P4 Multispectral User Manual Preparing the Aircraft 1. Remove the gimbal clamp from the camera as shown in the figure. 2. Attaching the Propellers Mount the propellers with black propeller rings to the motors with black dots. Mount the propellers with sliver propeller rings to the motors without black dots. Press the propeller down onto the mounting plate and rotate in the lock direction until it is secured. -
Page 8: Activating The Aircraft
Plug one end of the cable into the mobile device, and the other end into the USB port on the back of the remote controller. Activating the Aircraft When using your P4 Multispectral for the first time, activate it using DJI GS Pro. Ensure that your iPad has access to the internet. ©... -
Page 9: Aircraft Overview
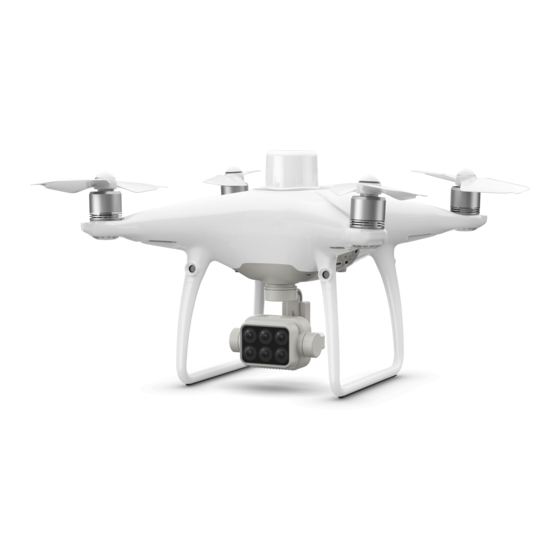
P4 Multispectral User Manual Aircraft Overview 1. Gimbal Cameras 8. Front LEDs (with six cameras corresponding to the 9. Motors wave bands below) 10. Propellers a. Red Edge (RE) b. Near-Infrared (NIR) 11. Aircraft Status Indicators c. Green (G) d. Visible Light (RGB) 12. -
Page 10: Remote Controller Overview
18. USB Port (for mobile device connection) 8. Small Device Positioning Tabs (for mobile Connection to mobile device for DJI GS Pro. phones) 19. Micro USB Port 9. Antennas Connects to a computer via a Micro USB Relays aircraft control and image cable for configuration. - Page 11 Aircraft This section introduces the aircraft components, features and functions. © 2019 DJI All Rights Reserved.
-
Page 12: Aircraft
Flight Modes The P4 Multispectral provides the following flight modes. Use the flight mode switch on the remote controller to switch between different flight modes. The P and S positions on the remote controller are for P-mode, and the A position is for A-mode. -
Page 13: Aircraft Status Indicators
P4 Multispectral User Manual Aircraft Status Indicators The P4 Multispectral has Front LEDs and Aircraft Status Indicators. The positions of these LEDs are shown in the figure below: Aircraft Status Indicators Front LEDs The Front LEDs show the orientation of the aircraft. The Front LEDs glow solid red when the air- craft is turned on to indicate the front (or nose) of the aircraft. -
Page 14: Return To Home (Rth)
P4 Multispectral User Manual Return to Home (RTH) Return to Home (RTH) function brings the aircraft back to the last recorded Home Point. There are three types of RTH: Smart RTH, Low Battery RTH, and Failsafe RTH. This section describes these three scenarios in detail. - Page 15 P4 Multispectral User Manual Low Battery RTH The low battery level failsafe is triggered when the DJI Intelligent Flight Battery is depleted to a point that may affect the safe return of the aircraft. The user can cancel the RTH procedure by pressing the RTH button on the remote controller.
- Page 16 Vision System is disabled. Users can use the remote controller to control aircraft altitude and speed. It is important to set a suitable Failsafe altitude before each flight. Go to Camera View in DJI GS Pro, tap the text under the Smart RTH button to set an RTH altitude.
- Page 17 P4 Multispectral User Manual Aircraft cannot return to the Home Point when GNSS signal is weak ] displays grey) or the module is unavailable. If you move the throttle stick after the aircraft rises above 65 feet (20 meters) but below the pre-set Failsafe RTH altitude, the aircraft will stop ascending and immediately return to the Home Point.
-
Page 18: Aerial Photography Missions
0% will the aircraft land. Users retain control of aircraft flight orientation. 3. If Landing Protection is inactive, DJI GS Pro will display a landing prompt when the aircraft descends below 0.3 meters. Tap to confirm or pull down the control stick for 2 seconds to land when the environment is appropriate for landing. -
Page 19: Rtk Functions
BLUE GREEN Generating Multispectral Maps Import the image data into DJI GS Pro or DJI Terra to generate multispectral maps. Refer to their user manuals for details. RTK Functions The P4 Multispectral has a built-in DJI Onboard D-RTK, which provides more accurate data for centimeter-level positioning to improve operation precision when using with the DJI D-RTK 2 High Precision GNSS Mobile Station or Network RTK service. -
Page 20: Vision System And Infrared Sensing System
P4 Multispectral User Manual Using with the DJI D-RTK 2 Mobile Station 1. Go to Mission Page in DJI GS Pro, tap the icon or RTK on top of the screen to go to the RTK settings menu, and then select D-RTK 2 as the RTK data source. Enable the aircraft RTK at the bottom of the menu to ensure the aircraft has access to RTK data. - Page 21 Calibrating Sensors Vision Systems cameras installed on the aircraft are calibrated on delivery. However these cameras are vulnerable to excessive impact and will require occasional calibration via DJI Assistant 2 for Phantom. Follow the steps below to calibrate the sensors.
- Page 22 P4 Multispectral User Manual Follow the steps below to use Vision Positioning: 1. Turn on the aircraft. The aircraft status indicator will flash green two times, which indicates the Vision Positioning is ready. 2. Gently push the left stick up to lift off and the aircraft will hover in place.
-
Page 23: Flight Recorder
Flight Recorder Flight data is automatically recorded to the internal storage of the aircraft. To access this data, connect the aircraft to the PC through the Micro USB port and launch the DJI Assistant 2. Attaching and Detaching the Propellers Use only DJI approved propellers with your aircraft. -
Page 24: Dji Intelligent Flight Battery
P4 Multispectral User Manual DJI Intelligent Flight Battery The DJI Intelligent Flight Battery has a capacity of 5870 mAh, a voltage of 15.2 V, and a smart charge/discharge functionality. It should only be charged using an appropriate DJI approved power adapter and charging hub. - Page 25 Battery voltage should reach the appropriate level when operating environment with temperatures between -10°C and 5°C. 3. End the flight as soon as DJI GS Pro displays the “Low Battery Level Warning” in low temperature environments. 4. Keep the battery indoors to warm it before flying in low temperature environments.
- Page 26 P4 Multispectral User Manual Checking the Battery Level The Battery Level Indicators display how much power remains. When the battery is turned off, press the Power Button once. The Battery Level Indicators will light up to display the current battery level. See below for details.
- Page 27 P4 Multispectral User Manual Battery Level Indicators While Charging LED1 LED2 LED3 LED4 Battery Level 0%~25% 25%~50% 50%~75% 75%~100% Fully Charged Using the Power Adapter and Charging Hub for Charging 1. Connecting to a Power Source Connect the power adapter to a power outlet (100-240V, 50/60Hz), then connect the charging bub to the power adapter.
- Page 28 P4 Multispectral User Manual Be sure to align the grooves on the Intelligent Flight Battery with the battery slot tracks. The Status LED Indicator will turn solid yellow if the battery is properly inserted. In storage mode, you can power on the Intelligent Flight Batteries to discharge them without having to connect to a power source if all batteries have more than 50% power.
- Page 29 P4 Multispectral User Manual DJI does not take any responsibility for damage caused by third-party chargers. If the battery level is above 95%, turn on the battery before charging. How to discharge your Intelligent Flight Battery: Place the Intelligent Flight Battery into the battery compartment and turn it on. Fly the aircraft out doors until the battery level is low (such as 20% of power left).
- Page 30 Gimbal Cameras This section provides the technical specifications of the cameras and explains the gimbal operation. © 2019 DJI All Rights Reserved.
-
Page 31: Gimbal Cameras
730 nm ± 16 nm; Near-infrared (NIR): 840 nm ± 26 nm. Camera microSD Card Slot The P4 Multispectral supports microSD cards up to 128 GB. A Class 10 or UHS-I and above microSD card is recommended due to their fast read and write speeds. Users can read the photos and videos, and the raw satellite observations recorded during missions from the microSD card. -
Page 32: Gimbal
P4 Multispectral User Manual Camera Operation Use the shutter and video recording buttons on the remote controller or in DJI GS Pro to shoot the photos or videos. Gimbal Profile The 3-axis gimbal provides a steady platform for the attached camera, allowing you to capture clear, stable images and video. - Page 33 Remote Controller This section describes the features of the remote controller and includes instructions for controlling the aircraft and cameras. © 2019 DJI All Rights Reserved.
-
Page 34: Remote Controller
4.3 mi (7 km). Connect an iPad to the remote controller via the USB port to use DJI GS Pro app to plan and perform missions. Export the captured images for analysis and create multispectral maps. - Page 35 P4 Multispectral User Manual Charging the Remote Controller Charge the remote controller using the included charger. Refer to the figure below for more details. Power Outlet Charger Controlling the Camera Shoot videos/photos, and adjust gimbal pitch angle via the Shutter Button, Video Recording Button, and Gimbal Dial on the remote controller.
- Page 36 P4 Multispectral User Manual Controlling the Aircraft This section explains how to control the orientation of the aircraft through the remote controller. Control can be set to Mode 1 , Mode 2 or Mode 3, or to a custom mode.
- Page 37 Moving the right stick up and down changes the aircraft’s forward and backward pitch. Push the stick up to fly forward and down to fly backward. P4 Multispectral will hover in place if the stick is centered. Push the stick further away from the center position for a larger pitch angle (maximum 30˚) and faster...
- Page 38 P4 Multispectral User Manual Flight Mode Switch Toggle the switch to select the desired flight mode. Choose between P-mode and A-mode. Position 1 Position Figure Flight Mode Position 1 P-mode Position 2 Position 2 P-mode Position 3 A-mode Position 3 RTH Button Press and hold the RTH button to start the Return to Home (RTH) procedure.
-
Page 39: Remote Controller Status Led
The remote controller should already be linked to the aircraft out of the box. Linking is only required when using a new remote controller for the first time. 1. Power on the remote controller, connect the mobile device, and open DJI GS Pro. 2. Power on the aircraft. - Page 40 Flight This section describes safe flight practices and flight restrictions. © 2019 DJI All Rights Reserved.
-
Page 41: Flight
DJI GS Pro. The locations designated by GEO are called GEO Zones. GEO Zones are specific flight areas that are categorized by flight regulations and restrictions. GEO Zones that prohibit flight are implemented around locations such as airports, power plants, and prisons. -
Page 42: Flight Restrictions
Restricted Zone, please go to https://www.dji.com/flysafe or contact flysafe@dji.com to unlock the zone. DJI GEO Zones aim to ensure the user’s flight safety, but it cannot be guaranteed to be in full compliance with local laws and regulations. Users should check local laws, regulations, and regulatory requirements before each flight and are responsible for the flight safety. -
Page 43: Geo Unlocking
Self-Unlocking is used for Authorization Zones, where the user is required to submit an unlock request by authenticating their phone number for a registered DJI account. This feature is only available in certain countries. Users can choose whether to submit their unlock request via the website at https://www.dji.com/flysafe (Scheduled Self-Unlocking), or through DJI GS Pro (Live Self-... -
Page 44: Preflight Checklist
DO NOT carry ferromagnetic materials with you during calibration such as cellular phones. DJI GS Pro will prompt you to resolve the compass issue if the compass is affected by strong interference after calibration is complete. Follow the prompted instructions to resolve the compass issue. -
Page 45: Starting/Stopping The Motors
P4 Multispectral User Manual 4. Re-calibrate the aircraft if the aircraft status indicators glows blinking red. If the Aircraft Status Indicator blinks red and yellow after the calibration procedure, move your aircraft to a different location and try again. DO NOT calibrate the compass near metal objects such as a metal bridge, cars, scaffolding. -
Page 46: Stopping Motors Mid-Flight
1. Place the aircraft in an open, flat area with the battery level indicators facing towards you. 2. Turn on the remote controller and then turn on the Intelligent Flight Battery. 3. Launch DJI GS Pro and enter Mission Page. 4. Wait until the Aircraft Status Indicators start to blink green slowly, which indicates that GNSS or RTK is in use. - Page 47 P4 Multispectral User Manual Video Suggestions and Tips 1. Go through the full pre-flight checklist before each flight. 2. Only shoot photos or record videos when flying in P-mode. 3. Always fly in good weather conditions and avoid flying in rain or heavy wind.
- Page 48 DJI Assistant 2 for Phantom This section introduces the usage of the DJI Assistant 2 for Phantom software. © 2019 DJI All Rights Reserved.
-
Page 49: Dji Assistant 2 For Phantom
DJI Assistant 2 for Phantom Update firmware, copy flight records and calibrate the Vision System in the DJI Assistant 2 for Phantom software. For users that own DJI Agras aircraft, the DJI Assistant 2 for MG can also be used for the functions above. - Page 50 Appendix © 2019 DJI All Rights Reserved.
-
Page 51: Appendix
Ground Sample Distance (GSD) to the area mapped (unit: m) Max operating area of approx. 0.47 km for a single flight Rate of Data Collection at an altitude of 180 m, i.e., GSD is approx. 9.52 cm/pixel © 2019 DJI All Rights Reserved. - Page 52 P4 Multispectral User Manual Gimbal Controllable Range Pitch: -90° to +30° Vision System ≤ 31 mph (50 kph) at 6.6 ft (2 m) above ground with Velocity Range adequate lighting Altitude Range 0 - 33 ft (0 - 10 m)
- Page 53 P4 Multispectral User Manual FCC / NCC: 4.3 mi (7 km); Max Transmission Distance CE / MIC / KCC / SRRC: 3.1 mi (5 km) (Unobstructed, free of interference) Built-in Battery 6000 mAh LiPo 2S Operating Current / Voltage 1.2 A @ 7.4 V...
- Page 54 This content is subject to change. Download the latest version from https://www.dji.com/p4-multispectral If you have any questions about this document, please contact DJI by sending a message to DocSupport@dji.com. DJI is a trademark of DJI. Copyright © 2019 DJI All Rights Reserved.
Need help?
Do you have a question about the P4 MULTISPECTRAL and is the answer not in the manual?
Questions and answers