Advertisement
Table of Contents
- 1 Table of Contents
- 2 Device Description
- 3 Getting Started
- 4 ICS Aircal Front Panel
- 5 ICS Aircal Delivery Head & Foot Switch
- 6 Performing a Caloric Irrigation
- 7 ICS Aircal System Safety
- 8 Service, Cleaning, and Maintenance
- 9 Other References
- 10 Technical Specifications
- 11 Notes on EMC (Electromagnetic Compatibility)
- 12 Troubleshooting
- 13 Firmware Procedures
- Download this manual
Advertisement
Table of Contents

Subscribe to Our Youtube Channel
Related Manuals for otometrics ICS AirCal


Summary of Contents for otometrics ICS AirCal
- Page 1 AirCal User Guide Doc. No. 7-50-1240-EN/06 Part No. 7-50-12400-EN...
- Page 2 Copyright notice © 2012, 2019 Natus Medical Denmark ApS. All rights reserved. ® Otometrics, the Otometrics Icon, AURICAL, MADSEN, HI-PRO 2, Otoscan, ICS and HORTMANN are registered trademarks of Natus Medical Denmark ApS in the U.S.A. and/or other countries. Version release date 2019-12-04 (215491) Technical support Please contact your supplier.
-
Page 3: Table Of Contents
Getting started ICS AirCal Front Panel ICS AirCal Delivery Head & Foot Switch Performing a Caloric Irrigation ICS AirCal System Safety Service, cleaning, and maintenance Other references Technical Specifications 10 Notes on EMC (Electromagnetic Compatibility) 11 Troubleshooting 12 Firmware procedures Otometrics - ICS AirCal... -
Page 4: Device Description
Indicates that there is a risk of death or serious injury to the user or patient. • Caution • Indicates that there is a risk of injury to the user or patient or risk of damage to data or the device. Note Indicates that you should take special notice. • Otometrics - ICS AirCal... -
Page 5: Getting Started
2 Getting started Getting started Room Setup A. Sink Light bar B. VNG/ENG Equipment G. Footstool C. Counter H. Examining table D. Cabinets over counter Telephone Examiner's stool Otometrics - ICS AirCal... - Page 6 • Install the cradle prior to filling the water reservoir. Installation requires that the ICS AirCal is tilted more than 20°. If the water reservoir has water in it, tilting the device could introduce air into the system. There is little chance of damage to the system but, priming of the water reservoir would be required to make the system operate properly and not overheat.
- Page 7 1. Locate the bag shipped with the cradle that contains 3 screws and an Allen key. 2. With the side chosen to hold the cradle facing the ceiling and the bottom of the unit facing you, lay the ICS AirCal on its side.
- Page 8 2.2.3.3 Connecting the Mains power cable The ICS AirCal should be connected to an electrical wall outlet by attaching the power cable to the ICS AirCal irrigator and plugging the cable into the electrical wall outlet. Otometrics - ICS AirCal...
- Page 9 Caution Only • use distilled water. Using common water from the tap will result in mineral deposits and will harm the ICS AirCal. Filling 1. Turn off the ICS AirCal irrigator and unplug from the electrical wall outlet. Otometrics - ICS AirCal...
- Page 10 3. Facing the front panel, locate the small cover at the back right side. Using the Allen key (supplied with the cradle) unscrew the reservoir cover and remove. A. Reservoir cover 4. Using the Allen key unscrew the internal cover and remove. Otometrics - ICS AirCal...
- Page 11 2 Getting started A. Internal cover 5. Expand the funnel supplied with the ICS AirCal irrigator and place in the refill hole of the reservoir. Otometrics - ICS AirCal...
- Page 12 10 times on and 10 times off. 7. Press the cool button . Decrease the temperature to 12°C. 8. If the temperature reaches the set temperature, then the irrigator is primed. Continue to step 10. Otometrics - ICS AirCal...
- Page 13 5. Press the priming switch to turn on and hold 5 seconds. 6. Release the priming switch to turn off and wait 5 seconds. 7. Repeat steps for a total of 10 times on and 10 times off. Otometrics - ICS AirCal...
-
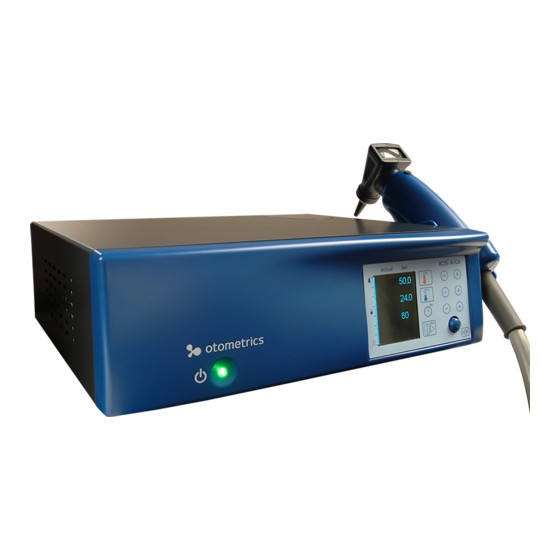
Page 14: Ics Aircal Front Panel
This is a push on/push off switch located on the bottom left of the front panel that applies power to the ICS AirCal. On is indicated by the illumination of a green LED and the digital display. When the ICS AirCal is first turned on it is in operation mode. Otometrics - ICS AirCal... - Page 15 < 60 seconds. If the ICS AirCal is in standby mode both the warm and cool set temperatures will display, the actual temperature will not display. Duration Timer 3.4.1 Recommended/Default Duration Timer The default duration for caloric irrigation is 60 seconds. Otometrics - ICS AirCal...
- Page 16 3 seconds to set all default settings (warm and cool tem- peratures, startup temperature, duration timer and beep volume). A 1 second beep will be sounded to confirm that the Otometrics - ICS AirCal...
- Page 17 12. Plug in the ICS AirCal to the electrical wall outlet and turn on ICS AirCal. Caution Due to the possibility of freezing during shipment, water must be drained from the reservoir before shipping • ► the ICS AirCal. See Troubleshooting for water removal instructions.. Otometrics - ICS AirCal...
-
Page 18: Ics Aircal Delivery Head & Foot Switch
Caution symbol indicates that the inner speculum should never be placed in the ear without an Outer Dis- • posable Speculum attached to it. A. Inner Speculum C. Full View Otoscope Lens B. Flow Time Activation Trigger D. Light On/Off Button Otometrics - ICS AirCal... - Page 19 Lens The Lens can be cleaned with a cleaning cloth like the Otometrics optical cleaning cloth (part # 7590527). If the lens is mis- handled and broken a new lens can be purchased. Slide the broken lens out and slide the new lens into place. See Section for an Accessories list.
-
Page 20: Performing A Caloric Irrigation
1. Verify that a new speculum has been placed on the delivery head. 2. Instruct the patient to keep eyes open (VNG) or closed (ENG). 3. Close goggles for VNG. Have patient close their eyes for ENG. 4. Start collecting response and start irrigation. Otometrics - ICS AirCal... -
Page 21: Ics Aircal System Safety
ISO 15223-1 Symbol 5.4.4 and device itself. IEC 60601-1 Refer to ICS AirCal Delivery Head & Foot Switch ► Table D.1 #10 Otometrics - ICS AirCal... - Page 22 EN 50419 these products as unsorted municipal waste. You can return your device and accessories to Natus Medical Denmark ApS, or to any Natus Medical Denmark ApS supplier. You can also contact your local authorities for advice on disposal. Otometrics - ICS AirCal...
- Page 23 ICS AirCal are suitable for use within the patient environment. 1. For the sake of safety, and in order not to void the warranty, the ICS AirCal should only be serviced by authorized ser- vice personnel. In case of defects, please make a detailed description of the defect(s) and contact your supplier.
-
Page 24: Service, Cleaning, And Maintenance
Lens on the Delivery Head The Lens can be cleaned with a cleaning cloth like the Otometrics optical cleaning cloth (part # 7590527). Otometrics - ICS AirCal... -
Page 25: Other References
However, if the system is not performing as expected a re-calibration may be needed. Other references For more detailed information, see the Reference Manual available on CD part # 8-49-91500. Technical Specifications ICS AirCal is type 1079 from Natus Medical Denmark ApS. Operating environment ° °... - Page 26 7.9 kg (17.5 lbs) With full reservoir 8.2 kg (18 lbs) Power supply Input voltage 100-240 VAC 50/60 Hz Power consumption <192 VA Fuse T 1.6H 250V Applied Part The applied part of the ICS AirCal is the irrigator head. Otometrics - ICS AirCal...
-
Page 27: Notes On Emc (Electromagnetic Compatibility)
Guidance and manufacturer's declaration - electromagnetic emissions for all equipment and systems ICS AirCal is intended for use in the electromagnetic environment specified below. The user of ICS AirCal should ensure that it is used in such an environment. Emissions test... - Page 28 Guidance and manufacturer's declaration - electromagnetic immunity for all equipment and systems ICS AirCal is intended for use in the electromagnetic environment specified below. The user of ICS AirCal should ensure that it is used in such an environment. Immunity test...
- Page 29 Recommended separation distances between portable and mobile RF communications equipment and ICS AirCal The ICS AirCal is intended for use in an electromagnetic environment in which radiated RF disturbances are controlled. The customer or the user of the ICS AirCal can help prevent electromagnetic interference by maintaining a minimum distance between portable and mobile RF communications equipment (trans- mitters) and the ICS AirCal as recommended below, according to the maximum output power of the communications equipment.
- Page 30 Guidance and manufacturer's declaration - electromagnetic emissions for all equipment and systems ICS AirCal is intended for use in the electromagnetic environment specified below. The user of ICS AirCal should ensure that it is used in such an environment. Emissions test...
- Page 31 Guidance and manufacturer's declaration - electromagnetic immunity - for equipment and systems that are NOT life-supporting ICS AirCal is intended for use in the electromagnetic environment specified below. The user of ICS AirCal should ensure that it is used in such an environment.
- Page 32 Recommended separation distances between portable and mobile RF communications equipment and ICS AirCal The ICS AirCal is intended for use in an electromagnetic environment in which radiated RF disturbances are controlled. The customer or the user of the ICS AirCal can help prevent electromagnetic interference by maintaining a minimum distance between portable and mobile RF communications equipment (trans- mitters) and the ICS AirCal as recommended below, according to the maximum output power of the communications equipment.
- Page 33 : At 80 MHz and 800 MHz the separation distance for the higher frequency range applies. Note 2 : These guidelines may not apply in all situations. Electromagnetic propagation is affected by absorption and reflection from structures, objects and people. Otometrics - ICS AirCal...
-
Page 34: Troubleshooting
6. Plug the ICS AirCal into the electrical wall outlet and turn ICS AirCal on. 7. Turn off the airflow. 8. To prime the pump, locate the priming switch on the back panel . 9. Press the priming switch to turn on and hold 5 seconds. Otometrics - ICS AirCal... -
Page 35: Firmware Procedures
12.1 Upgrading the firmware 1. Turn off the ICS AirCal system. 2. On the back panel, locate the firmware mode button (accessed through hole A) and the ICS AirCal USB port (B). A. Access to firmware button B. USB Port 3. - Page 36 This procedure installs the device driver on the computer that will be used to update the ICS AirCal firmware. 1. Turn on the computer. 2. Insert the ICS AirCal firmware upgrade CD. AirCal Driver AirCalInstaller.exe 3. On the CD, inside folder, locate the file. 4. Double-click on the file to run the installer program. Otometrics - ICS AirCal...
Need help?
Do you have a question about the ICS AirCal and is the answer not in the manual?
Questions and answers