
Related Manuals for otometrics Madsen Itera II


Summary of Contents for otometrics Madsen Itera II
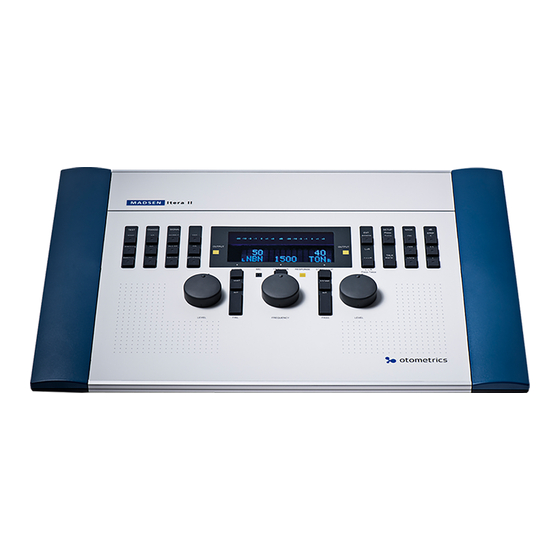
- Page 1 MADSEN Itera II Reference Manual Doc. No.7-50-0860-EN/26 Part No.7-50-08600-EN...
- Page 2 Copyright notice © 2010, 2019 Natus Medical Denmark ApS. All rights reserved. ® Otometrics, the Otometrics Icon, AURICAL, MADSEN, Otoscan, ICS and HORTMANN are registered trademarks of Natus Medical Denmark ApS in the U.S.A. and/or other countries. Version release date 2019-06-11 (214086) Technical support Please contact your supplier.
-
Page 3: Table Of Contents
The Audiometry Module Intended use About this manual 1.3.1 Safety Typographical conventions 1.4.1 Navigation in this manual Getting started with MADSEN Itera II and the OTOsuite Audiometry Module Unpacking Getting started Customizing your setup Overview of MADSEN Itera II Display Front panel controls 3.2.1 Front panel layout... - Page 4 6.2.1 Testing Testing with masking 6.3.1 When is masking required? 6.3.2 Air conduction with masking - suggested procedure 6.3.3 Bone conduction with masking - suggested procedure Storing thresholds Speech testing Monaural Speech testing 7.1.1 Selecting input Otometrics - MADSEN Itera II...
- Page 5 10.3 SETUP items 11 Configuring the Audiometry Module 12 Communicating with the device 12.1 Reconnecting to the device 12.2 Updating device firmware 13 Maintenance and calibration 13.1 Service and repair 13.1.1 Fuses 13.2 Cleaning 13.3 Calibration Otometrics - MADSEN Itera II...
- Page 6 18 Standards and safety 18.1 Symbols used 18.2 Warning notes 18.3 The OTOsuite Audiometry Module 18.4 Manufacturer 18.4.1 Responsibility of the manufacturer 19 Technical specifications 19.1 MADSEN Itera II 19.2 Accessories 19.3 Notes on EMC (Electromagnetic Compatibility) Index Otometrics - MADSEN Itera II...
-
Page 7: Introduction To Madsen Itera Ii
► in OTOsuite (see Managing Data and Results 85). You can download new firmware to MADSEN Itera II, and if this involves no change to the transducers, MADSEN Itera II does not need to be recalibrated. The Audiometry Module OTOsuite OTOsuite is a software tool that integrates a suite of audiological tests with result review and reporting capabilities into a single powerful PC application. -
Page 8: Intended Use
About this manual This is your guide to installing, calibrating and using MADSEN Itera II and to using the OTOsuite Audiometry Module. It also introduces you to the key features of the device and the software, as well as to working scenarios for performing tests and viewing and printing test results. -
Page 9: Safety
1 Introduction to MADSEN Itera II 1.3.1 Safety This User Manual contains information and warnings which must be followed to ensure the safe performance of MADSEN Itera II and the OTOsuite Audiometry Module. Warning • Local government rules and regulations, if applicable, should be followed at all times. - Page 10 1 Introduction to MADSEN Itera II Otometrics - MADSEN Itera II...
-
Page 11: Getting Started With Madsen Itera Ii And The Otosuite Audiometry Module
2. Check with the packing list to make sure that you have received all necessary parts and accessories. If your package is incomplete, contact your supplier. Getting started Training We recommend that you read this manual and make yourself familiar with the MADSEN Itera II, and how it operates with the OTOsuite Audiometry Module. Safety For safety information, see •... -
Page 12: Customizing Your Setup
2 Getting started with MADSEN Itera II and the OTOsuite Audiometry Module Printing • See the OTOsuiteUser Guide. Customizing your setup With Itera II you can quickly and easily customize your test sequences for maximum efficiency. Changing the setup Make the changes you want in the setup of Itera II and save these changes in the specific test setup. -
Page 13: Overview Of Madsen Itera
Settings and the test as it progresses are shown on the display. See Dis- ► play D. Front panel controls MADSEN Itera II is operated from the front panel. See Front panel con- ► trols Display A. Test signal indicator B. - Page 14 3 Overview of MADSEN Itera II The ear being tested is indicated with in the display. The display side for can be changed in the settings. See SETUP items ► Frequency The selected test frequency for tone testing is shown at the center.
-
Page 15: Front Panel Controls
3.2.1 Front panel layout The MADSEN Itera II buttons and controls are grouped according to their function and how frequently they are used. The buttons and knobs most frequently used are placed directly below the display. Otometrics - MADSEN Itera II... -
Page 16: Test Column
► Talk back Beep If you try to use a button which is not enabled, you will hear two short beeps. MADSEN Itera II also beeps when the SISI test is completed. 3.2.2 Test column Press to select the test:... -
Page 17: Transducer Column
3 Overview of MADSEN Itera II TONE • Selects the Tone Threshold test. SPEECH • Selects the Speech test. • SPECIAL Press to see the optional test types. Press the desired function key to select. SPECIAL On versions of Itera II supplied with more than three special tests, press again while its LED is flashing. -
Page 18: Signal Column
3 Overview of MADSEN Itera II 3.2.4 Signal column WARBLE Presentation of warble tone stimulus (WRB). Warble shortcut functions Warble frequency WARBLE To change the warble frequency, press and hold , while you turn the left LEVEL selector. Warble modulation... -
Page 19: Signal Indicators
3 Overview of MADSEN Itera II REVERSE REVERSE Press to toggle the function of the Interrupter between: • REVERSE (lamp lit) REVERSE is on (the test signal is activated continuously), the test signal is interrupted when you press Normal •... -
Page 20: Setup
3 Overview of MADSEN Itera II • you change FREQUENCY, see Frequency ► 3.2.8 Change Ear (L <--> R) • Press this button to switch between testing the left and right ear. Speech test • Press twice ( ) during the speech test to send the test signal to both ears, giving "Binaural Speech". -
Page 21: Db Steps
3 Overview of MADSEN Itera II • To adjust the masking intensity use the Right Level knob. SETUP To change the default setting, select SETUP items ► No masking Right level To adjust the masking intensity independently of the signal level use the knob. -
Page 22: Talk Over
3 Overview of MADSEN Itera II 3.2.14 Talk over Enables communication with the patient who may be sitting in a sound booth. The signal from the internal microphone or the right Speech microphone is sent to the patient's headset while the button is pressed. -
Page 23: Store/Toggle Threshold Status
3 Overview of MADSEN Itera II 3.2.17 Store/toggle threshold status Note This button is not applicable in Speech testing. • Note In UCL and MCL testing “No response” is not applicable. • Stores a threshold in the internal memory. Store •... -
Page 24: Stimulus/Speech Count Buttons
3 Overview of MADSEN Itera II Right Level knob Intensity change Changes the intensity of the masking signal in the selected dB steps. To change this setting, select SETUP SETUP items ► When you turn the knob clockwise, the intensity is increased and when you turn the knob counter-clock- wise, the intensity is decreased. -
Page 25: Frequency
3 Overview of MADSEN Itera II Right INT button (PASS) left INT Usually functions in total parallel with the button. Use the right INT button to control the masking signal. This will either present or interrupt the masking sig- nal depending on the setting in... -
Page 26: Xmit
3 Overview of MADSEN Itera II • Press to delete data at a specific frequency if it is activated during a test (see SISI (Short Increment Sensitivity Index) ► 75). 3.2.22 Xmit This button is not active. Socket connections - rear panel The socket connections on the back of MADSEN Itera II are protected by a guard, which is hinged onto the front panel and... - Page 27 When you connect other electrical equipment to MADSEN Itera II, • remember that equipment that does not comply with the same safety stand- ards as MADSEN Itera II can lead to a general reduction in the system's safety level. Note It is recommended that MADSEN Itera II supplies power to the...
-
Page 28: Side Panel
3 Overview of MADSEN Itera II Socket Description To connect the device to a PC, use the optional 9-pole PC- RS232 interface cable. K. RS 232 INTERFACE The installation must be carried out in accordance with Medical Elec- trical Systems in IEC 60601-1 3.1 edition: 2012, ANSI/AAMI ES60601-1 (2005) + AMD 1 (2012) and CAN/CSA-C22.2 No. -
Page 29: Navigating In The Otosuiteaudiometry Module
• enter tester details and test date entry for manually entered audiograms • enter special test and tuning fork test results The Audiometry Module menu system and toolbar General icons See the OTOsuiteUser Guide. Otometrics - MADSEN Itera II... -
Page 30: File Menu
Note The air conduction transducer is stored when you have selected it in • the transducer section of the Control Panel (or with device controls, if applicable) and data points are entered on the audiogram. Otometrics - MADSEN Itera II... -
Page 31: View Menu
Options > Audiometry > Tone Misc > Audiogram Legend Click to enable or disable the display of the audiogram legend. The legend contains the most commonly used symbols for the audiogram. It is not configurable. Otometrics - MADSEN Itera II... -
Page 32: Tools Menu
4 Navigating in the OTOsuiteAudiometry Module Menu item Icon Description The graph shows up to 20,000 Hz. MADSEN Itera II presents stimulus Standard / All / High up to 12,500 Hz. frequencies • Click to choose between viewing: Standard Frequencies Displays the audiogram from 125 to 8000 Hz. -
Page 33: The Masking Assistant
III, Singular Publishing Group 1997 Munro K.J., Agnew N. A comparison of inter-aural attenuation with the Ety- . and motic ER-3A insert earphone and the Telephonics TDH-39 supra-aural earphone. Br J Audiol 1999; 33: 259-262 Otometrics - MADSEN Itera II... - Page 34 ... > Assistant Min IA is frequency specific These are the Min IA tables for TDH-39 and Otometrics Inserts used in the Masking Assistant 1 Katz, J., Lezynski, J. (2002). Clinical Masking. In J. Katz, ed., Handbook of Clinical Audiology , Williams and Wilkins, Bal- N.
-
Page 35: The Audiometry Module Control Panel
The appearance of the Control Panel depends on the test device used. • The general function of the Control Panel is described in the OTOsuiteUser Guide. The Audiometry Module Control Panel shows the settings selected on the connected audiometer for the specific test. Otometrics - MADSEN Itera II... -
Page 36: The Control Panel
Fig. 1 The MADSEN Itera II Control Panel 4.5.1 The Control Panel When you activate the OTOsuite Audiometry Control Panel, MADSEN Itera II automatically connects to the audiometer. Note You cannot operate MADSEN Itera II from the Control Panel. •... -
Page 37: The Stimulus Bar
The green triple wave symbol above the level indicates that the stimulus is currently being presented. Stimulus bar color Indicates the routing for each channel: • Blue = left ear • Red = right ear • Blue/Red = binaural • Gray = unspecified Otometrics - MADSEN Itera II... -
Page 38: The Tone Stimulus Bar
Frequency • Indicated by the Hz value in the center of the stimulus bar. 4.6.2 The Speech stimulus bar A. VU meter B. Speech score C. Word count During online testing, the stimulus bar shows: Otometrics - MADSEN Itera II... -
Page 39: The Tone Test Screen
• The Legend box ► With a description of result boxes for special tests, utilities such as a timer and an overlays selector, and instructions for how to view/hide the feature boxes. Otometrics - MADSEN Itera II... -
Page 40: The Audiogram
Intensity is shown to the left of the audiogram in dB HL. • Octave frequencies are shown below the audiogram in Hz. • Interoctave frequencies are shown above the audiogram in Hz. Viewing the audiogram You can choose between: Otometrics - MADSEN Itera II... - Page 41 Below the audiogram, the intensity levels used for masking can be displayed. It is an option to display the masking Tools Options Tone View Misc. Masking Levels levels. Select > > > > > • In combined view, the non-test ear masking levels are shown below the graph. Otometrics - MADSEN Itera II...
-
Page 42: Curves And Symbols Selection
You can superimpose symbols on the audiogram where two different points share the same value (i.e. air and bone threshold). In order to see both superimposed symbols, you can define an offset direction for each individual symbol. Otometrics - MADSEN Itera II... -
Page 43: Creating New Symbols
(if not, set > > > > Compare Audiograms OTOsuite under NOAH Compare All sessions relating to the selected client, and containing audiometry data are automatically loaded into the Audiograms feature box. Otometrics - MADSEN Itera II... -
Page 44: The Legend Box
4.7.6 Tone view options You can access a number of Tone view options directly from the Tone main screen. Tools Options Tone The view options can be turned on/off. To do so, select > > Otometrics - MADSEN Itera II... - Page 45 Speech Banana Displays the speech banana of a listener with normal hearing. Speech Letters Displays speech sounds at their approximate dB level. Unusable area Shades the area which is outside the patient's dynamic range of hearing. Otometrics - MADSEN Itera II...
-
Page 46: Work-Flow Related Features
> > > > . Check The Speech test screen During online testing, the screen reflects the test done by the audiometer as it progresses. A. Stimulus bar B. Work area, tabular view C. Audiogram Otometrics - MADSEN Itera II... -
Page 47: The Work Area In The Speech Screen
Word Recognition Score/Sentence Recognition Score Score • Percentage of correct/incorrect words. Level • dB level at which the words were presented. [Msk] • Effective masking level (dB EML) used for contralateral masking. • Signal-to-Noise Ratio. Otometrics - MADSEN Itera II... -
Page 48: Speech Testing - Tabular View
Articulation Index (%), based on the Count-the-dot method. 4.10 Speech testing - tabular view MADSEN Itera II is intended for use with predefined speech pro- tocols that are loaded automatically when you select a user test. You can have a full overview and instantly select measurement type, ear, transducer, stimulus type, routing, and speech material. -
Page 49: Speech Testing - Graph View
The adaptive Speech legend showing the current measurement settings. Data has not been stored at this point. The adaptive Speech legend showing the three first measurements followed by a blank row with the current measurement settings ready to be stored. Otometrics - MADSEN Itera II... - Page 50 Changing an assigned transducer for a pinned test 1. Select the transducer in the Control Panel. Apply Settings Assign Selected Transducer 2. Right-click on the button in the pinned test row, and select Otometrics - MADSEN Itera II...
- Page 51 Editing a row Click on the data you wish to edit and use the right-click menu to change the value. Deleting a row Delete Measurement Right-click on the field you wish to delete and select Otometrics - MADSEN Itera II...
- Page 52 4 Navigating in the OTOsuiteAudiometry Module Otometrics - MADSEN Itera II...
-
Page 53: Preparing For Testing
Preparing for testing It is important to prepare properly before making measurements with MADSEN Itera II and the OTOsuite software. It is time-saving for both you and the client if the environment, the client, the test device, and the software are ready for the test. -
Page 54: Connecting The Cables Of The Test Equipment
MADSEN Itera II. 5.2.2 The patient responder • Place the patient in a sound booth, if one is available, and facing away from MADSEN Itera II. • Instruct the patient in how to use the patient responder. •... -
Page 55: Preparing For Air Conduction Testing
• If a sound booth is not available, place the patient facing away from MADSEN Itera II. This is to avoid visual clues during testing. •... -
Page 56: Preparing For Testing With Masking
If the patient is tested soon after this type of noise exposure, it may not be possible to determine the nor- mal hearing threshold. It is recommended that a minimum of 16 hours should pass between exposure and testing. Otometrics - MADSEN Itera II... -
Page 57: Hygienic Precautions
Make sure the connection between the Audiometry module and MADSEN Itera II is enabled. Fetch multiple test results • If you have done off-line testing with MADSEN Itera II, you can fetch test results from the audiometer. Transferring test results from the audiometer to the PC ►... -
Page 58: Proper Transducer Placement
If the foam eartip is a little too large, consider cutting it down to make it a little smaller. Bone Oscillator Note For unmasked bone thresholds, you can store binaural data: • Otometrics - MADSEN Itera II... - Page 59 1. For frontal bone placement, place the flat round part of the bone oscillator securely on the middle of the forehead about an inch (2.5 cm) below the hairline. 2. Make sure the bone oscillator is tight on the forehead but still comfortable. Otometrics - MADSEN Itera II...
- Page 60 5 Preparing for testing Otometrics - MADSEN Itera II...
-
Page 61: Tone Testing
Store/toggle threshold status ► 8. Select the next frequency. You can link the Store and Next Frequency functions, so that the test progresses with the next frequency when you STORE press . See SETUP items ► Otometrics - MADSEN Itera II... -
Page 62: Sound Field Testing
Make sure that there are no interfering ambient sounds, particularly at low frequencies. If necessary, place the • patient in a sound booth. Prerequisites TONE • Press • Press WARBLE PULSE • If needed, select as stimulus type. Otometrics - MADSEN Itera II... -
Page 63: Testing
Then repeat items to 6. STORE 7. When the threshold is determined, press to store that particular threshold. See Store/toggle threshold status ► FREQUENCY 8. Turn the knob to select the next frequency. Otometrics - MADSEN Itera II... -
Page 64: Testing With Masking
This will reduce the risk of over-masking caused by the high masking level required in the poorer ear. 1 (Katz, J., Lezynski, J. (2002). Clinical Masking. In J. Katz, ed., Handbook of Clinical Audiology , Williams and Wilkins, Bal- timore.) Otometrics - MADSEN Itera II... - Page 65 Munro & Agnew, BJA (1999) N/A - traditional approach 1000 Munro & Agnew, BJA (1999) 1500 N/A - traditional approach 2000 Munro & Agnew, BJA (1999) 3000 Munro & Agnew, BJA (1999) 4000 Munro & Agnew, BJA (1999) Otometrics - MADSEN Itera II...
-
Page 66: Air Conduction With Masking - Suggested Procedure
8. If required, test the remaining frequencies in the same way and switch to the other ear. 6.3.3 Bone conduction with masking - suggested procedure Prerequisites ► Prerequisites as in Bone Conduction threshold test • Prepare the patient for testing with masking. See Preparing for testing with masking ► Otometrics - MADSEN Itera II... -
Page 67: Storing Thresholds
9. If needed, test the remaining frequencies in the same way and switch to the other ear. Storing thresholds ► To use the store button, see Store/toggle threshold status Results can be stored on a PC when MADSEN Itera II is used with the OTOsuite Audiometry module. Otometrics - MADSEN Itera II... - Page 68 6 Tone testing Otometrics - MADSEN Itera II...
-
Page 69: Speech Testing
(gooseneck microphones). If you are using a MADSEN Itera II with two built-in gooseneck microphones, the following selections apply (gooseneck microphones are external microphones): MIC1 = left gooseneck microphone MIC2 = right gooseneck microphone Otometrics - MADSEN Itera II... -
Page 70: Selecting Masking For Speech Testing
If you select masking, the masking signal is displayed in the first line of the display. You can select – Speech noise (SPN), or – White noise (Wide Band Noise - WBN). 1. To adjust the masking signal type selection, select SETUP SETUP items ► Otometrics - MADSEN Itera II... -
Page 71: The Counter Function In Speech Testing
This means that if the monaural input was the left CD input channel (CD_ L <--> R 1), and binaural is selected by pressing , then the left CD input channel (CD_1) is also assigned to the right ear. To change the input channels, see Selecting input ► Otometrics - MADSEN Itera II... -
Page 72: One-Channel Or Two-Channel Speech Testing
, the selected test input source is sent to the left ear, indicated by an arrow from right to left. • Press once more to send the input to the right ear. Otometrics - MADSEN Itera II... -
Page 73: Speech In Noise
7.3.4 Masking level for binaural Speech 1. Turn the FREQUENCY knob to set the masking dB level. ► For a description of how to test a patient and record an audiogram, see Tone testing Otometrics - MADSEN Itera II... - Page 74 7 Speech testing Otometrics - MADSEN Itera II...
-
Page 75: Special Tests
3. To start the SISI test press The test stops automatically when the selected number of steps in intensity has been reached, and a beep is heard. Automatic scoring of responses The percentage of correct responses (% score) is updated automatically. Otometrics - MADSEN Itera II... -
Page 76: Masking During Sisi
Right level • To change the intensity press and hold the button and turn the knob. Signal type left LEVEL • To change the signal type press and hold the button and turn the knob. Otometrics - MADSEN Itera II... -
Page 77: Using Store In The Sisi Test
You can store up to five sets of measurements for each test frequency. If you try to save more than five sets of measurements for a given frequency, the message "No more STORE" is shown. Otometrics - MADSEN Itera II... -
Page 78: Stenger Test
Stimulus/speech count buttons 24). Changing stimulus You can change the stimulus type from pure tone to Warble (WRB) or Narrow Band Noise (NBN). When you deactivate these stimulus types, the stimuli return to pure tone (TON). Otometrics - MADSEN Itera II... -
Page 79: Hearing Instrument Simulation (His)
Prepare the patient for the simulation, for instance by fitting headphones on the patient, and explain the process. Select test 1. Press SPECIAL (twice, if needed) until is shown on the display. 2. Press the relevant function key to select 3. One of the following messages will appear: Otometrics - MADSEN Itera II... - Page 80 When the display shows "L 0 -HIS- 0 R", the zeros indicate that the hearing level corresponds to the Reference Level ► over the entire frequency range. To change this, see Adjusting HIS "Master Volume" Otometrics - MADSEN Itera II...
-
Page 81: Viewing Thresholds And Filters
Sound level = Ref. level + 10 = 65 + 10 = 75 dB SPL in both ears. None of the filters is active. 8.6.2 Viewing thresholds and filters 1. You can use the FREQUENCY knob to view stored thresholds and resulting filters graphically. Otometrics - MADSEN Itera II... -
Page 82: Manually Adjusting The His Filters
When you have set up the filter values, press the relevant button to return to the normal HIS screen. START/STOP You can press the here, and the filters are updated online if you change a value while the filter is activated. Otometrics - MADSEN Itera II... - Page 83 250 Hz. Fig. 3 High pass filter graph Fig. 3 ► shows a graph where the characteristics of a high pass (treble) filter are set to an amplification of +25dB for frequencies over 2000 Hz. Otometrics - MADSEN Itera II...
-
Page 84: Overview Of Monaural/Binaural Test Signals And The Masking Side
8 Special tests Overview of monaural/binaural test signals and the masking side Test signal Masking signal Monaural Binaural Ipsi Contra SPEECH SISI ABLB STEN Fig. 4 Monaural/binaural test signals and masking side Otometrics - MADSEN Itera II... -
Page 85: Managing Data And Results
You can delete these thresholds one by one or collectively. • You can transfer these data to a PC with the OTOsuite Audiometry Module. Printing results From the PC you can print audiograms that have been saved in the OTOsuite Audiometry Module. Otometrics - MADSEN Itera II... - Page 86 9 Managing Data and Results Otometrics - MADSEN Itera II...
-
Page 87: Setup Of Parameters
5. The most recently selected item will also be the one displayed the next time you activate SETUP SETUP 6. To exit this function press twice on 10.2.2 Return to default settings To return to the default settings, see SETUP items ► Otometrics - MADSEN Itera II... -
Page 88: Temporary Changes In The Setup
► • Impulse time • Input sensitivity, speech ► ► • Word counting method, speech • Alternating Fowler frequency ► ► • Master volume, HIS • Parameter selection, SETUP ► ► • Power out voltage Otometrics - MADSEN Itera II... -
Page 89: Setup Items
31 LIGHT INTENSITY ► 32 INTERNAL BEEP ► 33 EXT. RANGE ► ► 34 EXT.R. dB-SPACE ► 35 BAUDRATE 36 CD POWER SUPPLY ► 37 DISPLAY ► 38 STIMULI KNOB ► ► 39 DEFAULT SETTING Otometrics - MADSEN Itera II... - Page 90 F.F. 6 AC Select masking transducer for AC: MASKING • ---- (None) • AC TRANSDUCER • BC TRANSDUCER • SF TRANSDUCER 7 BC Select masking transducer for BC MASKING ---- (None) AC TRANSDUCER SF TRANSDUCER Otometrics - MADSEN Itera II...
- Page 91 Press STORE..continues at 1000 WRAP • STORE If you press at the highest possible frequency, you switch to the lowest possible frequency. STORE At other frequencies, pressing advances the frequency. See the following example. Otometrics - MADSEN Itera II...
- Page 92 If you press the button at the highest or the lowest possible frequency, you change to 1000 Hz. Itera II will automatically test frequencies above 1000 Hz in ascending order, and frequencies below 1000 Hz in descending order. See the following example. Otometrics - MADSEN Itera II...
- Page 93 Choice of initial intensity when changing frequency. NEW FREQ NO CHANGE • (the frequency remains the same) or adjustable in the range -10 to 50 dB. WRAP See the example (with setting 13 set to Otometrics - MADSEN Itera II...
- Page 94 ...continues at Press STORE..continues at Press STORE..continues at Press STORE..continues at Press STORE..continues at 1000 XX dB FIXED • New fixed value. WRAP See the example (with setting 13 set to Otometrics - MADSEN Itera II...
- Page 95 Press STORE..continues at Press STORE..continues at Press STORE..continues at 1000 XX dB ABOVE THR • New fixed value above any previously located threshold value. WRAP See the example (with setting 13 set to Otometrics - MADSEN Itera II...
- Page 96 Selection of the fixed period of time during which the signal will be presented when IMPULSE mode is LENGTH selected. • 0.25 to 2.50 seconds 19 WARBLE Set modulation size as a %: MOD. SIZE • 1 to 25% e.g.: At 5% the signal modulates 5% in relation to default frequency Otometrics - MADSEN Itera II...
- Page 97 SENSE right LEVEL with the selector. right LEVEL without If you turn the selector pressing , both right and left inputs are adjusted and the display shows an average value. Otometrics - MADSEN Itera II...
- Page 98 Selection of the time interval that passes between the device standing untouched and the EXTended (sound intensity) RANGE is deactivated. If OFF is selected, this safety feature is disabled. Options: OFF, 20 seconds to 120 seconds Default: Auto. Otometrics - MADSEN Itera II...
- Page 99 The stimuli (signal/masking) controlled by the left right LEVEL knobs correspond to the placing (left/right) of the stimuli on the display. Sets all SETUP parameters to default. DEFAULT • Press STORE SETTING The default values are: Otometrics - MADSEN Itera II...
- Page 100 29 - 31 Half gain 32: INTERNAL BEEP 33: EXT.R. TIMEOUT 34: EXT.R. dB-SPACE 30 dB below max. 35: BAUDRATE 19200 Baud 37: DISPLAY Fix signal on Left 38: STIMULI KNOB Fix signal to Left Otometrics - MADSEN Itera II...
-
Page 101: Configuring The Audiometry Module
Masking Assistant Masking Criteria Define the masking criteria for insert phone(s), earphones, and high frequency earphones (if applicable). Air-Bone Gap Criterion Set the dB level for the Air-Bone gap criterion. Otometrics - MADSEN Itera II... -
Page 102: Communicating With The Device
12 Communicating with the device Communicating with the device Connecting to the device OTOsuite is designed to communicate with and display test data generated by Otometrics test devices. • When you start up OTOsuite, click on the Control Panel icon. OTOsuite will automatically connect to the test device. -
Page 103: Maintenance And Calibration
Service and repair It is recommended that you keep the packing material in which MADSEN Itera II was delivered. If you need to send it in for service, the original packing material will ensure protection against damage during transport, etc. -
Page 104: Calibration
Clean the bone oscillator between patients, e.g. with a non-alcohol based antibacterial wipe, such as Audiowipes. 13.3 Calibration You can download new software to MADSEN Itera II, and if this involves no change to the transducers, MADSEN Itera II does not need recalibration. Annual calibration The audiometer, headphones, bone oscillators, and sound field speakers must be calibrated once a year by your authorized service department. -
Page 105: Unpacking And Installing
• Before you start using MADSEN Itera II, it is recommended that you leave it at room temperature for 30 minutes - par- ticularly if it has been stored at very cold or warm temperatures, e.g. if it has been in a car. -
Page 106: Powering
► – Connecting to a PC ► 3. Switch on MADSEN Itera II. 4. Run the Configuration Wizard in OTOsuite to connect to and set up communication with MADSEN Itera II. See Con- figuring the Audiometry Module ► 101. 14.2.1 Powering 1. -
Page 107: Bone Conduction
14.2.4 Bone conduction Socket connections - rear panel ► • Connect the bone conduction transducer plug into the BC socket located in the rear panel of MADSEN Itera II. 14.2.5 External microphone Socket connections - rear panel ► In speech testing and patient communication there are two possible external microphone solutions: •... - Page 108 II. The sound is then routed out through sound field speakers. • With Power Amplifier • Plug the Power Amplifier cables into the two center sockets in the rear panel of MADSEN Itera II. A. Free Field cables B. Power Amplifier cables Otometrics - MADSEN Itera II...
-
Page 109: Maximum Non-Destructive Voltage
30 V AC *± 30 V DC pin 8 (CTSout) 15 V AC *± 15 V DC pin 9 (nc) 240 V AC ± 240 V DC Relative to pin 5 on the RS232 interface socket. Otometrics - MADSEN Itera II... - Page 110 15 Maximum non-destructive voltage Otometrics - MADSEN Itera II...
-
Page 111: Maximum Output Levels
(B-71) (E-A-RTONE® 3A) 1000 1500 2000 3000 4000 6000 8000 9000 10000 11200 12500 14000 16000 n/a: data not available 16.2 Frequency TDH39 Bone conductor Insert phone HDA 200 HolmCo (B-71) (E-A-RTONE® 3A) 1000 1500 Otometrics - MADSEN Itera II... - Page 112 16 Maximum output levels Frequency TDH39 Bone conductor Insert phone HDA 200 HolmCo (B-71) (E-A-RTONE® 3A) 2000 3000 4000 6000 8000 9000 10000 11200 12500 14000 16000 n/a: data not available Otometrics - MADSEN Itera II...
-
Page 113: Abbreviations
MANU manual MASK masking Most Comfortable Level microphone MICL left external microphone MICR right external microphone MILI left internal microphone MIRI right internal microphone modulation narrow band noise right ear Otometrics - MADSEN Itera II... - Page 114 (same as SF) sound pressure level speech noise STEN Stenger threshold tone transducer TRANSD transducer UnComfortable Level volume unit WARB warble wide band noise (white noise) warble left ear Otometrics - MADSEN Itera II...
-
Page 115: Standards And Safety
1. This class of equipment is allowed in domestic establishments when used under the jurisdiction of a health care pro- fessional. 2. Do not use the instrument in the presence of flammable agents (gases) or in an oxygen-rich environment. Otometrics - MADSEN Itera II... - Page 116 Many types of electrical devices, e.g. mobile telephones, may generate radio fields. We recommend that the use of such devices in the vicinity of MADSEN Itera II be restricted. 8. The bone conductor cable and insert phone cable must not be removed or tampered with while MADSEN Itera II is powered on.
-
Page 117: The Otosuite Audiometry Module
The equipment is used in accordance with the instructions for use. The manufacturer reserves the right to disclaim all responsibility for the operating safety, reliability and performance of equipment serviced or repaired by other parties. Otometrics - MADSEN Itera II... - Page 118 18 Standards and safety Otometrics - MADSEN Itera II...
-
Page 119: Technical Specifications
Technical specifications 19.1 MADSEN Itera II Type identification MADSEN Itera II is type 1004 from Natus Medical Denmark ApS. Channels 2 separate and identical channels Pure tone frequencies AC and SF: 12 standard 125 - 8000 and 12500 Hz 250 - 8000 Hz standard frequencies... - Page 120 Air < 2.5 % Bone < 5 % Selectable transducers TDH39, ME-70, and Otometrics insert phones BC-1, B-71 (Mastoid / Forehead) TDH39, ME-70, Otometrics insert phones, Free-Field amplifier/loudspeaker Transducer options depend on how MADSEN Itera II is calibrated. Otometrics - MADSEN Itera II...
- Page 121 Static force of transducer headbands TDH 39: 4.5 N ± 0.5 N B-71: 5.4 N ± 0.5 N RS232 interface Format: 8 data bit, 1 stop bit Parity: Equal Baud rate: 9600, 19200, 38400, 57600 Baud Protocol: XON/XOFF Otometrics - MADSEN Itera II...
- Page 122 (Operation in temperatures exceeding -20°C (-4°F) or +60°C (140°F) may cause permanent damage.) Warm-up time < 10 min. Disposal MADSEN Itera II can be disposed of as normal electronic waste, according to WEEE and local regulations. Dimensions Approx. 450 x 290 x 85 mm, 17.7 x 11.4 x 3.3 inches Weight Approx.
-
Page 123: Accessories
Simulation • Talkback microphone • Patient Responder(s) • Mains cable • Power supply cable from MADSEN Itera II to CD player • PA 210 power amplifier for free-field testing • Wall mount kit for amplifier • Connection cables • Audiogram pad •... -
Page 124: Notes On Emc (Electromagnetic Compatibility)
Guidance and manufacturer's declaration - electromagnetic immunity for all equipment and systems MADSEN Itera II is intended for use in the electromagnetic environment specified below. The user of MADSEN Itera II should ensure that it is used in such an envir- onment. - Page 125 TV broadcast cannot be predicted theoretically with accuracy. To assess the electromagnetic environment due to fixed RF transmitters, an electromagnetic site survey should be considered. If the measured field strength in the location in which MADSEN Itera II is used exceeds the applicable RF compliance level above, the MADSEN Itera II should be observed to verify normal operation.
- Page 126 : At 80 MHz and 800 MHz the separation distance for the higher frequency range applies. Note 2 : These guidelines may not apply in all situations. Electromagnetic propagation is affected by absorption and reflection from structures, objects and people. Otometrics - MADSEN Itera II...
-
Page 127: Index
Audiogram selection 39-40 Module CD key Audiogram symbols, Audiogram mod- CD/tape connection Audiogram symbols, Itera II select input sensitivity Otometrics - MADSEN Itera II... - Page 128 Frequency range, audiogram space setting viewing dB STEP key Front panel DC power OUT connection display DC POWER OUT voltage Functions Default settings Default test parameters Delete beep measuring points thresholds Otometrics - MADSEN Itera II...
- Page 129 AC accessories replacement connecting BC accessories connections insert phones Gooseneck microphones powering connection Instrument, overview INT, left key Headphones INT, right key connection Intended use Hearing Instrument Simulator Interface cable filter connection Otometrics - MADSEN Itera II...
- Page 130 SPEECH SISI START/STOP with monaural/binaural test sig- STORE nals TALK BACK Masking assistant TALK OVER enabling/disabling TONE Masking Assistant TRANSD. enabling/disabling WARBLE Master volume regulation XMIT MCL, Itera II LEDs Measuring points light, setting deleting Otometrics - MADSEN Itera II...
- Page 131 Overview, instrument talk over tone masking signal warble frequency Parameters warble modulation size AC masking Patient communication AC transducer talk over Otometrics - MADSEN Itera II...
- Page 132 Speech screen Sensitivity unheard words talk back microphone Speech testing Settings interrupting speech signal Control Panel monaural default s. word count Setup parameters selection SETUP key Standards SF key Start counter, timer Otometrics - MADSEN Itera II...
- Page 133 Tone screen, Audiogram Module Test devices Toolbar connecting Audiometry information about select orientation Test devices (Audiometry) Tools menu firmware update Curves and symbols Test equipment Tools menu (Aud) connecting cables, Audiometry Curves and symbols Otometrics - MADSEN Itera II...
- Page 134 User interface Value selection View menu audiogram legend combined audiogram frequency range left-right audiogram Masking Assistant Overlays right-left audiogram View menu (Aud) audiogram legend combined audiogram frequency range masking assistant Overlays Voltage maximum non-destructive Otometrics - MADSEN Itera II...
Need help?
Do you have a question about the Madsen Itera II and is the answer not in the manual?
Questions and answers