
Related Manuals for Electronics Line Prime


Summary of Contents for Electronics Line Prime
- Page 1 Quick Start Installation Guide For detailed information please refer to the full Prime Installer Manual provided on our website: www.electronics-line.com...
-
Page 2: Table Of Contents
Table of Contents Introduction ....................3 System Installation ..................3 System Programming................5 Keys Menu Navigation ..............5 3.1. Enter Installer Programming mode ........5 3.2. Registering Wireless Devices ..........5 3.3. 3.3.1. Detectors ....................6 3.3.2. Keyfobs ...................... 9 3.3.3. -
Page 3: Introduction
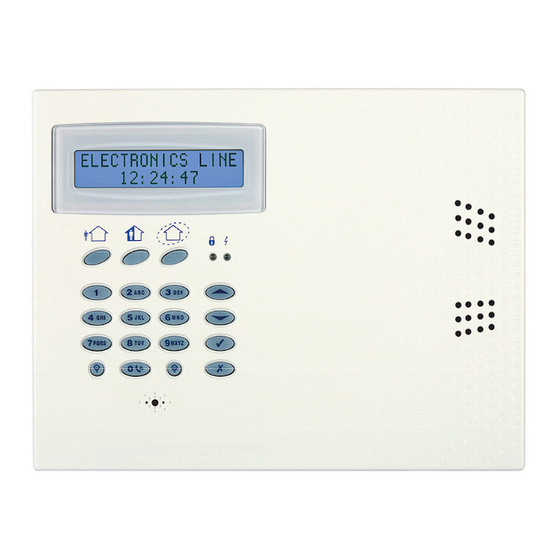
1. Introduction Thank you for choosing Prime wireless intruder control panel. This quick start guide manual describes the main steps for installing and programming the Prime Control System using the keypad on the main unit. To view the full version of the Installer manual, please refer our website www.electronics-line.com... - Page 4 Aux. 100mA max. Figure 1: Prime layout PSTN Dialer module Telephone line Main board Plug-in TX Auxiliary power (AC operated 10-15V, Battery operated 6-8V) Relay output (100mA max) Hardwired zone (Zone 33) Hardwired LCD keypad terminal block Front tamper switch 10.
-
Page 5: System Programming
3. System Programming 3.1. Keys Menu Navigation This manual explains how to program the Prime from the keypad located on the main unit. Table 1 describes the uses of the keypad keys during programming. Enter / Save (to move to the displayed menu or to save the updated data). -
Page 6: Detectors
3.3.1. Detectors Prime supports 33 security zones. Only one detector can be registered to each zone. Zones 1-32 are intended for wireless detectors by default. Zone 33 is an on-board hardwire zone (NC). Step 1: Register a detector Go to the main menu select [9]>[1]>[1] (Programming > Devices > Zones) Using the arrow keys, select a specific zone and press '√ʹ. - Page 7 Step 2: Set detector's parameters Go to the main menu select [9]>[1]>[1] (Programming > Devices > Zones) Using the arrow keys select a specific zone and press '√ʹ. Set the main parameters for each zone, according to Table 3. Quick Option Name Description and Notes 9>1>1>2...
- Page 8 This test enables you to identify transmitters and test their signal strength. Activate the transmitter you wish to test; the transmitter’s details appear on the Prime LCD and a sequence of tones is heard indicating the transmitter’s signal strength (Table 4).
-
Page 9: Keyfobs
3.3.2. Keyfobs The Prime Control System supports up to 19 keyfobs. Step 1: Register a keyfob Go to the main menu, select [9]>[1]>[2] (Programming > Devices > Keyfobs) Using the arrow keys select a specific keyfob and press '√ʹ. The system initiates Registration mode. -
Page 10: Wireless Keypads
3.3.3. Wireless keypads Step 1: Register a wireless keypad The Prime supports up to four wireless keypads. Go to the main menu, select [9]>[1]>[3] (Programming > Devices > Keypads) . Select the keypad to register and press '√ʹ. The system initiates Registration mode. -
Page 11: Program Communication To Monitoring Station
3.4. Program Communication to Monitoring Station This section describes the main parameters to establish communication between the Prime and the CMS (Control monitoring station). The Prime supports three accounts for monitoring station reporting Go to the installer programming menu [9]. -
Page 12: Set Up Follow Me Destination
3.5. Set Up Follow Me Destination The Follow-Me feature is designed to notify the user that an alarm event has occurred. Set up follow me accounts as follows; Go to the installer programming menu [9]. Select [5]>[1] (Communication > Accounts) Select the account to be used for Follow Me and press '√'. -
Page 13: Set/Edit Users
3.7. Set/Edit Users The Prime supports up to 32 individual user codes. Each of these codes is four digits long. The ability to perform an operation is defined by your user code’s authorization level. Each code is defined with its own authority level. Follow Table 8 to view the authorization level assigned to each of the codes. - Page 14 To Set/Edit User Code Go to the main display and press '√ʹ. Enter master code (default code '1234') Select [4] User Codes Select the code to edit and press '√ʹ. The display shows [1] Edit Code. Press '√ʹ. Type in the new code and press '√ʹ to confirm Scroll down to [2] Descriptor and press '√ʹ...
-
Page 15: Testing The System
4. Testing the System Before leaving the site, it is important to fully test the system. Prime has several testing tools to verify that the system will operate optimally, including the wireless communication Go to the main display and press '√ʹ... - Page 16 WARNING: This product should be tested at least once a week. CAUTION: Risk of explosion if battery is replaced by an incorrect type. Dispose of used batteries according to local regulations. Contacting Electronics Line 3000 Ltd. International Headquarters: Electronics Line 3000 Ltd.
Need help?
Do you have a question about the Prime and is the answer not in the manual?
Questions and answers