Advertisement
UNBOXING AND ASSEMBLY
CART HANDLES
HARDWARE
2
1
WHEELS
Check to make sure you have all the parts. If not, call
Remove the large packing tray and set aside.
us at 503-595-2665.
4
5
Lift and place the saw so it overhangs the bottom packing
Mount the wheels to the cart with the provided bolts,
tray by about 6 inches. This provides room to attach the
wheels to the frame.
x4
M6 LOCKNUT
x4
M6 BOLT
7
8
Slide the handle marked "L" into the tube nearest the front of
Do not attempt to elevate the blade until steps 8 and 9 are complete.
the saw and bolt in place. Tighten the bolt enough to compress
cart handles. Grasp and squeeze the backplate against the elevation handwheel (8A) and swing the handwheel to the right (8B) until
the tubes so the handle does not jiggle. Install the handle
marked "R" in the same way in the other tube.
9
9A
At the back of the saw, reach into the opening and remove a piece of red tape that holds a metal shipping pin in
place (9A). Then pull the metal shipping pin completely out of the saw (9B). This pin holds the elevation mechanism in
place during shipping and can now be discarded.
3
Cut both vertical edges of the box on the end near the
wheels and fold down. Remove the small packing tray by
sliding out from the cart and set aside.
x2
x2
WASHER
M10 LOCKNUT
x2
M10 BOLT
6
Once the wheels are mounted, tip the saw and cart to
washers and nuts.
the upright position.
8A
8C
8B
Roll the saw off the cardboard. Tip the saw down to rest on the
the red pointer is over the 45 degree mark (8C). Release the backplate to lock the tilt at 45 degrees.
9B
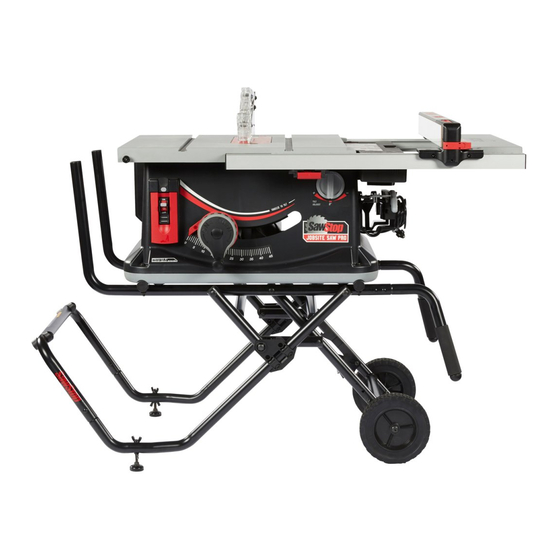
CONGRATULATIONS!
Y O U R S A W I S N O W A S S E M B L E D
HAVE QUESTIONS?
Give Us a Call
503-563-5822
or Email Us
jobsite.service@sawstop.com
Our technical support team is standing by, M-F, 7am-5pm PST
to help with whatever you need.
C O N G R A T U L A T I O N S !
LET'S GET STARTED
P JSSP 19 0001 00
Advertisement
Table of Contents

Related Manuals for SawStop JOBSITE SAW PRO


Summary of Contents for SawStop JOBSITE SAW PRO
- Page 1 WHEELS Give Us a Call 503-563-5822 or Email Us jobsite.service@sawstop.com Our technical support team is standing by, M-F, 7am-5pm PST to help with whatever you need. Check to make sure you have all the parts. If not, call Remove the large packing tray and set aside.
- Page 2 INSTALL THE RIVING KNIFE OR BLADE GUARD LOCATE THE ACCESSORIES Squeeze the latch on the table insert (1A), Open the clamp by reaching into the Slide the riving knife or blade guard out of and then lift the insert up and toward the opening and ipping the red handle up.
Need help?
Do you have a question about the JOBSITE SAW PRO and is the answer not in the manual?
Questions and answers