Table of Contents
Advertisement
Available languages
Available languages
SUPER 3600
Con funzionamento a uomo presente se le fotocellule o le coste sono guaste.
Conforme alle normative in vigore.
Avec travail avec homme present, dans le cas de panne de sécurité.
Conforme aux Normes en vigueur.
With functioning in dead man mode when the safety devices are failing.
According to current European Norms.
Mit arbeit im mannsbeisein im fall eines ausfalls der Sicherheiten.
In Übereinstimmung mit der aktuellen Normen.
Con funcionamiento a hombre presente en caso de averías con los accesorios de seguridad.
En conformidad a las Normas en vigor.
Operatore
Operateur
Operator
Torantrieb
Operador
SUPER 3600
SUPER 3600
ITALIANO pag. 05 / FRANÇAIS pag. 16 / ENGLISH page 27/ DEUTSCH pag. 38 / ESPAÑOL pag. 49
Alimentazione
Peso max cancello
Alimentation
Poids maxi portail
Power Supply
Max gate weight
Stromspannung
Max Torgewicht
Alimentacion
Peso máx verja
230V 50Hz
3600 kg / 7920 lbs
220V 60Hz
con / avec / with / mit
OPERATORE IRREVERSIBILE PER CANCELLI SCORREVOLI
OPERATEUR IRREVERSIBLE POUR PORTAILS COULISSANTES
IRREVERSIBLE OPERATOR FOR SLIDING GATES
SELBSTHEMMENDER TORANTRIEB FÜR SCHIEBETOREN
OPERADOR IRREVERSIBLE PARA VERJAS CORREDERAS
Spinta max
Poussée maxi
Max Thrust
Max Schubkraft
Max Empuje
380 kg / 836 lbs
298 kg / 655 lbs
1
S1-CRX/R2
Coppia max
Couple maxi
Max torque
Max. Drehmoment
Coppia max
159 Nm
AA30032
125 Nm
AA30033
Codice
Code
Code
Code
Codigo
Advertisement
Table of Contents

Related Manuals for RIB SUPER 3600


Summary of Contents for RIB SUPER 3600
- Page 1 SUPER 3600 con / avec / with / mit S1-CRX/R2 OPERATORE IRREVERSIBILE PER CANCELLI SCORREVOLI OPERATEUR IRREVERSIBLE POUR PORTAILS COULISSANTES IRREVERSIBLE OPERATOR FOR SLIDING GATES SELBSTHEMMENDER TORANTRIEB FÜR SCHIEBETOREN OPERADOR IRREVERSIBLE PARA VERJAS CORREDERAS Con funzionamento a uomo presente se le fotocellule o le coste sono guaste.
- Page 2 (ex. en l’installant dans un 2° - Per la sezione ed il tipo dei cavi RIB consiglia di utilizzare un cavo di tipo H05RN-F coffre fermant à clé).
-
Page 3: Installation
Panzergehaeuse) 2° - As far as the cable section and the cable kind are concerned, RIB suggests to use an H05RN-F cable, with a minimum section of 1,5mm 2 , and to follow, In any 2°... - Page 4 (por ejemplo instalándolo dentro de un panel cerrado a llave). 2° - Para la sección y el tipo de los cables, RIB aconseja utilizar cables de tipo H05RN-F con sección mínima de 1,5mm 2 e igualmente atenerse a la norma IEC 364 y a las normas de instalación del propio País.
- Page 5 LAYOUT IMPIANTO A - Operatore SUPER 3600 B - Fotocellule esterne C - Cremagliera Modulo 6 D - Selettore a chiave E - Antenna radio F - Lampeggiatore H - Colonnina portafotocellula I - Fotocellula per protezione interna L - Costa meccanica...
- Page 6 INSTALLAZIONE SUPER 3600 CONTROLLO PRE-INSTALLAZIONE - IL CANCELLO DEVE MUOVERSI SENZA ATTRITI - N.B. È obbligatorio uniformare le caratteristiche del cancello alle norme e leggi vigenti. La porta può essere automatizzata solo se in buono stato e se rispondente alla norma EN 12604.
-
Page 7: Manutenzione
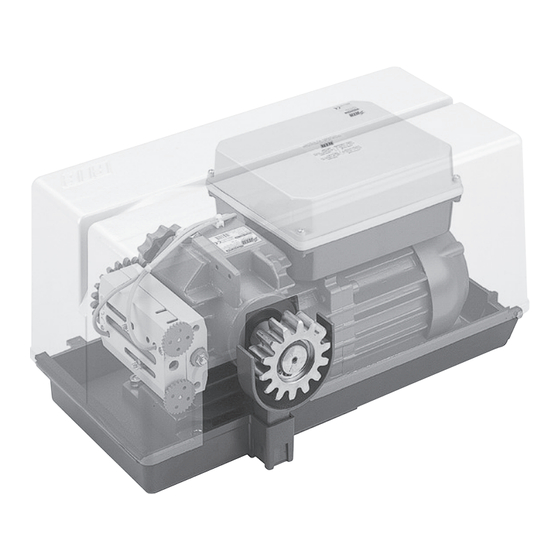
FISSAGGIO MOTORE E CREMAGLIERA La cremagliera va fissata a una certa altezza rispetto alla piastra di fissaggio del motore. Questa altezza può essere variata grazie a delle asole presenti sulla cremagliera. La registrazione in altezza viene fatta affinché il cancello durante il movimento, non si appoggi sull’ingranaggio di trazione del riduttore (Fig. -
Page 8: Collegamenti Elettrici
COLLEGAMENTI ELETTRICI S1-CRX/R2 cod. BA20080... - Page 9 A - CONNESSIONI RADIO È OBBLIGATORIO IMPOSTARE IL DIP 13 IN POSIZIONE ON. POWER 230 VAC MOTOR CAPACITOR L1 - N ALIMENTAZIONE 230 VAC 50/60 HZ (ESEGUITA IN PROBE NON DISPONIBILE FABBRICA) ENCODER NON DISPONIBILE LAMPEGGIATORE (MAX 40 W) RADIO CONNETTORE PER RADIO RICEVITORE ESTERNO 24VDC PROG.
- Page 10 B - SETTAGGI 2 - Mettere il DIP1 in posizione ON => Il led DL1 inizia a lampeggiare; 3 - Premere e mantenere premuto il pulsante PROG (ora il movimento è eseguito ad SW1 SW2 SW3 - MICROINTERRUTTORI PER PROCEDURE uomo presente, apre-stop-chiude-stop-apre-ecc.) =>...
- Page 11 attimo il pulsante PROG. Il led rosso DL1 di programmazione smette di lampeggiare. A cancello fermo il pulsante comanda il moto di apertura. Se viene azionato durante la 6 - Riposizionare DIP 1 su OFF e DIP 2 su OFF. chiusura fa riaprire il cancello.
-
Page 12: Caratteristiche Tecniche
comandata l’apertura, il cancello apre (durante l’apertura le fotocellule non Con questo funzionamento viene consentita l’apertura o la chiusura solo mantenendo premuti interverranno). Le fotocellule interverranno solo in fase di chiusura (con i pulsanti di comando. Il comando radio e la chiusura automatica vengono esclusi in quanto ripristino del moto inverso dopo un secondo anche se le stesse restano il loro funzionamento non è... -
Page 13: Risoluzione Problemi
RISOLUZIONE PROBLEMI Dopo aver effettuato tutti i collegamenti seguendo attentamente lo schema ed aver posizionato il cancello in posizione intermedia, verificare la corretta accensione dei led DL2, DL3, DL4, DL5, DL8. In caso di mancata accensione dei led, sempre con cancello in posizione intermedia,verificare quanto segue e sostituire eventuali componenti guasti. - Page 14 OPTIONAL - Per i collegamenti ed i dati tecnici degli accessori attenersi ai relativi libretti di istruzione. PIASTRA DA CEMENTARE CREMAGLIERA MOD. 6 rivestita con CATAFORESI, con angolare, in barre da 2 m. cod. ACS9090 cod. ACG8103 TELECOMANDO SUN BLOCK SELETTORE A CHIAVE DA PARETE cod.
- Page 15 RED permette la realizzazione di un impianto con coste fissate anche sull’anta in movimento senza l’adozione di sistemi raccogli cavo. È conforme alla norma EN13849-1:2007 e congiuntamente ad un quadro elettronico RIB da incasso cod. ACG9434 è un dispositivo di protezione di Classe 2.
-
Page 16: Caractéristiques Techniques
SCHÉMA DÉTAILLÉ DE L’INSTALLATION A - Operateur SUPER 3600 B - Photocellules p/protec. externe C - Cremaillere m6 D - Selecteur E - Antenne radio F - Signal electrique H - Poteau zingué p/cellule ne I - Photocellules p/protection interne L - Barre palpeuse mécanique fixé... - Page 17 INSTALLATION SUPER 3600 CONTRÔLE PRÉ-INSTALLATION !! LE PORTAIL DOIT SE DÉPLACER SANS FROTTER !! N.B. Il est impératif d’uniformiser les caractéristiques du portail avec les normes et les lois en vigueur. La porte peut être automatisée seulement si elle est en bon état et qu’elle est conforme à...
-
Page 18: Entretien
INSTALLATION DU MOTOR E DE LA CREMAILLERE La crémaillère doit être fixée à une certaine hauteur par rapport à la base du moteur. Cette hauteur peut être modifiée grâce à des boutonnières qui sont présentes sur la crémaillère. Le réglage en hauteur est effectué afin que le portail ne s’appuie pas sur l’engrenage de traction du réducteur (Fig. -
Page 19: Branchements Électriques
BRANCHEMENTS ÉLECTRIQUES S1-CRX/R2 code BA20080... - Page 20 A - BRANCHEMENTS RADIO IL EST OBLIGATOIRE DE INSTAURER LA FICHE AVEC DIP 13 EN POSITION “ON”. POWER 230 VAC MOTOR CAPACITOR L1 - N ALIMENTATION 230 VCA 50/60 HZ PROBE PAS DISPONIBLE CLIGNOTANT (MAX 40 W) ENCODER PAS DISPONIBLE RADIO CONNECTEUR POUR RADIO RÉCEPTEUR EXTÉRIEUR 24 VCC U-V-W...
- Page 21 B - RÉGLAGES l’installation ou durant les contrôles successifs le cas échéant. 1 - Après avoir réglé les fins de course électriques, positionner le portail à demi-course par SW1 SW2 SW3 - MICROINTERRUPTEURS POUR PROCÉDURES le biais du déblocage manuel; DIP 1 CONTRÔLE DU SENS DE ROTATION DU MOTEUR (ON) (POINT C) 2 - Mettre le DIP1 en position ON =>...
- Page 22 OFF pendant 10 secondes. 5 - Fin de procédure. 3 - Appuyer sur la touche de la télécommande (normalement, le canal A) dans les 10 secondes réglées. Si la télécommande est correctement mémorisée, la led DL10 (verte) FONCTIONNEMENT DES ACCESSOIRES DE COMMANDE émet un clignotement.
- Page 23 Au moment de la panne de courant, l’état du portail est sauvegardé en mémoire. avec succès Test Fonctionnel. Au retour de la tension de réseau, appuyer sur le bouton-poussoir d’ouverture (K, ouvre ou ATTENTION: LE MONITORAGE DE L’ENTRÉE BARRE PALPEUSE PEUT TRE ACTIVÉ radio).
-
Page 24: Solution Des Problemes
CARACTÉRISTIQUES TECHNIQUES SOLUTION DES PROBLEMES - Humidité < 95% sans condensation Après avoir effectué tous les raccordements en suivant attentivement le schéma et avoir - Tension d’alimentation 230V~ ±10% positionné le portail en position intermédiaire, vérifier l’allumage correct des leds DL2, DL3, - Fréquence 50/60 Hz DL4, DL5, DL8. - Page 25 OPTIONS - Pour les branchements et les données techniques des accessoires, se conformer aux livrets d’instruction correspondants. PLAQUE À CIMENTER CRÉMAILLÈRE MOD. 6 acier traité cataphorèse, avec cornière, en barre de 2 m. code ACS9090 code ACG8103 EMETTEUR RADIO SUN BLOCK BLOCK - SÉLECTEUR À...
- Page 26 RED permet la réalisation d’une installation avec barres palpeuses fixées également sur le battant en mouvement sans l’adoption de systèmes d’assemblage de câbles. Il est conforme à la norme EN13849-1:2007 et associé à un tableau électronique RIB, il encastrable code ACG9434 est un dispositif de protection de Classe 2.
-
Page 27: System Layout
SYSTEM LAY-OUT A - SUPER 3600 operator B - Photoelectric cells (external) C - Rack M6 D - Key selector E - Tuned aerial F - Flashing lamp H - Galvanized column for P.E. cells I - Photo electric cells (internal) -
Page 28: Emergency Release
INSTALLATION SUPER 3600 CHECKING BEFORE THE INSTALLATION !! THE GATE SHALL MOVE FRICTIONLESS !! 2” N.B.: Gate features must be uniformed with the standards and laws in force. The door/ gate can be automated only if it is in a good condition and its conditions comply with the EN 12604 norm. -
Page 29: Limit Switch Adjustment
MOTOR AND RACK INSTALLATION The rack must be fixed at a certain height with respect to the motor base. This height can be varied thanks to the slots on the rack. The height needs to be adjusted so that the gate does not rest on the reduction unit traction gear (Fig. - Page 30 ELECTRIC CONNECTIONS S1-CRX/R2 code BA20080...
- Page 31 A - CONNEXIONS RADIO IT IS COMPULSORY TO SET THE DIP 13 OF THE CONTROL PANEL IN THE ON POSITION. POWER 230 VAC MOTOR CAPACITOR NC: NORMALLY CLOSED CONTACT NO: NORMALLY OPEN CONTACT L1 - N 230Vac 50/60Hz POWER SUPPLY ENCODER IS NOT AVAILABLE BLINKER (40 W MAX.)
- Page 32 When you press and hold the PROG.Button, if the gate opens with the green led on then you may proceed to step 4. POINT B - SETTINGS If the gate moves in the wrong direction compared with the movement leds: DIP 1 MOTOR ROTATION DIRECTION CHECK (See Point C) - turn OFF the main AC power...
- Page 33 PROCEDURE FOR DELETING ALL RADIO CODES USED ONLY FOR COMPLETE OPENING - no effect, if pressed during the gate opening You can only delete the codes if the gate is closed. - the gate re-open, if pressed while the gate is closing 1 - Position DIP 1 to ON and then DIP 2 to ON.
- Page 34 In case there are more couple of photocells, the contacts from all the photocell receivers The signal that this mode has been activated is given by the blinking of the programming led. could be connected in series. With the blinking of the programming led, the opening and closing operation are allowed In case the photocells are not installed, this contact must be short circuited with a wire jump only with the command button pressed and held.
-
Page 35: Technical Specifications
TECHNICAL SPECIFICATIONS TROUBLE SHOOTING - Humidity < 95% without condensation After having carried out all connections, by carefully following the layout and having - Power voltage 230V~ ±10% positioned the gate in intermediate position, check the correct ignition of LEDS DL2, DL3, - Frequency 50/60Hz DL4, DL5, DL8. - Page 36 ACCESSORIES - For the connections and the technical data of the optional equipments follow the relevant handbooks. PLATE TO BE CEMENTED MODULE 6 RACK with CATAPHORESIS treatment, right angle in 2 m - 6,56 feet bars. code ACS9090 code ACG8103 BLOCK RADIO TRANSMITTER SUN BLOCK KEY SELECTOR FOR WALL-INSTALLATION...
- Page 37 Batteries not included. RED allows to make a system made with edges fixed to the moving shutter without having to use cable sleeving systems. It complies with EN13849-1:2007 Standard, if installed with an RIB Electronic Board it is built-in code ACG9434 a Class-2 Device.
-
Page 38: Technische Eigenschaften
ANLAGEN LAY-OUT A - Torantrieb SUPER 3600 B - Photozelle Toraussenseitig C - Zahnstange M6 D - Schlusselschalter E - Antenne F - Blinkleuchte H - Verzinkte Metallsäule als Photozellentrager I - Photozelle - Torinnenseitig L - Sicherheitskontaktleiste auf dem Schiebetor... - Page 39 INSTALLATION SUPER 3600 VOR DER MONTAGE AUSZUFÜHRENDE ÜBERPRÜFUNGEN !! DAS TOR MUSS REIBUNGSFREI LAUFEN !! ANMERKUNG: Es ist erforderlich, die Charakteristiken des Tors an die geltenden Normen und Gesetze anzupassen. Das Tor kann nur automatisch Angeschlossen werden, wenn es in einem einwandfreien Zustand ist und der EN12604 entspricht.
-
Page 40: Wartung
MOTORBEFESTIGUNG UND ZAHNSTANGE (Abb. 5-6) Die Zahnstange muß in bestimmten Abstand von der Verankerungsplatte befestigt werden. Die Zahnstange darf nicht angeschweißt, sondern nur mit Hilfe von Gewindeschrauben an dem Gittertor befestigt werden. Die Höheneinstellung soll verhindern, daß das Gittertor auf dem Antriebszahnrad des Antriebes aufliegt. - Page 41 ELEKTROANSCHLÖÜSSE S1-CRX/R2 Kode BA20080...
- Page 42 A - VERBINDUNGEN RADIO PFLICHTEINSTELLUNG FÜR STEUERUNG MIT DIP13 AUF POSITION ON. POWER 230 VAC MOTOR CAPACITOR L1 - N Stromversorgung 230 Vac 50/60 Hz ENCODER NICHT VERFÜGBAR Blinker (max. 40 W) RADIO Steckverbinder für externen Funkempfänger 24 Vdc PROG. Programmiertaste U-V-W OBERFLÄCHENANSCHLUSS ZU JC KLEMMEN VON STEUERUNG...
- Page 43 B - EINSTELLUNGEN 1 - Nach Einstellung der elektrischen Endschalter das Tor auf halbem Weg mittels der manuellen Entriegelung positionieren; SW1 SW2 SW3 - BETRIEBSMIKROSCHALTER 2 - DIP 1 auf EIN stellen => Die LED-Anzeige DL 1 beginnt zu blinken; DIP 1 STEUERUNG MOTORDREHRICHTUNG (EIN) (PUNKT C) 3 - Die Taste PROG drücken und gedrückt halten (die Bewegungen Öffnen-Stopp-Schließen-...
- Page 44 3 - Die Taste der Fernsteuerung (gewöhnlich Kanal A) innerhalb der eingestellten Zeit von FUNKTIONSWEISE DER STEUERZUSATZEINRICHTUNGEN 10 Sekunden drücken. Bei korrekter Speicherung der Fernsteuerung leuchtet das LED WARNUNG: VERBINDEN SIE STEUERUNG-ZUBEHÖR, NUR WENN ES AUF IMPULS- DL10 (grün) auf. MODUS.
- Page 45 auch für den Modus Öffnung für Fußgänger. Der Pausenzyklus kann mit DIP 3 aktiviert oder werden. deaktiviert werden (AN aktiv). Das Check besteht aus Funktionstest der Sicherheitskontaktleiste, das vor jeder Schliessung ausgeführt wird. Die Schließung des Tores kommt folglich erlaubt nur, wenn es Tast- FUNKTIONSWEISE NACH STROMAUSFALL überschritten der funktionelle Test sperrt.
- Page 46 TECHNISCHE EIGENSCHAFTEN LÖSUNG VON PROBLEMEN - Feuchtigkeit <95% ohne Kondensierung Nachdem alle Verbindungen sorgfältig dem Schema folgend ausgeführt wurden und das Tor - Versorgungsspannung 230V ~ + 10% auf die mittlere Position gestellt wurde, das korrekte Einschalten der LEDs DL2, DL3, DL4, - Frequenz 50/60 Hz DL5 und DL8 kontrollieren.
- Page 47 OPTIONEN - Für die Anschlüsse und die technischen Daten der Zubehöre verweisen wir auf die entsprechenden Betriebsanleitungen. EINZUZEMENTIERENDE PLATTE ZAHNSTANGE MODUL 6 in Metall schwarz mit Cataphoresi Behandlung und Winkelbefestigung, in 2 m lange Stücken. Kode ACS9090 Kode ACG8103 BLOCK FERNSENDER SUN SCHLÜSSELWAHLSCHALTER BLOCK FÜR DIE WAND Kode ACG1053...
- Page 48 RED erlaubt die Realisierung einer Anlage mit Kontaktleisten, die auch auf dem sich bewegenden Tor angebracht sein können, ohne dass man Kabelsammelsysteme benötigt. Unterputz Kode ACG9434 Entspricht der Norm EN13849-1:2007 und in Verbindung mit einer RIB - Schalttafel stellt Wandbefestigung Kode ACG9436 es eine Schutzvorrichtung der Klasse 2 dar. Kode ACG6202...
-
Page 49: Características Técnicas
DISPOSICIÒN DE LA INSTALACIÒN A - Operador SUPER 3600 B - Fotocélulas externas C - Cremallera Módulo 4 D - Interruptor de llave E - Antena de radio F - Intermitente H - Columnas para las fotocélulas I - Fotocélulas internas L - Nervadura mecánica... - Page 50 INSTALACIÓN SUPER 3600 CONTROL PRE-INSTALACIÓN ¡¡LA VERJA TIENE QUE MOVERSE SIN ROCES!! IMPORTANTE. Es obligatorio uniformar las características de la verja a las normas y leyes en vigor. La puerta puede ser automatizada sólo si se encuentra en buen estado y responde a la norma EN 12604.
-
Page 51: Mantenimiento
ANCLAJE MOTOR Y CREMALLERA (Fig. 5-6) La cremallera se tiene que anclar a una determinada altura respecto al soporte del motor. Dicha altura se puede variar gracias a unos ojales presentes en la cremallera. El ajuste de la altura se efectúa para que la verja durante el movimiento no se apoye sobre el engranaje de tracción del K (Fig. - Page 52 CONEXIONES ELÉCTRICAS S1-CRX/R2 cód. BA20080...
- Page 53 A - CONEXIÓN RADIO ES OBLIGATORIO PROGRAMAR LA PLACA CON DIP 13 EN POSICION ON. POWER 230 VAC MOTOR CAPACITOR L1 - N ALIMENTACIÓN 230 VAC 50/60 HZ PROBE NO DISPONIBLE INTERMITENTE (MÁX 40 W) ENCODER NO DISPONIBLE RADIO CONECTOR PARA RADIO RECEPTOR EXTERNO 24 VDC U-V-W CONEXIÒN DE INTERFAZ A BORNES JC DE PLACA CARD R2 PROG.
- Page 54 B - AJUSTES mitad del recorrido mediante el desbloqueo manual; 2 - Colocar el DIP1 en posición ON => el led DL1 comienza a parpadear; SW1 SW2 SW3 - MICROINTERRUPTORES PARA PROCEDIMIENTOS 3 - Pulsar y mantener presionado el pulsador PROG (ahora el movimiento se realiza en DIP 1 CONTROL DEL SENTIDO DE ROTACIÓN DEL MOTOR (ON) (PUNTO C) presencia de personas, abre-stop-cierra-stop-abre-etc.) =>...
- Page 55 FUNCIONAMIENTO ACCESORIOS DE MANDO instante el pulsador PROG. El led rojo DL1 de programación deja de parpadear. 6 - Volver a colocar el DIP 1 en posición OFF y el DIP 2 en OFF. ADVERTENCIA: CONECTE ACCESORIOS DE COMANDO SOLO SI IMPULSIVO. 7 - Final del procedimiento.
- Page 56 FUNCIONAMIENTO DE LOS ACCESORIOS DE SEGURIDAD PULSADOR DE STOP (COM - STOP) Durante cualquier operación el pulsador de STOP ejecuta la detención de la cancela. FOTOCÉLULA (COM-PHOT) Si se lo presiona con la cancela totalmente abierta (o parcialmente, utilizando el mando DIP 6 OFF =>...
-
Page 57: Resolución De Problemas
CARACTERÍSTICAS TÉCNICAS RESOLUCIÓN DE PROBLEMAS - Humedad < 95% sin condensación Después de haber efectuado todas las conexiones siguiendo el esquema y haber posicionado - Tensión de alimentación 230V~ ±10% el portón en posición intermedia, verifique el correcto encendido de los led DL2, DL3, DL4, - Frecuencia 50/60 Hz DL5, DL8. - Page 58 OPCIONALES - Para las conexiones y datos técnicos de los accesorios, consultar los manuales respectivos. PLANCHA A ENCEMENTAR CREMAGLIERA MOD. 6 con tratamiento de CATAFORESIS, con angular, in barras de 2 m. cód. ACS9090 cód. ACG8103 BLOCK TELEMANDO SUN SELECTOR DE LLAVE DE PARED cód.
- Page 59 Alimentar con 3 pilas estilo tipo AA de 1,5V no incluidas. RED permite realizar una instalación con costas colocadas incluso sobre la hoja en movimiento sin la adopción de sistemas recoge cables. Conforme a la norma EN13849-1:2007. Unido a un cuadro electrónico RIB es un empotrado cód. ACG9434 dispositivo de protección de Clase 2.
-
Page 60: Registro Di Manutenzione
REGISTRO DI MANUTENZIONE DOSSIER D’ENTRETIEN - MAINTENANCE LOG WARTUNGSREGISTER - REGISTRO DE MANTENIMIENTO Il presente registro di manutenzione contiene i riferimenti tecnici e le registrazioni delle attività di installazione, manutenzione, riparazione e modifica svolte, e dovrà essere reso disponibile per eventuali ispezioni da parte di organismi autorizzati. - Page 61 Data Descrizione dell’intervento (installazione, avviamento, verifica delle sicurezze, riparazioni, modifiche) Firma del tecnico Firma del cliente Date Description de l’intervention (installation, mise en marche, réglage, contrôle des sécurités, réparations, modifications) Signature du techicien Signature du client Date Description of the operation (installation, start-up, adjustement, safety device check, repair, modifications) Technician’s signature Customer’s signature Datum...
- Page 62 NOTES...
- Page 63 We declare under our responsibility that SUPER 3600 operator is conform to the following standards: Wir erklaeren das der SUPER 3600 den folgenden EN-Normen entspricht: Declaramos bajo nuestra responsabilidad que los operators SUPER 3600 es conforme a la siguientes normas y disposiciones: EN 301 489-1...
- Page 64 SUPER 3600 Codice Denominazione Particolare CEL1072 Pressacavo ottone nichelato 1/4 CPL1119 Ingranaggio Z22 ACG1080 Chiave per serratura carter CEL1426 Cond 35µF SUPER 3600 220V/60Hz 1P CTC1044 Molla per sblocco ACG8103 Piastra da interrare CEL1433 Pressacavo CTC1084 Anello di tenuta OR106 BA00158 Camp.+Statore SUPER1 220/60 1P...
Need help?
Do you have a question about the SUPER 3600 and is the answer not in the manual?
Questions and answers