Table of Contents
Advertisement
Quick Links
Radio Management
Flat wall-mounted radio transmitter
Flat wall-mounted radio transmitter 1-channel
Art. No. : A 41 F..
Flat wall-mounted radio transmitter 2-channel
Art. No. : A 42 F..
Flat wall-mounted radio transmitter 4-channel
Art. No. : A 44 F..
Operating instructions
1 Safety instructions
Electrical equipment may only be installed and fitted by electrically skilled persons.
Serious injuries, fire or property damage possible. Please read and follow manual fully.
Keep button cells out of reach of children! If button cells are swallowed, get medical help
immediately.
Risk of explosion! Do not throw batteries into fire.
Risk of explosion! Do not recharge batteries.
The radio communication takes place via a non-exclusively available transmission path,
and is therefore not suitable for safety-related applications, such as emergency stop and
emergency call.
These instructions are an integral part of the product, and must remain with the end
customer.
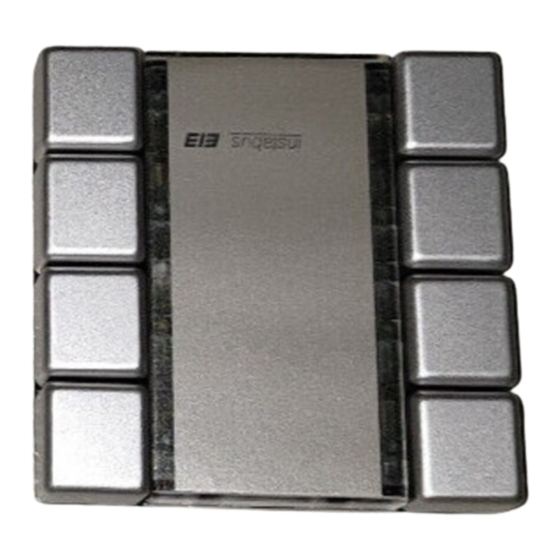
2 Device components
(1) Wall transmitter
(2) Base plate
(3) Fastening screws
(4) Inscription panel
(5) Inscription panel cover
32562723
J0082562723
Figure 1
1/8
21.07.2016
Advertisement
Table of Contents

Subscribe to Our Youtube Channel
Related Manuals for Jung A 41 F Series


Summary of Contents for Jung A 41 F Series
-
Page 1: Safety Instructions
Radio Management Flat wall-mounted radio transmitter Flat wall-mounted radio transmitter 1-channel Art. No. : A 41 F.. Flat wall-mounted radio transmitter 2-channel Art. No. : A 42 F.. Flat wall-mounted radio transmitter 4-channel Art. No. : A 44 F.. Operating instructions 1 Safety instructions Electrical equipment may only be installed and fitted by electrically skilled persons. - Page 2 Radio Management Flat wall-mounted radio transmitter 3 Function System information By statute, the transmitting power, the reception characteristics and the antenna cannot be changed. The range of a radio system from the transmitter to the receiver depends on various circumstances. The range of the system can be optimised by selecting the optimal installation location, taking into account the structural circumstances.
- Page 3 Radio Management Flat wall-mounted radio transmitter 4 Operation Channel assignment of the wall transmitter Figure 3: Channel assignment Sending radio telegrams Press channel button, e.g. 1+ , to transmit a radio telegram. The corresponding LED lights up as an acknowledgement. As long as no light scene functions were selected, the following responses occur, depending on the type of receiver: Button...
- Page 4 Radio Management Flat wall-mounted radio transmitter Call up All Off In the teaching procedure for a channel button or a light scene button, the All Off button of the receiver is automatically also taught, with the exception of radio blind actuators. Function switch 1 is in the OFF position (see Commissioning chapter).
- Page 5 Radio Management Flat wall-mounted radio transmitter Figure 4: Cutting the adhesive pads for multiple combinations i If necessary, after mounting the wall transmitter in the CD program, carefully remove the excess adhesive film in the corners. Changing the battery WARNING! Risk of chemical burns.
- Page 6 Radio Management Flat wall-mounted radio transmitter Figure 6: Insert battery i Keep contacts of batteries and device free of grease. Apply new battery to the positive contact of the battery holder. Observe polarity: the positive pole of the battery must be at the top. Press gently on battery to snap it in.
-
Page 7: Technical Data
Radio Management Flat wall-mounted radio transmitter Button 2- Channel 2- Light scene 2 Light scene 3 Button 2+ Channel 2+ Button 3- Channel 3- Light scene 4 Light scene 5 Button 3+ Channel 3+ i Function switch 1 can be used to disable the saving of light scenes for buttons 1 - 3. i The buttons 4+ and 4- always correspond to the channels 4+ and 4-. -
Page 8: Troubleshooting
Check positions of function switches. 6.3 Conformity Albrecht Jung GmbH & Co. KG hereby declares that the radio system type Art. No. A 41 F.. / A 42 F.. / A 44 F.. corresponds to the directive 2014/53/EU. You can find the full article number on the device. The complete text of the EU Declaration of Conformity is available under the Internet address: www.jung.de/ce...
Need help?
Do you have a question about the A 41 F Series and is the answer not in the manual?
Questions and answers