Advertisement
Quick Links
eNet
Radio transmitter modules
Radio transmitter module 1-channel
Art. No. : FM 4001 M
Radio transmitter module 2-channel
Art. No. : FM 4002 M
Radio transmitter module 3-channel
Art. No. : FM 4003 M
Radio transmitter module 4-channel
Art. No. : FM 4004 M
Operating instructions
1 Safety instructions
Electrical equipment may only be installed and fitted by electrically skilled persons.
Keep button cells out of reach of children! If button cells are swallowed, get medical help
immediately.
Risk of explosion! Do not throw batteries into fire.
Risk of explosion! Do not recharge batteries.
The radio communication takes place via a non-exclusively available transmission path,
and is therefore not suitable for safety-related applications, such as emergency stop and
emergency call.
These instructions are an integral part of the product, and must remain with the end
customer.
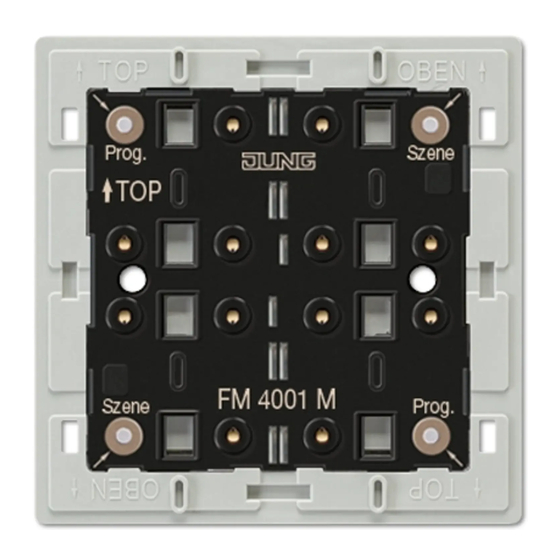
2 Device components
(1) Base plate
(2) Fastening screws
(3) Design frame
(4) Wall transmitter module
(5) Plastic screws
(6) Covers
32579203
J:0082579203
Figure 1: 4-gang radio wall transmitter module
1/10
20.03.2014
Advertisement

Subscribe to Our Youtube Channel
Related Manuals for Jung FM 4001 M


Summary of Contents for Jung FM 4001 M
-
Page 1: Safety Instructions
Radio transmitter modules Radio transmitter module 1-channel Art. No. : FM 4001 M Radio transmitter module 2-channel Art. No. : FM 4002 M Radio transmitter module 3-channel Art. No. : FM 4003 M Radio transmitter module 4-channel Art. No. : FM 4004 M... - Page 2 eNet Radio transmitter modules 3 Function System information This device is a part of the eNet system. High transmission reliability at a radio frequency of 868 MHz is achieved by the transmission behaviour and bidirectional data transfer. The range of a radio system depends on various external circumstances. The range can be optimised by the choice of installation location.
- Page 3 eNet Radio transmitter modules Channel assignment of the wall transmitter Figure 2: Channel assignment of wall transmitter module 1-gang, 2-gang, 3-gang and 4-gang Operating light Switching: Press button for less than 0.4 seconds. Dimming: Press the button for longer than 0.4 seconds. The dimming process ends when the button is released.
- Page 4 eNet Radio transmitter modules Set required switch-on brightness. Press button over entire surface for longer than 4 seconds. The light is briefly switched off and switched on again to the switch-on brightness. Switch- on brightness is saved. Polling sum status The buttons of a channel are set as channel buttons.
- Page 5 eNet Radio transmitter modules Figure 3: Cutting the adhesive pads for multiple combinations i If necessary, after mounting the wall transmitter in the CD program, carefully remove the excess adhesive film in the corners. 5.2 Commissioning Insert battery WARNING! Risk of chemical burns. Batteries can burst and leak.
- Page 6 eNet Radio transmitter modules Figure 4: Activating programming mode for channel buttons Press the top left and bottom right buttons simultaneously for longer than 4 seconds (figure 4). Red LED flashes slowly. The radio sensor is in programming mode for approx. 1 minute. Switch the actuator to programming mode (see actuator instructions).
- Page 7 eNet Radio transmitter modules Figure 5: Activating programming mode for scene buttons Press the top right and bottom left buttons simultaneously for 4 seconds (figure 5). The red LED flashes slowly. The function sensor is in programming mode. Switch radio actuator to programming mode (see radio actuator instructions). Press the scene button briefly.
-
Page 8: Technical Data
eNet Radio transmitter modules Press the top left and bottom right buttons simultaneously for longer than 20 seconds (figure 4). The red status LED flashes after 4 seconds. After 20 seconds the LED flashes faster. Press the desired button briefly. The red LED flashes more slowly. -
Page 9: Troubleshooting
eNet Radio transmitter modules Channel 3 * Rocker switch, scene Setting the buttons of the Basic setting: Rocker switch channel as channel buttons (rocker switch) or scene buttons (scene). Channel 4 * Rocker switch, scene Setting the buttons of the Basic setting: Rocker switch channel as channel buttons (rocker switch) or scene... - Page 10 We provide a warranty as provided for by law. Please send the device with a description of the defect to our central customer service office. ALBRECHT JUNG GMBH & CO. KG Volmestraße 1 58579 Schalksmühle Telefon: +49.23 55.8 06-0 Telefax: +49.23 55.8 06-2 04...
Need help?
Do you have a question about the FM 4001 M and is the answer not in the manual?
Questions and answers