Advertisement
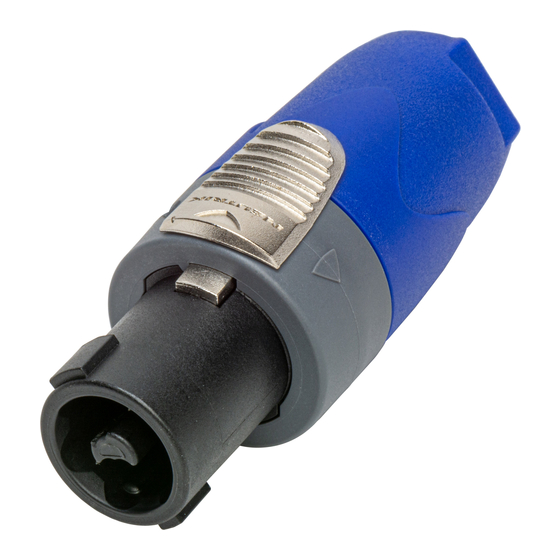
Lockable Loudspeaker Connector
Assembly Instructions
A
B
C
D
E
25 mm [1.0"]
12 mm [0.5"]
1-
2+
Speakon SPX Series
Assembly of the Connector:
A
Place bushing and chuck over cable.
B
Prepare cable as shown.
Important is the stripping length of 25 mm and
12 mm.
Insert wires into terminals and secure clamp
C
terminals with screw driver (Pozidrive ).
D
For easy wiring especially on big cables, first
screw on the inner conntacts 1+ and 2+ and
afterwards the outer contacts 1- and 2- !
E
Push chuck up to housing .
Important: Align the chuck by positioning
the nose into the recess.
1+
F
Tighten the bushing
INFO to the screw driver:
2-
Pozidrive # 1
- 1 -
®
NL4FX / NL4FRX
®
DO NOT USE!
Philips
Advertisement
Table of Contents

Subscribe to Our Youtube Channel
Related Manuals for NEUTRIK Speakon SPX Series


Summary of Contents for NEUTRIK Speakon SPX Series
- Page 1 Lockable Loudspeaker Connector ® Speakon SPX Series NL4FX / NL4FRX Assembly Instructions Assembly of the Connector: Place bushing and chuck over cable. Prepare cable as shown. Important is the stripping length of 25 mm and 12 mm. 25 mm [1.0"] Insert wires into terminals and secure clamp 12 mm [0.5"]...
- Page 2 Important: Align the chuck by positioning the nose into the recess. Handling: Engagement: Separation: NEUTRIK AG NEUTRIK Zürich AG NEUTRIK (UK) Ltd. NEUTRIK USA INC. NEUTRIK Tokyo Ltd. NEUTRIK France NEUTRIK Vertriebs GmbH Liechtenstein Switzerland GreatBritain Japan France Germany/Netherlands/Austria Tel.: +423/237 24 24...
Need help?
Do you have a question about the Speakon SPX Series and is the answer not in the manual?
Questions and answers