Siemens SITOP PSU8200 Manual
Integration of a sitop 24 v power supply in simatic pcs 7
Hide thumbs
Also See for SITOP PSU8200:
- Manual (66 pages) ,
- Operating instructions manual (58 pages) ,
- Manual (99 pages)

Related Manuals for Siemens SITOP PSU8200


Summary of Contents for Siemens SITOP PSU8200
- Page 1 Application example 04/2016 Integration of a SITOP 24 V Power Supply in SIMATIC PCS 7 SITOP PSU8200, PSE202U, PSE200U, UPS1600, PSU8600 https://support.industry.siemens.com/cs/ww/en/view/109481908...
-
Page 2: Warranty And Liability
Application Examples at any time without prior notice. If there are any deviations between the recommendations provided in these Application Examples and other Siemens publications – e.g. Catalogs – the contents of the other documents have priority. We do not accept any liability for the information contained in this document. -
Page 3: Table Of Contents
The solution ....................6 Overview ................... 6 Hardware and software components ..........8 Basics ......................9 SITOP PSU8200 ................9 SITOP PSE202U ................10 SITOP UPS1600 with UPS1100 ............11 SITOP PSE200U ................12 Power supply system SITOP PSU8600 ..........13 Redundant 24 V DC power supply ............... - Page 4 Table of contents 8.2.1 Overview of the power supply ............60 8.2.2 Monitoring of redundancy ..............61 8.2.3 Monitoring of the DC UPS ..............62 8.2.4 Monitoring the selectivity module ............. 66 Operating the PSU8600 power supply system ......... 67 References ....................
-
Page 5: Task
1 Task Task Introduction The reliable 24V power supply is an important factor in high plant availability during the operation of SIMATIC PCS 7. SITOP makes available 1- or 3-phase basic power supply units with different output power ratings of up to 1000 W. These units have comprehensive certifications like ATEX or IECex as well as MTBF values of up to 1 million hours in 24-hour uninterrupted duty. -
Page 6: The Solution
The enclosed demo project gives you a comprehensive overview of configuration and the way of functioning. SITOP modular This variant uses SITOP PSU8200 power supply units, the SITOP PSE202U redundancy module, the SITOP UPS1600/UPS1100 uninterruptible power supply with battery module, and the SITOP PSE200U selectivity module. - Page 7 2 The solution Power supply system SITOP PSU8600 Another variant uses the SITOP PSU8600 power supply system. The basic unit with four outputs that are selectively monitored is expanded by four more outputs (CNX8600) that are selectively monitored. Using the (BUF8600) buffer module, it is possible to bypass brownouts.
-
Page 8: Hardware And Software Components
2 The solution Hardware and software components The application has been created with the following components: Hardware components Table 2-1 Component Qty. Article number Note AS 410-5H 6ES7 410-5HX08 0AB0 Automation system ET 200SPHF 6ES7 155-GAU00-0CN0 External peripherals PSU8200 6EP3 334-8SB00-0AY0 DC 24 V/10 A power supply PSE202U 6EP1 961-3BA21... -
Page 9: Basics
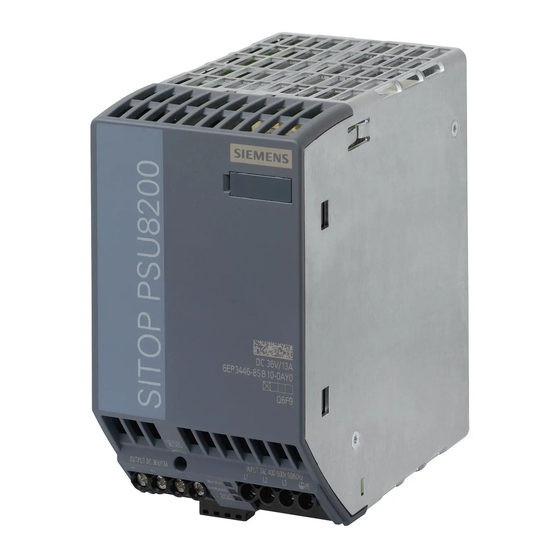
3 Basics Basics SITOP PSU8200 One- and three-phase SITOP PSU8200 devices are the technology power supplies for demanding solutions. The wide-range input makes it possible to connect to almost any electrical power system worldwide and ensures a high degree of safety even when large voltage fluctuations occur. -
Page 10: Sitop Pse202U
3 Basics SITOP PSE202U SITOP redundancy modules provide additional protection from failure of the 24 V supply. The redundancy module continuously monitors two identical power supply units. If one unit fails, the other one automatically supplies the power. Additionally, a signal is sent via a signal contact that can be evaluated by a controller, PC, or control system. -
Page 11: Sitop Ups1600 With Ups1100
3 Basics SITOP UPS1600 with UPS1100 In the case of a power failure, the SITOP UPS1600 uninterruptible power supply can supply the automation system with 24V for up to several hours. Depending on the version of the DC UPS, it is integrated into the control system by means of digital I/Os or via PROFINET (Figure 3-3). -
Page 12: Sitop Pse200U
3 Basics SITOP PSE200U The selectivity and diagnostics modules are the optimum enhancement for all 24V power supplies to distribute the load current to several feeders and to monitor it. The module detects an overload or short-circuit in one or more feeders and shuts them down as needed. -
Page 13: Power Supply System Sitop Psu8600
3 Basics Power supply system SITOP PSU8600 The SITOP PSU8600 power supply system consists of a PSU8600 basic unit, up to three CNX8600 expansion modules, and a maximum of two BUF8600 buffer modules. The three-phase basic unit provides either one selectively monitored output or four selectively monitored outputs (Figure 3-5). -
Page 14: Redundant 24 V Dc Power Supply
4 Redundant 24 V DC power supply Redundant 24 V DC power supply For redundant power supply, you need two identical (PSU8200) power supply units and one (PSE202U) redundancy module. Ideally, you should connect both power supply units to separate 120/230V electric circuits. To monitor redundancy, the signal contact of the redundancy module is connected to one of the digital inputs of the external peripherals. -
Page 15: Configuring The Hardware Configuration
4 Redundant 24 V DC power supply Configuring the hardware configuration You do not configure the hardware of the power supply and the of the redundancy module in the SIMATIC Manager. You configure the AS and the external peripherals according to the PCS 7 standard. To monitor the power supply units and the redundancy module, the signal contacts are each connected to one of the digital inputs of the external peripherals and symbolized appropriately in the hardware configuration. -
Page 16: Copying Process Tag Types
4 Redundant 24 V DC power supply Copying process tag types Before starting to create the AS program, it is advisable to copy the necessary plan templates to the master data library of the PCS 7 project. Process tag type “PSU2ModulesRed”... -
Page 17: Creating An As Program
4 Redundant 24 V DC power supply Creating an AS program The procedure is as follows: 1. Drag and drop process tag type “PSU2ModulesRed” to the desired folder in the technological hierarchy and rename it (1). Fig. 4-4 2. Open the plan and adapt each input signal as follows: –... - Page 18 4 Redundant 24 V DC power supply Fig. 4-5 3. Compile the AS program and update the view of the CFC plan. 4. Load the program into the automation system. Integration of a SITOP 24 V Power Supply in PCS 7 Entry ID: 109481908, V1.0, 04/2016...
-
Page 19: Parameterizing Messages
4 Redundant 24 V DC power supply Parameterizing messages To allow operators to assign the message if one of the devices fails, they are adapted on the monitoring blocks. The procedure is as follows: 1. Open one after the other the properties of the “MonDiL” blocks and click on the “Messages…”... -
Page 20: Creating A Process Picture
4 Redundant 24 V DC power supply Creating a process picture You need a process picture to visualize the status of the redundant power supply. The procedure is as follows: 1. Create a new process picture or open an existing one (1) in the folder of the technological hierarchy in which the CFC plan that you edited before is located. -
Page 21: Runtime
4 Redundant 24 V DC power supply Note In the example, small squares are configured as LED lamps to represent the status of the assemblies in color in addition to the block icons. With the squares, the background color is dynamized and linked to the process values of the monitoring blocks. -
Page 22: Uninterruptible 24 V Power Supply
5 Uninterruptible 24 V power supply Uninterruptible 24 V power supply To buffer the power supply, you need a (UPS1600) DC UPS module and a (UPS1100) battery module in addition to the power supply units. Battery modules are available with a choice of capacities ranging from 1.2 Ah to 12 Ah. -
Page 23: Configuring The Hardware Configuration
5 Uninterruptible 24 V power supply 5.1.1 Configuring the hardware configuration You configure the AS and the external peripherals according to the PCS 7 standard. To configure the SITOP UPS1600 uninterruptible power supply, the corresponding GSD file must be installed. You can find the Generic Station Description in the item entitled GSD for SITOP UPS1600 for integration in STEP 7 V5. - Page 24 5 Uninterruptible 24 V power supply Fig. 5-2 Integration of a SITOP 24 V Power Supply in PCS 7 Entry ID: 109481908, V1.0, 04/2016...
- Page 25 5 Uninterruptible 24 V power supply Configuring the hardware The next thing to do is to update the UPS1600 in the hardware configuration The procedure is as follows: 1. Drag the UPS1600 from the device catalog (1) onto the PROFINET IO system of the AS.
- Page 26 5 Uninterruptible 24 V power supply The procedure is as follows: 1. Select the DC UPS (1) in the hardware configuration. 2. Open the properties of the “UPS1600 xxA PN” modules (2) on slot 0.1 by double-clicking. 3. Switch to the “Parameters” tab. 4.
- Page 27 5 Uninterruptible 24 V power supply Configuring symbols To interconnect the driver block of the control program with a symbolic address at a later time, parameterize the I/O addresses of the DC UPS using symbols. The procedure is as follows: 1.
-
Page 28: Copying Process Tag Types
5 Uninterruptible 24 V power supply 5.1.2 Copying process tag types The function blocks of the SITOP UPS1600 are configured in process tag type “UPS1600”. This type contains one “DrvUPS” driver block and the “UPS1600” monitoring block. The blocks have already been correctly interconnected with one another. The procedure is as follows: 1. -
Page 29: Creating An As Program
5 Uninterruptible 24 V power supply 5.1.3 Creating an AS program The procedure is as follows: 1. Drag process tag type “UPS1600” to the desired folder in the technological hierarchy and rename it. (1) Fig. 5-7 2. Open the plan and carry out the following modifications: –... -
Page 30: Messages
5 Uninterruptible 24 V power supply 5.1.4 Messages The messages of the SITOP UPS1600 have already been parameterized in the function block and you do not need to change them. Fig. 5-9 Integration of a SITOP 24 V Power Supply in PCS 7 Entry ID: 109481908, V1.0, 04/2016... -
Page 31: Ups1600 With Monitoring Of The Signal Contacts
5 Uninterruptible 24 V power supply UPS1600 with monitoring of the signal contacts The DC UPS is monitored using the external peripherals. To do this, the signal contacts of the module are connected to the digital inputs of the external peripherals. Fig. -
Page 32: Configuring The Hardware Configuration
5 Uninterruptible 24 V power supply 5.2.1 Configuring the hardware configuration You do not configure the hardware of the uninterruptible power supply in the SIMATIC Manager. You configure the AS and the external peripherals according to the PCS 7 standard. The digital inputs of the external peripherals that are connected to the DC UPS are shown in the HW configuration using appropriate symbols. -
Page 33: Creating An As Program
5 Uninterruptible 24 V power supply The procedure is as follows: 1. Open the SITOP library. 2. Copy process tag type “SITOP” (1) to the “Process tag types” folder in the master data library. 3. Make sure that you copy the APL blocks that are used to the master data library too. - Page 34 5 Uninterruptible 24 V power supply 2. Open the plan and carry out the modifications below for the input signal to monitor buffering mode (Rel. 1): – Rename the monitoring block (2) to match its use. Here, the system monitors the signal for buffering mode. –...
- Page 35 5 Uninterruptible 24 V power supply Fig. 5-16 4. Copy interconnected blocks “Pcs7DiIn” and “MonDiL” to the clipboard again and paste them into the CFC plan again. Carry out the modifications below for monitoring the battery charge (Rel. 3): – Rename the monitoring block (9) to match its use.
-
Page 36: Parameterizing Messages
5 Uninterruptible 24 V power supply 5.2.4 Parameterizing messages Open the message configurations of the “MonDiL” blocks one after the other and carry out the following modifications: 1. At “SIG1” of buffer monitoring (1), change the message text and the message class to “Warning –... -
Page 37: Creating A Process Picture
5 Uninterruptible 24 V power supply Creating a process picture Installing the SITOP library for PCS 7 also copied the block icons and faceplates for display on the OS. Depending on the variant that you used to monitor the DC UPS, the “Compile OS”... -
Page 38: Runtime
5 Uninterruptible 24 V power supply Runtime After starting runtime and switching to the corresponding technological hierarchy, it is now possible to monitor the status of the uninterruptible power supply on the OS. The block icon (1) shows the current charge of the battery and indicates pending messages. -
Page 39: Selective Monitoring Of 24V Feeders
6 Selective monitoring of 24V feeders Selective monitoring of 24V feeders Using the SITOP PSE200U selectivity module, you can monitor up to four 24 V feeders and switch them off individually in the case of a fault. Different versions of the selectivity module are available each of which has an output current range of 0.5…3 A or 3…10 A. -
Page 40: Configuring The Hardware Configuration
6 Selective monitoring of 24V feeders Configuring the hardware configuration You do not configure the hardware of the power supply and of the selectivity module in the SIMATIC Manager. You configure the AS and the external peripherals according to the PCS 7 standard. To monitor the selectivity module, the signal contact is connected to one of the digital inputs of the external peripherals and symbolized appropriately in the hardware configuration. -
Page 41: Copying Process Tag Types
6 Selective monitoring of 24V feeders Copying process tag types Before starting to create the AS program, it is advisable to copy the necessary plan templates to the master data library of the PCS 7 project. Process tag type “PSE200U” is available for a selectivity module with single- channel signaling. -
Page 42: Creating An As Program
6 Selective monitoring of 24V feeders Creating an AS program The procedure is as follows: 1. Drag and drop process tag type “SITOP” to the desired folder in the technological hierarchy and rename it (1). Fig. 6-4 2. Open the plan and adapt the input signal as follows: –... - Page 43 6 Selective monitoring of 24V feeders 3. For a remote reset from the Operator Station, you must add to the program a digital output driver block and an operation block for digital signals. – Paste APL blocks “OpDi01” (1), “TimerP” (2), and “Pcs7DiOu” (3) into the CFC plan.
-
Page 44: Parameterizing A Message
6 Selective monitoring of 24V feeders Parameterizing a message To ensure that operators realize that a 24 V feeder has failed, the message of the monitoring block is also adapted. The procedure is as follows: 1. Open the properties view of the “MonDiL” block and click on the “Messages...” pushbutton. -
Page 45: Creating A Process Picture
6 Selective monitoring of 24V feeders Creating a process picture You need a process picture to visualize the status of the selectivity module. The procedure is as follows: 1. Create a new process picture or open an existing one (1) in the folder of the technological hierarchy in which the CFC plan that you edited before is located. -
Page 46: Runtime
6 Selective monitoring of 24V feeders Note In the example, an additional small square is configured as an LED lamp to represent the status of the assembly in color. With the square, the background color is dynamized and linked to the process values of the monitoring block. ... -
Page 47: Power Supply System Sitop Psu8600
7 Power supply system SITOP PSU8600 Power supply system SITOP PSU8600 The PSU8600 basic module has four 24 V feeders that are switched-off individually in the case of overloading. A CNX8600 expansion module is plugged in to the basic module to provide four more 24 V feeders with selective monitoring, as well as a BUF8600 buffer module. -
Page 48: Hardware Configuration
7 Power supply system SITOP PSU8600 Hardware configuration You configure the AS and the external peripherals according to the PCS 7 standard. To configure the power supply system, the corresponding GSD must be installed. You can find the Generic Station Description in the item entitled GSD for SITOP PSU8600 for integration in Step 7 V5. - Page 49 7 Power supply system SITOP PSU8600 Fig. 7-2 Integration of a SITOP 24 V Power Supply in PCS 7 Entry ID: 109481908, V1.0, 04/2016...
- Page 50 7 Power supply system SITOP PSU8600 Configuring the hardware The procedure is as follows: 1. Drag the PSU8600 from the device catalog (1) onto the PROFINET IO system of the AS. 2. Highlight the PROFINET IO device and drag one CNX8600 expansion module and one BUF8600 buffer module each (2) to a free slot on the basic module.
- Page 51 7 Power supply system SITOP PSU8600 Setting the SITOP PSU8600 parameters (commissioning) In the HW configuration for the PSU8600, you can set general parameters, parameters for PROFIenergy and the output parameters of the basic module’s and the expansion module’s 24 V outputs. You can find more detailed information on the different parameters in the SITOP PSU8600 manual.
- Page 52 7 Power supply system SITOP PSU8600 Note Note that remote parameterization by means of the HW configuration is only effective if you have set the “REN” DIP switch (1) on the device to the “ON” position. Configuring symbols To interconnect the driver block of the control program with a symbolic address at a later time, parameterize the I/O addresses of the basic module using symbols.
-
Page 53: Copying Process Tag Types
7 Power supply system SITOP PSU8600 Copying process tag types The function blocks of the SITOP PSU8600 are configured in process tag type “PSU8600_CNX8600”. This type contains one “DrvPSU” driver block, the “PSU8600” monitoring block, and three “CNX8600” blocks of the expansion modules. The “PSU8600”... -
Page 54: Creating An As Program
7 Power supply system SITOP PSU8600 Creating an AS program The procedure is as follows: 1. Drag process tag type “PSU8600_CNX8600” from the project library and drop it in the desired folder in the technological hierarchy and rename it (1). Fig. -
Page 55: Messages
7 Power supply system SITOP PSU8600 Fig. 7-8 3. Compile the AS program and update the view of the CFC plan. 4. Load the program into the automation system. Messages The messages of the SITOP PSU8600 have already been parameterized in the function block and you do not need to change them. -
Page 56: Creating A Process Picture
7 Power supply system SITOP PSU8600 Creating a process picture You need a process picture to visualize the status of the selectivity module. The procedure is as follows: 1. Create a new process picture or open an existing one (1) in the folder of the technological hierarchy in which the CFC plan that you edited before is located. -
Page 57: Runtime
7 Power supply system SITOP PSU8600 Runtime After starting runtime and switching to the corresponding technological hierarchy, it is now possible to monitor the status of the power supply system on the OS. Fig. 7-12 Integration of a SITOP 24 V Power Supply in PCS 7 Entry ID: 109481908, V1.0, 04/2016... -
Page 58: Commissioning The Demo Project
8 Commissioning the demo project Commissioning the demo project You need the hardware to test the functionality of the SITOP UPS1600 and the PSU8600. Testing with PLCSIM is not possible. You can, however, load the AS program in PLCSIM and it is possible to set the signals of the redundancy and selectivity modules or display them. - Page 59 8 Commissioning the demo project If you do not have available a CPU 410-5H, then configure a new automation system. The procedure is as follows: 1. Create an AS according to your existing hardware. 2. Configure the external peripherals as shown in Chapters 4.1, 5.1.1, 5.2.1, 3.
-
Page 60: Operating Sitop Modular
8 Commissioning the demo project Operating SITOP modular 8.2.1 Overview of the power supply After starting runtime, switch to the “SITOP 24 V” system area. In this process picture, the system gives you the information below or you can carry out these operations: ... -
Page 61: Monitoring Of Redundancy
8 Commissioning the demo project 8.2.2 Monitoring of redundancy In the sample project, another process picture is configured for monitoring redundancy. You can call the picture by switching to the “SITOP Redundancy” sub-area. Figure 8-4 In the process picture, you will get the following information: ... -
Page 62: Monitoring Of The Dc Ups
8 Commissioning the demo project 8.2.3 Monitoring of the DC UPS In the sample project, another process picture is configured for monitoring the uninterruptible power supply. You can call the picture by switching to the “SITOP Buffering” sub-area. Figure 8-6 In the process picture, you will get the following information: ... - Page 63 8 Commissioning the demo project When monitoring via Industrial Ethernet/PROFINET, the uninterruptible power supply has its own block icon with faceplate. By installing the SITOP library, the necessary components are copied to your system. Below, we will give you a brief description displays on the Operator Station.
- Page 64 8 Commissioning the demo project Standard view In the standard view, you get detailed information about the operating status of the DC UPS. Figure 8-9 Alarm view Message view displays the messages of the block. Here, you can acknowledge individual messages or all of them. Figure 8-10 Integration of a SITOP 24 V Power Supply in PCS 7 Entry ID: 109481908,...
- Page 65 8 Commissioning the demo project Trend view In trend view, you can display all the important values as a curve progression. If value archiving is activated on the AS block, you can switch between current values and archive values. Figure 8-11 Note view In note view, you can store messages for other operating or maintenance personnel.
-
Page 66: Monitoring The Selectivity Module
8 Commissioning the demo project 8.2.4 Monitoring the selectivity module In the sample project, another process picture is configured for monitoring selectivity. You can call the picture by switching to the “SITOP Selectivity” sub-area. Figure 8-13 In the process picture, you will get the following information: ... -
Page 67: Operating The Psu8600 Power Supply System
8 Commissioning the demo project Operating the PSU8600 power supply system After starting runtime, switch to the “SITOP PSU8600” system area. The block icon of the PSU8600 (1) is stored in this process picture. Figure 8-15 When monitoring via Industrial Ethernet/PROFINET, the power supply system has its own block icon with faceplate. - Page 68 8 Commissioning the demo project Faceplate The faceplate for the PSU8600 makes available the following views: Standard view Alarm view (corresponds to the APL standard) Trend view (corresponds to the APL standard) Note view (corresponds to the APL standard) ...
- Page 69 8 Commissioning the demo project Expansion modules Clicking on the “Further Views” pushbutton (4) takes you to the pushbuttons for displaying the expansion modules. The number of pushbuttons that are displayed depends on the hardware configuration. You can monitor the status of the expansion modules here. Figure 8-18 Buffer modules Clicking on the “Further Views”...
-
Page 70: References
SITOP library for PCS 7 V8.0 and V8.1 https://support.industry.siemens.com/cs/ww/en/view/109476154 Generic Station Description (GSD) for SITOP UPS1600 https://support.industry.siemens.com/cs/ww/en/view/75854605 SITOP UPS1600/UPS1100 manual https://support.industry.siemens.com/cs/ww/en/view/84977415 SITOP PSU8200 1PH manual https://support.industry.siemens.com/cs/ww/en/view/92575279 SITOP PSE202U redundancy module manual https://support.industry.siemens.com/cs/ww/en/view/42248598 SITOP PSE200U selectivity module manual https://support.industry.siemens.com/cs/ww/en/view/61777451 \10\ SITOP PSU8600 power supply system manual https://support.industry.siemens.com/cs/ww/en/view/105867947...
Need help?
Do you have a question about the SITOP PSU8200 and is the answer not in the manual?
Questions and answers