CDVI GALEO Installation Manual
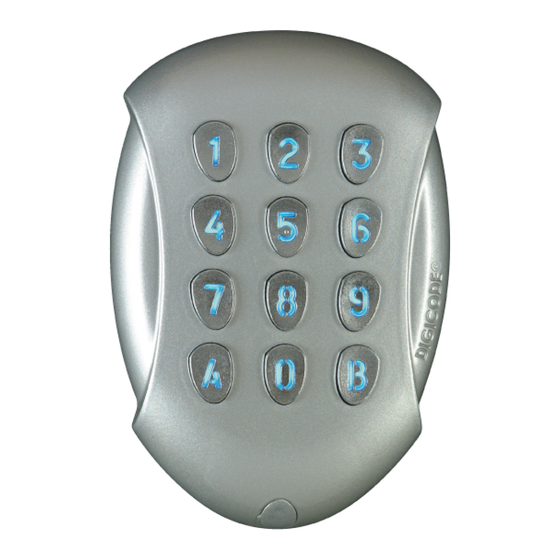
Illuminated weatherproof keypad with remote electronics
Hide thumbs
Also See for GALEO:
- Installation manual (28 pages) ,
- Installation instructions manual (6 pages) ,
- Installation manual (25 pages)
Table of Contents

Subscribe to Our Youtube Channel
Related Manuals for CDVI GALEO


Summary of Contents for CDVI GALEO
- Page 1 ENGLISH ESPAÑOL GALEO Illuminated weatherproof keypad with remote electronics Teclado retroiluminado resistente a la intemperie con electrónica externa The installer’s choice cdvigroup.com...
-
Page 2: General Information
2] NOTES & RECOMMENDATIONS Cable Mounting recommendations The distance between the GALEO and the remote electronic can not exceed more than 10 meters. Mount the keypad on a flat surface to avoid Make sure that the cable is not near by a high vol- any vandalism and to insure the best mounting. -
Page 3: Mounting Kit
Recommendations»). Place the back supplied (M4x30) mounting placing first the top in the hooks plate of the GALEO on the wall and screws. and then the bottom. the bracket of the remote electronic then mark with a pen the hole location then drill the 2 mounting holes (drill bit Ø... - Page 4 INSTALLATION MANUAL GALEO Illuminated Weatherproof Keypad with remote electronics 5] WIRING DIAGRAM GALEO 2 RELAY OUTPUTS D - 693 : Remote electronics P3 jumper allows to the user to modify its own Pin code. To enable this feature put the jumper on.
- Page 5 INSTALLATION MANUAL GALEO Illuminated Weatherproof Keypad with remote electronics 6] WIRING DIAGRAM GALEO 3 RELAY OUTPUTS D - 693 : Remote electronics P3 jumper allows to the user to modify its own Pin code. To enable this feature put the jumper on.
-
Page 6: Changing The Master Code
INSTALLATION MANUAL GALEO Illuminated Weatherproof Keypad with remote electronics 7] PROGRAMMING DEFAULT VALUES AUDIBLE SIGNAL: program a code. The master code and - Without codes. The buzzer indicates different the Pin code can be of 4 or 5-digit code. - Illumination time: 10 seconds. -
Page 7: Adding, Changing Or Deleting A User Code
INSTALLATION MANUAL GALEO Illuminated Weatherproof Keypad with remote electronics 2. Press A5 to modify the master code. default value master code). 2 beeps are emitted One beep is emitted. Enter the new 4 or 5 digit to confirm entry in programming mode. - Page 8 PROGRAMMING INSTRUCTION H. SETTING A SUB MASTER CODE Programming instructions are the same as for the GALEO keypad with 1 relay output. The Sub Master code allows the user to change its GALEO 2: 2 relay outputs N/O and N/C contacts own code without entering in programming mode.
- Page 9 Code Name location location location GALEO Relay 1 (1 output) GAleo relays 2 (2 output) GAleo relays 3 (3 outputs) Relay 1 : From user location Relay 1 : From 00 to 59, Relay 1 : From 00 to 59, REMINDER 00 to 99.
-
Page 10: Programming Chart
INSTALLATION MANUAL GALEO Illuminated Weatherproof Keypad with remote electronics 14] PROGRAMMING CHART Enter Master code twice 2 x beeps Illumination Time Relay 1 Time Relay 2 Time Relay 3 Code length Master code duration 1 x beep 1 x beep... - Page 11 INSTALLATION MANUAL GALEO Illuminated Weatherproof Keypad with remote electronics Sub master Sub master Sub master Buzzer (Audible Reset User codes code 1 code 2 code 3 feedback) 00-99 1 x beep 1 x beep 1 x beep 1 x beep...
-
Page 12: Presentación Del Producto
MANUAL DE INSTALACIÓN GALEO Teclado retroiluminado con electrónica externa Gracias por depositar su confianza en CDVI con la adquisición de este producto. 1] PRESENTACIÓN DEL PRODUCTO Acabado en aluminio. retroiluminado. Faible encombrement. Test a vibraciones Disponible con 2 y 3 relés. -
Page 13: Instrucciones De Montaje
«Notas y Recomendaciones» para placa trasera del GALEO utilizando coloque el GALEO en la placa tra- más información). Coloque la placa los tornillos M4x30 suministrados. sera. Comience por los enganches trasera del GALEO y de la electrónica... - Page 14 MANUAL DE INSTALACIÓN GALEO Teclado retroiluminado con electrónica externa 6] DIAGRAMA DE CONEXIONADO GALEO CON 2 SALIDAS DE RELÉ Electrónica externa El jumper P3 permite cambiar a un usuario su propio código de acceso. Para activar esta función, coloque el jumper. (Para más información, acuda al...
- Page 15 MANUAL DE INSTALACIÓN GALEO Teclado retroiluminado con electrónica externa 7] DIAGRAMA DE CONEXIONADO GALEO CON 3 SALIDAS DE RELÉ D - 693 : Electrónica externa El jumper P3 permite cambiar a un usuario su propio código de acceso. Para activar esta función, coloque...
- Page 16 MANUAL DE INSTALACIÓN GALEO Teclado retroiluminado con electrónica externa 8] PROGRAMACIÓN Introduzca 2 veces el código maestro 2 pitidos Tiempo de Tiempo de Tiempo de Tiempo de Longitud de iluminación del activación del activación del activación del Código maestro códigos teclado relé...
- Page 17 MANUAL DE INSTALACIÓN GALEO Teclado retroiluminado con electrónica externa Programación Sub-código Sub-código Sub-código Señalización Resetear de códigos de maestro 1 maestro 2 maestro 3 sonora usuarios 00-99 1 pitido 1 pitido 1 pitido 1 pitido 1 pitido 4 o 5 cifras...
- Page 18 En ese momento, el código maestro volverá a ser corto confirmará la acción. 1 2 3 4 5 y todos los códigos de usuario se borrarán. Después de esto, el GALEO entrará en 3. Teclee B para salir del modo de programa- modo de stand-by.
- Page 19 00. Otro pitido confirmará la programación. En función del número de relés de su teclado GALEO (1, 2 o 3), los grupos de usuarios asociados 3. Programación de relés: a cada relé serán diferentes: Relé 1 (Grupo 1) : Teclee A1.
- Page 20 3. Introduzca el nuevo código de acceso. Para activar dichas señales, pulse 1. Se emitirán 2 pitidos cortos para confirmar la valida- ción del nuevo código y el GALEO volverá al modo de Se emitirá 1 pitido corto para confirmar la progra- stand-by.
- Page 21 Posición Código Apellidos Apellidos Apellidos GALEO - Modelo de 1 Relé GALEO - Modelo de 2 Relés GALEO - Modelo de 3 Relés Grupo 1: Desde 00 hasta 99. Grupo 1: Desde 00 hasta 59. Grupo 1: Desde 00 hasta 59.
- Page 22 MANUAL DE INSTALACIÓN GALEO Teclado retroiluminado con electrónica externa 8] NOTAS cdvigroup.com...
- Page 23 MANUAL DE INSTALACIÓN GALEO Teclado retroiluminado con electrónica externa cdvigroup.com...
- Page 24 Referencia : G0301ES0431V02 Extranet : EXE-CDVI_IM GALEO CMYK A5 EN-ES 01 *G0301es0431V02* CDVI Group FRANCE (Headquarter/Siège social) Phone: +33 (0)1 48 91 01 02 Fax: +33 (0)1 48 91 21 21 CDVI CDVI FRANCE + EXPORT IBÉRICA Phone: +33 (0)1 48 91 01 02...
Need help?
Do you have a question about the GALEO and is the answer not in the manual?
Questions and answers