Table of Contents
Advertisement
Available languages
Available languages
Quick Links
π
H-5805
TORK
MATIC
®
®
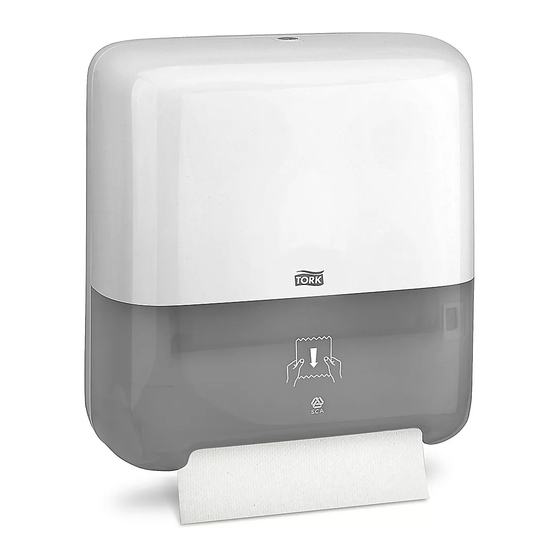
TOWEL DISPENSER
TOOLS NEEDED
Drill
Dispenser x 1
USING THE KEY AND OPTIONAL PUSH BUTTON MODE
USING THE KEY
1. To open dispenser while keeping it locked, insert key
at position A. (See Figure 1)
2. Turn and hold key clockwise to open dispenser.
(See Figure 2)
NOTE: Release key back to position A after
closing to lock dispenser.
PAGE 1 OF 12
1-800-295-5510
uline.com
MANUAL
6mm Drill Bit
Phillips Screwdriver
Dispenser Key x 1
Figure 1
Figure 2
PARTS
Wall Anchor x 4
USING PUSH BUTTON MODE
1.
Insert key at position A. (See Figure 1)
2. Turn counterclockwise to position B. (See Figure 3)
3. Remove key and push in lock to open dispenser.
(See Figure 4)
Para Español, vea páginas 5-8.
Pour le français, consulter les pages 9-12.
Screw x 4
Figure 3
Figure 4
0516 IH-5805
Advertisement
Table of Contents

Summary of Contents for U-Line TORK MATIC H-5805
- Page 1 Para Español, vea páginas 5-8. Pour le français, consulter les pages 9-12. π H-5805 1-800-295-5510 uline.com TORK MATIC MANUAL ® ® TOWEL DISPENSER TOOLS NEEDED Drill 6mm Drill Bit Phillips Screwdriver PARTS Dispenser x 1 Dispenser Key x 1 Wall Anchor x 4 Screw x 4 USING THE KEY AND OPTIONAL PUSH BUTTON MODE USING THE KEY...
-
Page 2: Mounting Instructions
MOUNTING INSTRUCTIONS NOTE: Recommended mounting height is 48" 3. Remove template from wall. Insert wall anchors (if necessary) into four previously drilled holes. Hold from the floor to the bottom of the dispenser. If using template, recommended mounting dispenser up to wall so holes in wall and dispenser height is 48"... -
Page 3: Maintenance
LOADING INSTRUCTIONS CONTINUED 2. Pull paper out slightly so it covers roller and the 4. Close dispenser and pull paper out of dispenser arrows below it. (See Figure 10) using two hands to ensure a fresh sheet for initial dispensing. Ensure refill gauge on front cover is green. -
Page 4: Troubleshooting
TROUBLESHOOTING OPERATING ISSUE CAUSES RECOMMENDATIONS Paper is not visible. Paper is not properly loaded. Arrows are embossed on the dispenser to show where the paper should be loaded. Place paper between rollers. Push bar to feed through mechanism. There is a paper jam. Open cassette cover (place fingers on both sides of cassette, locate raised tabs, pull cover towards you and down). -
Page 5: Herramientas Necesarias
π H-5805 800-295-5510 uline.mx TORK MATIC ® ® DESPACHADOR MANUAL PARA TOALLAS HERRAMIENTAS NECESARIAS Taladro Broca de Taladro Desarmador de Cruz de 6 mm PARTES 1 Despachador 1 Llave de Despachador 4 Taquetes 4 Tornillos USAR LA LLAVE Y EL MODO DE BOTÓN PULSADOR OPCIONAL USAR LA LLAVE USAR EL MODO DE BOTÓN PULSADOR Para abrir el despachador mientras permanece... -
Page 6: Instrucciones De Instalación
INSTRUCCIONES DE INSTALACIÓN NOTA: La altura de instalación recomendada 3. Quite la plantilla de la pared. Inserte los taquetes (si son necesarios) en los cuatro orificios previamente es de 1.22 m (48") desde el suelo hasta la taladrados. Sostenga el despachador contra parte inferior del despachador. -
Page 7: Mantenimiento
CONTINUACIÓN DE LAS INSTRUCCIONES DE CARGA 2. Jale del papel ligeramente hacia afuera de 4. Cierre el despachador y jale del papel para manera que cubra el rodillo y las flechas que hay sacarlo del despachador con las dos manos, asegurándose de que hay una hoja de papel debajo del mismo. -
Page 8: Solución De Problemas
SOLUCIÓN DE PROBLEMAS PROBLEMA DE FUNCIONAMIENTO CAUSAS RECOMENDACIONES El papel no queda a la vista. No se cargó el papel Hay flechas grabadas en el despachador para indicar apropiadamente. dónde debe cargarse el papel. Coloque el papel entre los rodillos. Empuje la barra para insertarlo a través del mecanismo. -
Page 9: Outils Requis
π H-5805 1-800-295-5510 uline.ca TORK MATIC – DISTRIBUTEURS DE SERVIETTES MANUEL OUTILS REQUIS Perceuse Mèche de perceuse de 6 mm Tournevis cruciforme PIÈCES Distributeur x 1 Clé de distributeur x 1 Ancrage mural x 4 Vis x 4 UTILISATION DE LA CLÉ ET DU MODE BOUTON-POUSSOIR (OPTIONNEL) UTILISATION DE LA CLÉ... -
Page 10: Instructions D'installation
INSTRUCTIONS D'INSTALLATION REMARQUE : Il est recommandé d'installer le 3. Retirez le gabarit du mur. Insérez les ancrages muraux (au besoin) dans les quatre trous prépercés. distributeur à une hauteur de 1,2 m (48 po) à Maintenez le distributeur au mur afin de faire partir du plancher jusqu'au bas du distributeur. -
Page 11: Entretien
INSTRUCTIONS DE CHARGEMENT SUITE INSTRUCTIONS DE CHARGEMENT SUITE 2. Tirez légèrement le papier afin qu'il recouvre le 4. Fermez le distributeur et sortez le papier du rouleau d'alimentation et les flèches en dessous. distributeur en utilisant vos deux mains pour vous (Voir Figure 10) assurer qu'une nouvelle feuille est présente pour commencer la distribution. -
Page 12: Dépannage
DÉPANNAGE PROBLÈME CAUSES RECOMMANDATIONS La papier n'est pas visible. La papier n'est pas chargé Les flèches sont en relief sur le distributeur pour indiquer où le papier doit correctement. être chargé. Placez le papier entre les rouleaux. Poussez la barre pour alimenter le papier à...


Need help?
Do you have a question about the TORK MATIC H-5805 and is the answer not in the manual?
Questions and answers