Table of Contents
Advertisement
Quick Links
ATTENTION ELECTRICIANS:
ANY PROBLEMS FOUND DURING INSTALLATION OF THE FAN PLEASE CONTACT THE NATIONAL
WARRANTY NUMBER PRIOR TO LEAVING SITE. DO NOT REMOVE THE FAN FROM THE CEILING
UNLESS INSTRUCTED TO DO SO.
National Warranty Number | 1300 116 305
NOTE: THIS FAN MUST BE INSTALLED BY A LICENSED AND QUALIFIED
ELECTRICIAN
without light
with light
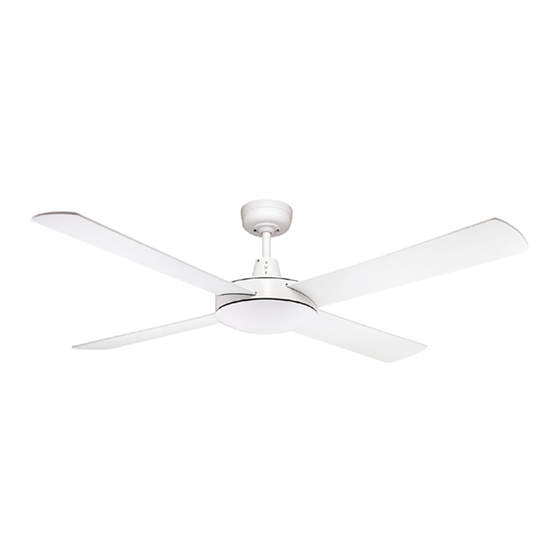
Four Blade 48"or 52"
Four Blade 48"or 52"
IN
ACCORDANCE
WITH
Monday to Friday 9am to 5pm AEST
LOCAL
AUTHORITY
Australian Edition Version 1.0 August 2019
REGULATIONS
Advertisement
Table of Contents
Troubleshooting

Related Manuals for Fanco Urban 2 Outdoor


Summary of Contents for Fanco Urban 2 Outdoor
- Page 1 without light with light Four Blade 48”or 52” Four Blade 48”or 52” ATTENTION ELECTRICIANS: ANY PROBLEMS FOUND DURING INSTALLATION OF THE FAN PLEASE CONTACT THE NATIONAL WARRANTY NUMBER PRIOR TO LEAVING SITE. DO NOT REMOVE THE FAN FROM THE CEILING UNLESS INSTRUCTED TO DO SO.
- Page 2 IMPORTANT INFORMATION - PLEASE READ BEFORE ATTEMPTING INSTALLATION Please read these instructions carefully, be mindful of all warnings and safety information shown throughout this manual. Should you have any questions please call 1300 116 305. Please review the accompanying assembly diagrams before attempting installation. This fan MUST be installed by a licensed &...
-
Page 3: Fan Assembly
LOCATION AND INSTALLATION REQUIREMENTS Provide adequate clearance from the floor. The lowest point on the fan blades must be at least 2.1m (7 feet) from floor level in Australia. Ceiling Make sure that the chosen location of the fan will not allow the rotating fan blades to come into contact with any objects. - Page 4 FAN ASSEMBLY DANGER! Before commencing installation, turn off electricity supply at the main power box or disconnect power by removing fuse or turning off circuit breaker. This fan must be installed by a licensed and qualified electrician in accordance with local authority regulations. Firstly connect internal wiring by clipping connectors together [a] [push into locked position], then [b] connect mains active, neutral and earth wires to supply terminal block on mounting plate.
- Page 5 INSTALLING FAN BLADES Remove the two screws from the covering plate of blade-fixing hole. Insert blades one at a time through four slots around the centre band and secure with three screws for each blade through the top opening. Repeat this procedure for all blades Replace the cover plate and secure with two screws once all four blades have been firmly fitted.
- Page 6 FAN WITH LIGHT EXPLODED DIAGRAM NOTE: THIS FAN MUST BE INSTALLED BY A LICENSED AND QUALIFIED ELECTRICIAN IN ACCORDANCE WITH LOCAL AUTHORITY REGULATIONS...
- Page 7 FAN WITHOUT LIGHT EXPLODED DIAGRAM National Warranty Hotline|1300 116 305 Monday to Friday 9am to 5pm AEST...
- Page 8 FAN WITH LED LIGHT EXPLODED DIAGRAM NOTE: THIS FAN MUST BE INSTALLED BY A LICENSED AND QUALIFIED ELECTRICIAN IN ACCORDANCE WITH LOCAL AUTHORITY REGULATIONS...
- Page 9 DETAILED WIRING DIAGRAMS W H LIGHT(LED) W H LIGHT(E27) CAPACITOR CAPACITOR (CE-2) (CE-2) (CE-2) (CE-2) ORANGE ORANGE (CE-2) (CE-2) (CE-5) (CE-5) YELLOW YELLOW GREY GREY (CE-2) (CE-2) reverse reverse (CE-2) Black (CE-2) Black W HOUT LIGHT CAPACITOR (CE-2) (CE-2) ORANGE (CE-2) (CE-2) YELLOW...
-
Page 10: General Maintenance And Cleaning
GENERAL MAINTENANCE & CLEANING Regular cleaning of the ceiling fan blades and fan motor housing is the only maintenance that is required. Regular cleaning will reduce the build up of dust that can cause the fan to become out-of-balance (wobble). To reduce the possibility of electric shock or injury, it is highly recommended to isolate power to the ceiling fan. -
Page 11: Balancing Fan / Wobbling Trouble Shooting
BALANCING FAN / WOBBLING TROUBLE SHOOTING Please note that all ceiling fans are not the same, even in the same model—some may move more or less than others. Movement of a couple of centimetres is quite acceptable and does not suggest the fan will fall down. Even though all blades are weighed and grouped by weight, it is impossible to eliminate wobble altogether. -
Page 12: General Troubleshooting
GENERAL TROUBLESHOOTING PROBLEM POSSIBLE CAUSES PROBABLE SOLUTIONS Fan does not power Fuse or circuit breaker blown Loose power line connections Check main and branch circuit fuses or circuit to the fan breakers Reversing switch (where Check line wire connections to fan applicable) neither up or Push switch either fully up or down (Warning: The ceiling... - Page 13 CEILING FAN WARRANTY INFORMATION The warranty of the Urban 2 Outdoor is handled on behalf of Fanco Australia by Aero DC. This warranty applies only to Australian states and its mainland territories. The benefits of this warranty are in addition to any rights offered under state or territory law.
-
Page 14: Not Covered By Warranty
NOT COVERED BY WARRANTY. Any damage incurred after delivery to the owner that is not caused by a fault in the products materials or workmanship; damage from lightning or power surges; incorrect installation; damage due to incorrect installation; noise or other influence of ripple control or information access systems operated over power delivery infrastructure; water damage of any kind;... - Page 15 DOCUMENTS TO RETAIN FOR FUTURE WARRANTY CLAIMS TO ASSIST WITH ANY WARRANTY CLAIMS ATTACH THE FOLLOWING DOCUMENTS FOR FUTURE REFERENCE. Copy of the Purchasing Receipt. Proof of Professional Installation - in-accordance with local authority Regulations (copy of installation Invoice, Safety Certificate or letter on Letter head including licence details) National Warranty Hotline|1300 116 305 Monday to Friday 9am to 5pm AEST National Warranty Hotline|1300 116 305...
- Page 16 Distributed by EM Imports Pty Ltd 10 Overlord Place Acacia Ridge Queensland Australia 4110 Warranty & Support: AeroDC Ph: 1300 116 305 support@aerodc.com.au National Warranty Hotline|1300 116 305 Monday to Friday 9am to 5pm AEST NOTE: THIS FAN MUST BE INSTALLED BY A LICENSED AND QUALIFIED ELECTRICIAN IN ACCORDANCE WITH LOCAL AUTHORITY REGULATIONS...
Need help?
Do you have a question about the Urban 2 Outdoor and is the answer not in the manual?
Questions and answers