Table of Contents
Advertisement
Quick Links
Advertisement
Table of Contents

Related Manuals for Fanco EarthFirst Gaia DC


Summary of Contents for Fanco EarthFirst Gaia DC
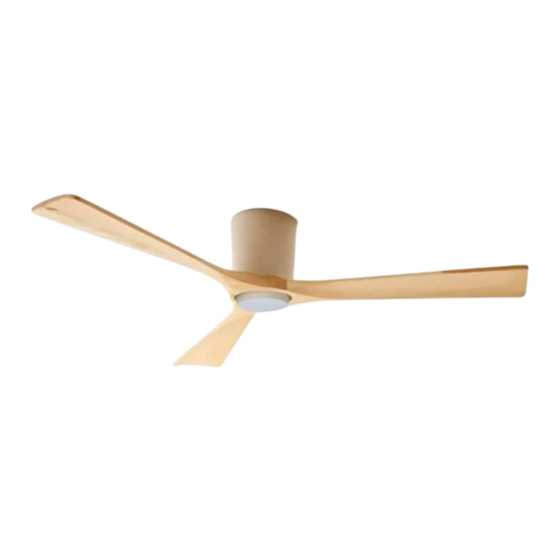
- Page 1 Gaia Installation Manual Part of the EarthFirst Range Version 1.0...
-
Page 2: Important Safeguards
CEILING FAN INSTRUCTION BOOKLET Thank you for purchasing your Fanco Gaia DC Ceiling Fan. Please read all instructions carefully before assembly and use. IMPORTANT SAFEGUARDS: Read all instructions carefully, even if you feel you are quite familiar with this type of appliance. When... -
Page 3: Important Note
21. The LED light panel in the light kit (light models) is user replaceable as it connects with 'Push Plug' wiring. It is user replaceable ONLY with Fanco certified replacement LED panels. Using unauthorised parts may damage the fan, cause undesired results, or be a safety hazard. - Page 4 PREPARATION: 1. Unpack your ceiling fan carefully, then remove all parts and components, and lay on a cloth or soft surface to avoid damage. DO NOT lay the motor housing on its side as the housing may get damaged. 2. Before commencing installation, check that all parts are included. NOTE: You may need to remove all packaging material to ensure there are no missing parts.
-
Page 5: Installation And Assembly
INSTALLATION AND ASSEMBLY: CAUTION! Before installing the fan make sure you have turned OFF the electricity supply. SELECTING A LOCATION: 1. Choose a location for mounting the fan where the blades will have at least 2.1 metres of clearance from the floor. 2. -
Page 8: Installation Steps
INSTALLATION STEPS: IMPORTANT: Ensure the power is OFF when installing this fan. 1. Remove two (2) screws completely, and loosen two (2) screws from the Hanging Plate. 2. Separate the Motor Assemble from the Hanging Plate. Hanging Plate Motor Assembly 3. - Page 9 4. Hang the complete assembly onto the 6. Once connected, remove the ‘S’ Hook. hanging plate using the supplied ‘S’ Hook. 7. Replace the two (2) screws, and tighten two 5. Connect the cables to the receiver. (2) screws from the Hanging Plate. IMPORTANT: Position the receiver inside the canopy, taking care to ensure no cables are in a position where they may become damaged.
- Page 10 10. Align one (1) FSC 100% Solid Timber Blade to the screw holes to the bottom of the motor and attach with the screws provided. IMPORTANT: Use a hand tool ONLY. IMPORTANT: Tighten firmly once all blades are installed. DO NOT over-tighten. 11.
- Page 11 2. Insert the light wire from the fan through the centre of the Light Plate. 3. Screw the Light Plate to the motor shaft and ensure it is firmly in place. 4. Connect the push plug wire of the Light Kit to the push plug wire from the motor. 5.
-
Page 12: Care And Cleaning
7. Align the grooves of the Light Ring with the grooves of the Light Kit Plate and twist into place. IMPORTANT: Do not overturn. LIGHT ADAPTABLE MODELS (WITH NO LIGHT COVER) 1. Align the No Light Cover with the base of the fan and rotate until firmly in place. IMPORTANT: Do not overturn. - Page 13 WOBBLE: • Ceiling fans are designed to move during operation because they are not generally rigidly mounted • Movement of a couple of centimetres is acceptable for safe operation. • Balancing kits included should be used to adjust the balance when first installed. NORMAL WEAR AND TEAR: Vigorous cleaning or rough handling of the fan may cause threaded components to work loose or blade carriers to bend.
-
Page 14: Functions Of The Remote Control
INSTALLING MULTIPLE FANS: Sometimes you may encounter a remote-control issue when installing multiple fans. For the purposes of this troubleshooting guide: Fan A uses Remote control A and Receiver A, while Fan B uses Remote control B and Receiver B. •... -
Page 15: Troubleshooting
TROUBLESHOOTING: Trouble Possible Cause Suggested Remedy Fans does not start after Remote and receiver are not Re-pair the receiver and remote pairing process. paired successfully Battery flat in remote control Replace the battery in remote control Loose wire connections or Check wire connections and ensure plugs are plugs to fan/receiver positively connected...
Need help?
Do you have a question about the EarthFirst Gaia DC and is the answer not in the manual?
Questions and answers