
Subscribe to Our Youtube Channel
Related Manuals for Speco Intensifier O2iB50M


Summary of Contents for Speco Intensifier O2iB50M
- Page 1 Intensifier® IP Bullet Camera QUICK INSTALLATION GUIDE O2iB50M Please read this manual carefully before installation and operation of the product.
- Page 2 Thank you for purchasing this product. This guide is designed to be a reference tool for the product. Please read it carefully before operating the product and retain it for future reference. Should you require any technical assistance, please contact Speco Technologies Technical Support. CAUTION...
-
Page 3: Limitation Of Liability
PRECAUTIONS Please read the manual carefully before the installation in order to set up the camera correctly and to obtain the best picture quality. Installation and services should only be carried out by an authorized personnel according to local safety regulations. -
Page 4: Product Overview
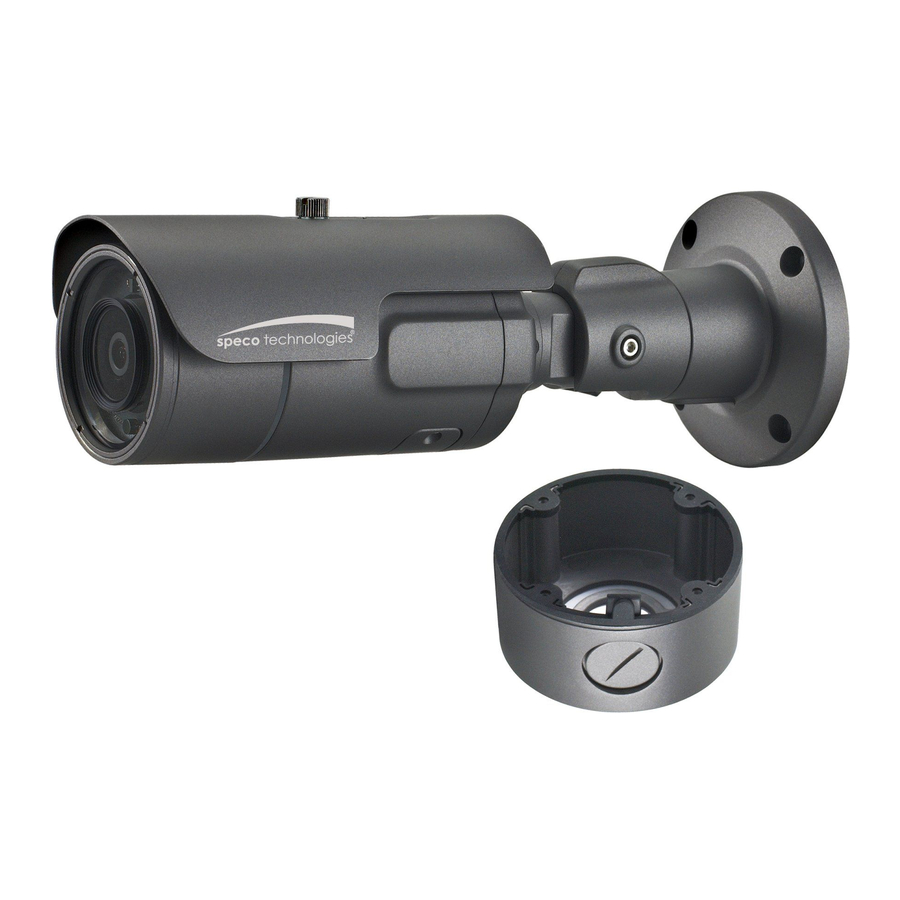
1. PRODUCT OVERVIEW Key Features 2.0 Mega pixel 1/2.8" SONY progressive sc an CMOS image sensor for excellent image quality IP67 rated weather-proof 2.7 ~ 12mm / 5.0 ~ 50mm X10 Optical zoom Cable managed bracket ... -
Page 5: Name And Function Of Each Part
DSS, Corridor-view (in H.264), Mirror / V-Flip, etc. Backlight WDR (Low / Middle / High) Shutter Speed 1/4 ~ 1/2000 Noise Reduction 2D / 3DNR Audio Streaming Two-way, Full-Duplex Audio G.711 Compression Audio Data / Sample 64Kbps / 8KHz Rate Audio Input / Microphone input / 1x Line-In, Line-Output / 1x Line-Out Output... -
Page 6: Name And Function
L-Wrench (4mm) x 1 L-Wrench (2.5mm) x 1 Junction Box x 1 Screw (M4 x 12L) x 4_ (Junction Box) CD x 1 2.2 Name and Function ITEM DESCRIPTION Power Connector DC12V Network and POE POE (Power Over Ethernet) and LAN cable Connector Sensor Input : White(Sensor_In), Yellow(GND) Sensor In / Alarm Out... -
Page 7: Installation
2.3 OSD cap detailed description SD Card Factory Reset Closing Cap L-Wrench (2.5mm) Closing Cap Open Open the Closing Cap and fasten the Closing Cap well. 3. INSTALLATION 3.1 How to mount to wall Wall_Junction Box Plastic anchor Tapping screw (Ø4 x 30) x 4 Screw x 4... -
Page 8: Installation Example
① Panning 360˚ Slightly loosen Pan Bracket nut then Panning adjust pan of the camera and 360° tighten the Bracket nut. ② Tilt 0˚ ~ 100˚ Rotation Tilt Slightly loosen Tilt bolt then 360° Rotation Tilt Pan 0°100° adjust tilt of the camera and tighten the bolt firmly. - Page 9 3.3.3 Accessing the Camera or video server’s Homepage 1) Open the browser and enter the camera’s IP address in the address bar or double click the device in IP Scanner. Enter the IP address here 2) Enter the user name and password when prompted. 3) Default user name is admin and password is 1234.
-
Page 10: Dimensions (Mm)
4. DIMENSIONS (mm)
Need help?
Do you have a question about the Intensifier O2iB50M and is the answer not in the manual?
Questions and answers