Neptune E4000 Installation Manual
Electronic register
Hide thumbs
Also See for E4000:
- Supervisor manual (2 pages) ,
- Operator's manual (2 pages) ,
- Operator's manual (2 pages)
Table of Contents
Advertisement
M-303
Rev. M
Neptune E4000 Electronic Register
Installation Manual
IMPORTANT: To ensure proper installation of this product, thoroughly review the
information in this revision of the manual. Information is subject to change as
new features are implemented. Failure to follow instructions may result in system
malfunction.
www.redsealmeasurement.com
Advertisement
Table of Contents

Related Manuals for Neptune E4000


Summary of Contents for Neptune E4000
- Page 1 M-303 Rev. M Neptune E4000 Electronic Register Installation Manual IMPORTANT: To ensure proper installation of this product, thoroughly review the information in this revision of the manual. Information is subject to change as new features are implemented. Failure to follow instructions may result in system malfunction.
- Page 2 WARNINGS, CAUTIONS AND NOTES Throughout this manual you will see WARNINGS, CAUTIONS and NOTES. They are here for your benefit and warrant attention. By paying careful attention to them you can prevent injury and possible equipment damage. Below are examples: WARNINGS: INFORM THE READER OF POSSIBLE BODILY INJURY IF PROCEDURES ARE NOT FOLLOWED EXACTLY.
-
Page 3: Esd Precautions
ATTENTION - OBSERVE PRECAUTIONS FOR HANDLING ELECTROSTATIC SENSITIVE DEVICES. Caution - This electronic device is sensitive to damage from ESD (electrostatic discharge). Observe the following precautions when servicing this device. Electronic devices with exposed connectors are highly susceptible to damage by electro- static discharge (ESD). -
Page 4: Table Of Contents
4.1 Introduction 4.2 Check Parts 4.3 Truck Preparation 4.4 Removing the Existing Register and Mechanical ATC 4.5 Installing the E4000 on the Meter 4.6 Installing the RTD 4.7 Wiring the RTD 4.8 Installing the Single Stage LPG Solenoid Valve 4.9 Wiring the Single Stage LPG Solenoid Valve 4.10 Installing the Dual-Stage LPG Valve... - Page 5 5.4 Removing the Existing Register 5.5 Installing the E4000 on the Meter 5.6 Installing the RTD 5.7 Wiring the RTD 5.8 Installing the Dual Stage Petroleum Valve 5.9 Wiring the Dual Stage Petroleum Valve 5.10 Installing the E4000 Junction Box 5.11 Wiring the E4000 Register Head...
-
Page 6: Functional Overview
100 deliveries in battery-backed memory. (Battery life is approximately 10 years.) The driver controls the E4000 from a push button panel on the front of the register. This allows yes/no type decisions to be made and numerical values to be entered that are associated with delivery functions. -
Page 7: Specifications And Approvals
2. SPECIFICATIONS AND APPROVALS 2.1 Specifications Display 143 x 19 mm text area • 2 lines, 20 characters per line • 8.3 x 5.9 mm character area • Power Rating (supply from isolating or battery source) 9-16 VDC, 14.6 VDC nominal •... -
Page 8: Custody Transfer Approval
UL Suitable for use in Class 1, Division 2, Group A, B, C and D or non-Hazardous locations only. The E4000 Electronic Register is UL approved when installed and operated in accordance with this manual. Modifications to the unit or deviations from specified usage may invalidate the UL... -
Page 9: System Components
3. SYSTEM COMPONENTS 3.1 E4000 Register Head The E4000 electronic register is designed and field proven to withstand the harsh environment on tank trucks. The enclosure is plastic with a NEMA 3 rating. The E4000 can be mounted directly on the positive... -
Page 10: Keypad
This correction is mandatory for some products under Weights and Measures legislation in certain states and countries. The probe is a 100 ohm RTD. The E4000 measures the product temperature during delivery and uses the approved API volume correction table for the product at that temperature. -
Page 11: Valve Control
Dual stage valves are also available for making preset deliveries of LPG or petroleum (figures 3-5 & 3-6). The E4000 has 2 relays which control the two-stage shut off either by volume or monetary amount. The first stage reduces flow by 90% to slowly bring delivered volume up to the preset amount. -
Page 12: Junction Box
There are two modes of operation with an external computer: 1. The computer is running the E4000 Configuration Program and is temporarily connected to the junction box to change non metrological parameters and update stand alone pricing. -
Page 13: Installation, Lpg (Mechanical Meter)
4. INSTALLATION, LPG (MECHANICAL METER) 4.1 Introduction Before attempting to install an E4000 read this manual! To simplify installation and reduce the time required, follow the directions provided in this document. Each installation will vary depending on the layout and overall condition of the truck, the fluid being measured, and the installer’s experience with electronic registers and flowmeters. -
Page 14: Installing The E4000 On The Meter
4.5 Installing the E4000 on the Meter Note: If fitting an E4000 to a meter that has previously been in service, this is a good time to inspect the measuring chamber and gear train. Neptune RL200 with ATC Cover Remove the star wheel from the meter drive shaft and add the shaft extension as shown in figure 4-1. -
Page 15: Installing The Rtd
The RTD is a 4 wire shielded probe. There is a cable entry port specifically for the RTD on the side of the E4000. Run the cable through this port and connect the wires to the RTD terminals 6, 7, 8 and 12 as shown in figure 4-13. If mounting the RTD in the strainer cover ensure enough slack to allow the strainer cover to be removed for servicing. -
Page 16: Installing The Single Stage Lpg Solenoid Valve
4.8 Installing the Single Stage LPG Solenoid Valve Mount the solenoid valve to the meter body (as shown) using the bracket provided. For LPG installation, mount the valve with the ports configured as shown in figure 4-7. Connect the COM port of the solenoid valve to the top of the differential valve. -
Page 17: Installing The Dual-Stage Lpg Valve
E4000 register (section 4-13). Connect the white wire to terminal 23 and the black wire to terminal 24 on the register’s POWER 12 VDC terminal strip (figure 4-13). Connect the orange wire to terminal 18 (PRESET), and the blue/black wire from the twisted pair to either black wire from the solenoid valve (there is no required polarity for the solenoid valve) and secured with the supplied wire nut. - Page 18 Figure 4-11. Dual Stage Valve Wiring Conduits Remove the center hole plug from the E4000 register base and install the supplied 90 degree conduit nipple in the center port at the rear of the register. A supplied rubber gasket should be installed over the threads of the 90 degree conduit nipple before it is inserted in the port of the register.
-
Page 19: Installing The Junction Box And Printer
Placing grommets on any holes to prevent cable damage is recommended. The power/data cable should pass through the right side port of the E4000 register as viewed from the rear (figure 4-16). Make the connections as shown in the wiring diagrams for the E4000 register (figure 4-13, single- stage valve or figure 4-14, dual-stage valve). - Page 20 Figure 4-13. Register Wiring for LPG, Mechanical Meter, Single Stage Valve Figure 4-14. Register Wiring for LPG, Mechanical Meter, Dual Stage Valve...
-
Page 21: Wiring The Junction Box
HHC DATA wiring, even if you are not using a hand-held computer, because this is also required to communicate with the register when using the E4000 configuration program. Note: Terminal 5 of the HHC block and the SHIELD terminals on the HHC and POWER blocks are not used. -
Page 23: Installing The Printer
(figure 4-20). (This is for software EA.01.05.E and later versions.) 4.16 Connecting Power to the Junction Box The junction box for the E4000 Electronic Register includes a voltage regulator to ensure that Figure 4-21. Junction Box (Voltage Figure 4-22. In-line 5A Fuse Holder... - Page 24 (figure 4-25). With all connections completed turn the ignition switch to the ON position. The E4000 will power up as indicated by the LCD back light illuminating. Replace the E4000 register cover taking care to position the cover gasket correctly.
-
Page 25: Connecting A Mobile Computer
Figure 4-25. Using the Self-Stripping Power Tap. 4.17 Connecting a Mobile Computer To operate with the E4000, a mobile computer plugs into a 9 pin serial connector on the junction box. Red Seal Measurement has prepared a communications protocol document specifying how a computer can interface directly to the register. -
Page 26: Installation, Petroleum
Adapter Ring 5.6 Installing the RTD E4000 registers equipped with an RTD (figure 5-2) are supplied with a ½” NPT male threaded thermowell. The thermowell can be positioned in the available dual-port strainer cover (figure 5-3). To ensure good conductivity to the RTD, fill the thermowell with anti-freeze or mineral oil... -
Page 27: Wiring The Rtd
The RTD is a 4 wire shielded probe. There is a cable entry port specifically for the RTD on the side of the E4000. Run the cable through this port and connect the wires to the RTD terminals 6, 7, 8 and 12 as shown in figure 5-9. If mounting the RTD in the strainer cover ensure enough slack to allow the strainer cover to be removed for servicing. - Page 28 Figure 5-4. Dual Stage Petroleum Valve Figure 5-6. Conduit Fittings degree conduit nipple, on the outside of the register. Check the conduit nipples for a watertight seal. The first stage main valve (pre-warn) is controlled by the solenoid that is connected by tubing from a port on the top of the valve through a three-way valve to two ports on one side of the valve.
-
Page 29: Installing The E4000 Junction Box
(figure 5-8). Route the 40 ft. power/data cable from the E4000 register head at the rear of the truck before permanently fixing the junction box. Route the cable away from sharp edges, drive train components, hot exhaust components, or other sources of potential damage. -
Page 30: Wiring The E4000 Register Head
The power/data cable should pass through the right side port of the E4000 register as viewed from the rear (figure 5-11). Make the connections as shown in the wiring diagram for the E4000 Figure 5-9. Register Wiring for Petroleum, Dual Stage Valve... -
Page 31: Wiring The Junction Box
(figure 5-9). The colors of the wires are shown in the diagram for identification purposes. The numbers correspond to the E4000 terminal strip position to which the wire is connected. See figure 5-10 for an example of proper wire routing and connection. -
Page 33: Installing The Printer
(figure 5-14). (This is for software EA.01.05.E and later versions.) 5.14 Connecting Power to the Junction Box The junction box for the E4000 Electronic Register includes a voltage regulator to ensure that the unit receives clean power within the appropriate voltage range. The box comes prewired for printer power and truck power connections, and has an in-line 5A fuse on the power input (figure Figure 5-15. - Page 34 (figure 5-19). With all connections completed turn the ignition switch to the ON position. The E4000 will power up as indicated by the LCD back light illuminating. Replace the E4000 register cover taking care to position the cover gasket correctly.
-
Page 35: Connecting A Mobile Computer
Figure 5-19. Using the Self-Stripping Power Tap 5.15 Connecting a Mobile Computer To operate with the E4000, a mobile computer plugs into a 9 pin serial connector on the junction box. Red Seal Measurement has prepared a Communications Protocol document specifying how a computer can interface directly to the register. -
Page 36: Installation With Rml2000 Lpg Mass Flowmeter
6. INSTALLATION WITH RML2000 LPG MASS FLOWMETER The following diagrams show the register head and junction box wiring for the E4000 when used in conjunction with the Neptune RML2000 mass flow meter. For complete information on the installation of this system, see the RML2000 installation manual, M-614. - Page 37 Figure 6-2. Register Wiring for LPG, RML2000 Mass Flow Meter, Single Stage Valve Figure 6-3. Register Wiring for LPG, RML2000 Mass Flow Meter, Dual Stage Valve...
-
Page 38: Start Up And Calibration
7. START UP AND CALIBRATION The E4000 will turn on automatically on power up. This is indicated by the LCD display illuminating, followed by a screen test operation and a display of the software version. The screen will stop at the root software menu in the following condition:... -
Page 39: W&M (Weights And Measures) Mode
Note: Complete software details are listed in the E4000 Software Manual 7.3 W&M Mode (Weights and Measures Mode) The W&M Mode is the menu selection allowing a technician to calibrate the E4000 to the flowmeter it will operate with. The Weights and Measures menu is only accessible via a physically sealed internal calibration switch positioned on the side of the register. -
Page 40: Configuring The E4000
This procedure applies to E4000 firmware version EA.01.08E and later. The firmware version of the E4000 can be determined by viewing the display during the first 5 seconds after powering up the register (the version will be shown in the lower left corner of the display), or by printing a calibration report. -
Page 41: Calibrating The Temperature Probe (Rtd)
6. Select the correct temperature units according to local standards. [Enter] TEMPERATURE SCALE Deg_C Deg_F 7. Select the required display resolution for the volume units. [Enter] VOLUME RESOLUTION 0.01 0.001 8. Select the type of input pulses to be counted. [Enter] NOTE: For a mechanical positive displacement meter, set PULSE TYPE to QUAD. -
Page 42: Calibrating The E4000 Volumetric K-Factor
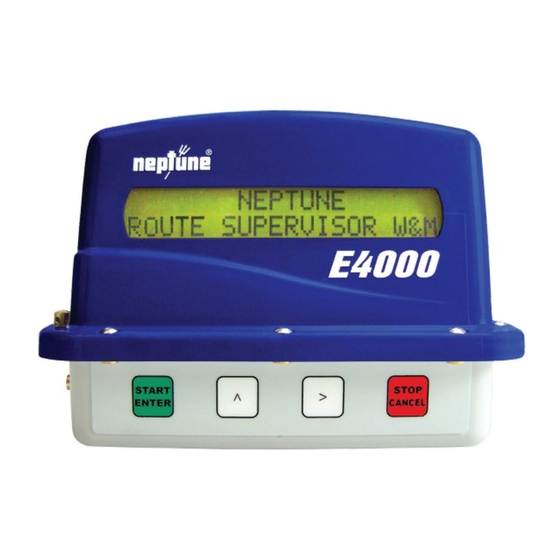
To print a shift report: 1. From the NEPTUNE root menu, press either > or ^ on the four button front panel, until ROUTE is flashing, then press the START/ENTER button. ROUTE SUPERVISOR W&M... - Page 43 2. Press > or ^ until REPORTS is flashing, then press the START/ENTER button. DELIVERY VOLUME REPORTS 3. Press > or ^ until SHIFT is flashing, then press the START/ENTER button. SHIFT CALIBRATION 4. Press the START/ENTER button when the display reads “PRINT END_OF_SHIFT REPORT?” PRINT END_OF_SHIFT REPORT? 5.
- Page 44 3. Select [^] the desired product code for the fluid to be calibrated 0-9, and press [Enter]. SELECT PRODUCT CODE 4. Assign a name to the product code selected. Scroll [>] [^] through the characters to enter the name, and then press [Enter]. PRODUCT NAME PROPANE 5.
- Page 45 8. Verify the K-Factor is entered correctly, and press [Enter]. K-FACTOR CORRECT? XXXXXX/UNIT Auto-calibration using an approved volumetric prover 9. To prepare for the calibration tests first wet down and zero the prover. If the register controls flow, press [Enter] to open the solenoid valve. Open the prover manual valve to allow fluid into the prover.
- Page 46 14. Press [Enter}, and open the prover manual valve to allow fluid into the prover. As fluid flows gross and net volumes are displayed as before. GROSS XXXXXXX XXXXXXX Note: Pressing [Stop/Cancel] at any time during the AUTO CALIBRATION procedure will close the solenoid valve, if equipped, and flow cannot continue until [Enter] is pressed to re-open the solenoid valve.
- Page 47 *Note: For LPG, corrections must be made for the difference in temperature of the product as it passed through the meter and the temperature of the product as it occupies the prover, along with a correction for the thermal expansion of the prover based on it’s temperature, and also a correction of the prover volume based on pressure effects, when calculating the Gross(uncompensated) volume of the prover.
- Page 48 Note: Insert 4 ½”x 11” paper into the printer 1. From the NEPTUNE root menu, press either of the white buttons > or ^, on the four button front panel, until “ROUTE” is flashing, then press the green START/ENTER button.
-
Page 49: Installation Checklists
1 ohm (measured with power to the E4000 system switched off). ___ Attach TRUCK FRAME connection as a separate wire (not same wire as TRUCK... - Page 50 ___ Check that port C (N/O) of the valve is connected to line pressure. System ___ Check to see that the E4000 LCD Display turns on automatically when the truck ignition is ___ Configure the E4000 (Section 7.4.1). ___ Set the BATCH mode in the Supervisor menu to program the correct valve operation (Section 7.2).
-
Page 51: E4000 Initialization Procedure
Allen wrench or stiff wire. With the switch depressed, press the Ʌ button and the red Stop button at the same time. While all three are pressed, turn on the power to the E4000 system. This may require two people. - Page 52 The product/system data is now entered, and you can return from the supervisor menu to the root menu by pressing the STOP button. 9. The E4000 initialization procedure is now complete, and the system is ready to make deliveries. Select ROUTE in the root menu, then DELIVERY to begin.
-
Page 53: Introduction To Responsible Recycling (R2)
10. INTRODUCTION TO RESPONSIBLE RECYCLING (R2) Purpose This information is provided to help you properly manage used and end-of-life E4000 R2 Focus Materials, also known as FMs. FMs are materials in end-of-life electronic equipment that warrant greater care during recycling, refurbishing, materials recovery, energy recovery, incineration, and/ or disposal due to their toxicity or other potential adverse worker health and safety, public health, or environmental effects that can arise if the materials are managed without safeguards. - Page 54 State] http://www.epa.gov/epawaste/partnerships/plugin/partners.htm [manufacturers and retailers who have committed to collecting, reusing, or recycling old electronics] Materials that must be properly disposed of: E4000 Material to be disposed of Printed circuit boards and components, which contain silver, • gold, tin, and copper Transformers, which contain, internally and externally, copper, •...
-
Page 55: Power/Data Cable Wire Color Conversion Chart
11. POWER/DATA CABLE WIRE COLOR CONVERSION CHART The power/data cable used for connecting the E4000 to the junction box was changed in 2009. The cur- rent cable contains individual wires instead of twisted pairs, and the identifying colors for the wires are different. - Page 56 1310 Emerald Rd. Greenwood, SC 29646 Phone: 800-833-3357 Fax: 864-223-0341 M-303(K) E4000 O&M 09/12...
Need help?
Do you have a question about the E4000 and is the answer not in the manual?
Questions and answers
HOW TO FIX DATE WILL NOT CHANGE