B&G h1000 system User Manual
Hide thumbs
Also See for h1000 system:
- Installation manual (38 pages) ,
- User manual (35 pages) ,
- User manual (27 pages)
Table of Contents

Related Manuals for B&G h1000 system


Summary of Contents for B&G h1000 system
- Page 1 HB-1000D Issue: 0001...
- Page 2 You can access any information from any display unit, so even one display unit can do everything providing the sensors are in the system. Before you begin using your new h1000 System, please take the time to read this manual to help you achieve the full potential from your new system.
-
Page 3: Warnings & Precautions
h1000 introduction certification w a r n i n g s & p r e c a u t i o n s : w a r n i n g s & p r e c a u t i o n s : WARNING: DO NOT USE AN ALCOHOL BASED CLEANER ON THIS DISPLAY. -
Page 4: Table Of Contents
h1000 contents contents Overview Certification Warnings & Precautions: Trademarks Contents Display overview Lighting Controls Switching on and off Switching On Switching Off Default Data Pages Default factory settings Display format Display Formats Custom Pages Pages Composite Pages Track Screen Depth Pilot Display Main Menu Menu System... -
Page 5: Contents
h1000 contents contents Wind calibration Wind Calibration Compass calibration Compass Calibration System System set-up Compass Tactical Compass Display Storing the course Last tack information Alarms Alarm conditions Error Conditions Data Failure Technical specifications Installation Precautions Panel mounting Electrical connections External Connections Interface connections Connections System expansion... - Page 6 h1000 overview System overview Page 5...
-
Page 7: Display Overview
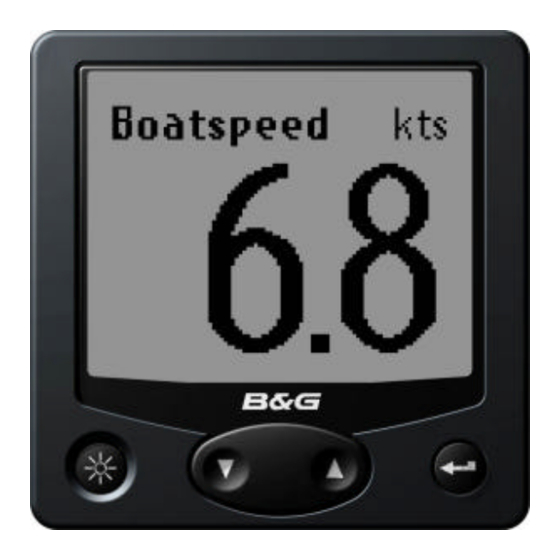
h1000 overview display overview Title Line Highlighted Data Entry Field Menu Item Additional returns to commands are previous menu displayed here when highlighted light controls The lighting level can be changed at any time by pressing the LIGHTS key. This causes the lighting level to cycle in the sequence high - medium - low - off and then back to high. -
Page 8: Switching On And Off
Page 7 of this manual. The flexibility of the h1000 of display system allows an endless combination formats to suit individual needs. Stored Log examples of the default data pages Switching Off Turning off the 12 Volt power supply will power off the h1000 System Page 7... -
Page 9: Default Factory Settings
h1000 getting started fault factory settings Language: English Speed/Distance Units: Nautical Miles Depth Units: Metres Wind Speed Units: Knots Bearing Reference: Magnetic Date Format: Day-Month-Year Time Reference: UTC (universal time coordinate) changing display format display formats The display can be customised for personal preferences using the page contents menu. -
Page 10: Track Screen
h1000 getting started graphical pages graphical pages There are four full screen graphical pages available when the appropriate data is on the system. These pages are viewed by selecting Page Contents from the Main Menu, and then selecting the Full Screen option from the Select Format page. -
Page 11: Main Menu
h1000 main menu main menu menu system From any data page, press the E N T E R E N T E R key to access the h1000 menu system. The M a i n M e n u M a i n M e n u will be displayed. -
Page 12: Memories
h1000 memories memories memories This menu covers various features of the system in which user-supplied data is stored for future use. compass The compass memory holds the current course and can also be user defined. Port and Starboard courses are retained and are updated at each E N T E R E N T E R key press whilst in the Tactical compass Tactical compass page. -
Page 13: Lighting
h1000 calibrations memories alarms Note: all alarms are set to when they leave the factory. When an alarm condition occurs, all displays will show an alarm window which identifies the alarm and displays the current value. If an external alarm is connected to the Universal Interface, this will also sound. -
Page 14: Calibration
h1000 calibrations calibrations calibration Calibration values take time and effort to set up and it is often necessary to perform various manoeuvres with the boat. For this reason, an optional security check is provided before entry into the Calibration Menu to prevent accidental resets. security pin The security PIN check uses a four digit Personal Identification Number or PIN. -
Page 15: Depth Calibration
h1000 calibrations depth calibration depth calibration Depth calibration allows the units of measurement, damping and transducer offset to be adjusted. depth units Depth values can be shown in metres, feet or fathoms. To change the units, highlight Unit and press ENTER. -
Page 16: Speed Calibration
h1000 calibrations speed calibration speed calibration Speed calibration sets the units of measurement, damping and speed calibration factor (Refer to the flow chart detailed on P age 15). units Boat speed values can be shown in knots, kph or mph. To change the units, highlight Unit and press ENTER. - Page 17 h1000 calibrations speed calibration adjustment – ref Reference speed adjustment, allows for quick and easy calibration of your boat speed readings against a known calibrated source; for example, speed over the ground from a GPS or alongside another boat with a calibrated log.
-
Page 18: Wind Calibration
h1000 calibrations wind calibration wind calibration Wind calibration sets the wind speed measurement units, damping, and masthead unit offset. The masthead unit offset can be adjusted while observing the live apparent wind angle on the same page (Refer to the flow chart detailed on Page 17). wind speed - units Wind speed values can be shown in knots, kph, mph or m/s. - Page 19 h1000 calibrations wind calibration Page 18...
-
Page 20: Compass Calibration
h1000 calibrations compass calibration compass calibration The Compass Calibration Menu sets the heading offset, damping, and swing parameters for the h1000 fluxgate compass (Refer to the flow chart detailed on Page 19). compass offset The compass offset electronically compensates for fixed errors (misalignment) between the flux-gate sensor and the direction of the boat. - Page 21 h1000 calibrations compass calibration Note: passed is shown under the Swing title when a successful compass swing has been stored Page 20...
-
Page 22: System
h1000 system system set-up system set-up The system menu configures parameters that affect the system as a whole (Refer to the flow chart detailed on Page 21). remote unit setup Remote unit setup allows configuration of units that do not have a keyboard; for example, 3FD’s and Analogue meters. - Page 23 h1000 system system Page 22...
-
Page 24: Compass
h1000 tactical compass compass function tactical compass display When a compass and a wind sensor are connected to the system, the Tactical Compass function becomes available as a full page display option. After a tack or gybe, and the yacht is sailing a steady course, press the ENTER key to store the displayed heading. -
Page 25: Alarms
h1000 alarms alarms As well as responding to user input the display also shows information about external events reported over the network and allows the user to respond. There are three types of external event: Alarm conditions Error conditions Data failure alarm conditions Alarm conditions arise when a measured parameter moves outside a range of set values. - Page 26 h1000 alarms alarms error conditions An error condition arises when a h1000 unit detects an internal malfunction or when an outside element behaves inconsistently (for example, if the autopilot sends a rudder drive signal but fails to detect any resulting rudder movement). The unit that detects either type of problem broadcasts an error message and the displays respond by showing an error overlay window.
-
Page 27: Technical Specifications
h1000 specifications technical specifications • Dimensions: 110mm x 110mm • Power consumption: 50mA = approx 1 BEN (Max. 60 BEN per System) Digital Display 3 BEN Analogue Display 2 BEN Speed/Depth Interface Box 3 BEN Wind Interface Box 1 BEN Universal Interface Box 1 BEN 3 BEN... -
Page 28: Installation
h1000 installation installation precautions To avoid electromagnetic interference, it is recommended that the h1000 Display be installed no less than 0.3 metres from a compass and 1 metre from the GPS. The h1000 Display is Waterproof to IP67. Use the cover when not in use. The rear connectors that are not connected to cables must remain protected by their appropriate caps. -
Page 29: Electrical Connections
h1000 installation electrical connections external connections Two FastNet² connectors are provided at the rear of the unit. These connectors allow connection to the rest of the system for the supply of power and data. Pin Number Signal Busy FastNet²- FastNet²+ Front view of male connector pins interface connections... -
Page 30: System Expansion
h1000 system expansion system expansion pilot features The h1000 Pilot is a fully functional Autopilot which can be used either as a stand-alone system or integrated into an instrument system. • The LCD panel is an FSTN, positive, transflective type having 120 pixels horizontally and 80 pixels vertically. -
Page 31: 3Fd Features
Configure each line with information to suit your requirements • Simple and easy to use with h1000 Display • Interfaces with the h1000 System via the FastNet² data bus. • 3 levels of lighting controlled by any h1000 display •... - Page 32 h1000 system expansion system expansion diagram Page 31...
-
Page 33: Abbreviations
h1000 abbreviations definitions abbreviations COG = Course Over Ground Direction of the path over ground actually followed by a boat, derived from a GPS SOG = Speed Over Ground A calculation of the rate of movement of the boat over the ground, derived from a GPS TWA = True wind angle Angle between boats heading and true wind direction... -
Page 34: Warranty
h1000 warranty warranty 1. warranty Brookes & Gatehouse Limited (“B&G”) guarantees this product against defects in materials or workmanship on the terms and conditions set out below (the “Warranty”). 2. warranty period The Warranty continues for 24 months from the date of purchase by the user’s (excluding mechanical items, including but not limited to, autopilot drive units which are subject to 12 months warranty). - Page 35 h1000 warranty warranty 6. software B&G shall not be liable under this Warranty or otherwise for any defect in software incorporated within the product. 7. further warranties The Warranty set out in this document is the only Warranty offered by B&G. B&G makes no further promises in relation to this product such as (but not limited to): 7.1.
Need help?
Do you have a question about the h1000 system and is the answer not in the manual?
Questions and answers