Table of Contents
Advertisement
Index
pag.
3
pag.
3
pag.
4
pag.
4
pag.
5
pag.
6
pag.
7
pag.
7
pag.
7
pag.
8
pag.
8
pag.
10
pag.
10
pag.
10
pag.
10
pag.
10
pag.
10
pag.
11
pag.
11
pag.
11
pag.
11
- 1 -
User manual
pag.
12
pag.
12
pag.
12
pag.
13
pag.
14
pag.
14
pag.
15
pag.
15
pag.
15
pag.
16
pag.
16
pag.
17
pag.
17
pag.
17
pag.
17
pag.
18
pag.
19
pag.
20
pag.
20
pag.
21
pag.
22
pag.
22
pag.
23
pag.
23
pag.
24
pag.
25
pag.
25
Advertisement
Table of Contents

Related Manuals for GE GLX+Q 1 1COM 16A 2M AST IR


Summary of Contents for GE GLX+Q 1 1COM 16A 2M AST IR
-
Page 1: Table Of Contents
■ Automatic operation pag. Index 1. NIGHT PROGRAM C1 menu pag. 1.1 NIGHT C1 display pag. 1.2 Change NIGHT C1 pag. ■ Safety warnings pag. 2. Menu HOLIDAY PROGRAM pag. ■ Technical characteristics 2.1 Creating a HOLIDAY program pag. pag. ■... - Page 2 • Two versions with GLX+Q 1 1COM 16A 2M AST IR 1 relay and P1 fixed programming with GLX+Q 1 2COM 16A 2M AST IR 2 relays: relay 1 programmable...
-
Page 3: Safety Warnings Pag
2) After installation, it must be made impossible to access the • Output: terminals without specific tools - GLX+Q 1 1COM 16A 2M AST IR: 1 relay with changeover contact 3) Before accessing the connection terminals, verify that the 16(10)A / 250Vac... -
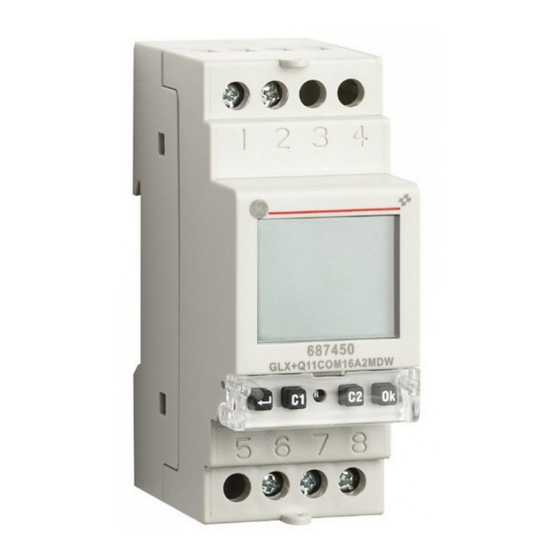
Page 4: Dimensions Pag
DIMENSIONS CONNECTION DIAGRAMS GLX+Q 1 1COM 16A 2M AST IR GLX+Q 1 2COM 16A 2M AST IR - 4 - User manual... -
Page 5: Display And Keypad Description Pag
Field “holiday program” DISPLAY AND KEYPAD DESCRIPTION Field “CET/DST” Field “key functions” Key “ ”: menu/esc/check battery activation Key “Ok”: confirm value/activation IR transmission Key “C1”: decreases the value/menu back/ switching relay 1/lock relay 1 Key “C2”: increases the value/menu forward switching relay 2/lock relay 2 Key “R”: resets settings Field “text1 / day”... -
Page 6: Installation Pag
• Use a pointed object to press the “R” key to reset it. The display INSTALLATION segments will turn on for a few seconds, then the instrument will switch to IR reception mode. • The instrument is supplied with the battery not installed to prevent Note: in the case of a mains power failure, IR reception is not useless consumption. -
Page 7: Setting The Language Pag
Setting the language Setting the date format 5 languages It is possible to select between are available: the dd-mm-aa and Italian, English, yy-mm-dd formats. Spanish, French, German. ➢ Select the format with “C1” and “C2”. ➢ Select ➢ Confirm with “Ok”. the language with “C1”... -
Page 8: Setting The Time Pag
Setting the coordinates/province When the day is being entered, the capital display will show a bar with the corresponding day of the week By setting the geographical (1Ò Monday, 7Ò Sunday). coordinates, the instrument is able to automatically Setting the time calculate the sunrise and sunset times for each day The parameter (hours, minutes) - Page 9 • if a language other than Italian is page). The display will show the date, selected, the following parameters time, relay status, day of the week (in must be entered: letters on the top row, in numbers at the bottom) and the CET / DST symbol. - latitude - longitude Note: if the instrument is not powered...
-
Page 10: Manual Operation Pag
MANUAL OPERATION PRE-SET PROGRAMS (only for GLX+Q 1 2COM 16A 2M AST IR) GLX+Q 1 2COM 16A 2M AST IS is equipped with 6 pre-set programs Switching on/off manually that allow you to program the instrument’s night behaviour. Press the “C1” (“C2”) key briefly to P1 program switch the output relay 1 (relay 2, if present). - Page 11 P3 program P5 program This program sets switch on at sunset This program sets switch on at a and switch off at dawn, with a night-time programmable time (after sunset) and interruption in which the relay is temporarily switch off at dawn. in the off position.
-
Page 12: P1 Program Pag
From the normal operating status: The default settings are the following: ➢ Press key “ ” • GLX+Q 1 1COM 16A 2M AST IR: - Program P1 (unchangeable) ➢ Select PROGRAM with “C1” and “C2” • GLX+Q 1 2COM 16A 2M AST IR: and confirm with “Ok”... -
Page 13: 1.2 Change Night C1
To go from one screen to the ➢ Enter the parameters relative to the other, press keys “C1” and “C2”. selected program: P1: no parameter P2: no parameter P3: night switch off time, night switch on time P4: night switch off time P5: night switch on time P6: initial time of the impulse, duration of impulse... -
Page 14: Menu Holiday Program Pag
2. Menu HOLIDAY PROGRAM Note: the first and last date are to be considered included in the 2.1 Creating a HOLIDAY program holiday period ➢ Press “Ok” to confirm From the normal operating status: Once the programming is confirmed, ➢ Press “ ” the following message will appear on the display ➢... -
Page 15: Checking A Program Pag
➢ Select HOLIDAY CHECK and press The instrument’s memory makes it possible to store up to 4 holiday “Ok” to confirm periods + 20 holiday days. ➢ Choose the relay onto which Once the maximum capacity is reached, an attempt to store an to visualize the program additional program will cause the following message to be displayed holiday with “C1”... -
Page 16: Deleting A Program Holiday Pag
3. Programs reset ➢ At this point, new program parameters can be entered. The parameter being changed will flash. Use the keys “C1” Program reset make it possibile to delete all holiday events (days and and “C2” to set the values and press periods) saved in the instrument, in the case of GLX+Q 1 2COM 16A 2M “Ok”... -
Page 17: Settings Menu Pag
➢ press “Ok” twice to access the change mode or “ ” to exit SETTINGS MENU without changing ➢ select the language with “C1” and “C2” ➢ confirm with “Ok”. This menu is used to display and change the instrument’s general ➢... -
Page 18: Cet / Dst Change Menu Pag
➢ enter the time, minutes with will appear on the display and “C1” and “C2” the instrument will return to the main and press “Ok” to confirm page; if the function is active, press ➢ The following message will appear “C2”... -
Page 19: Position Menu Pag
The default values for the time change are: - if you want to change the province, select CAPITAL POSITION and press “Ok”. The - winter Ò summer change: last Sunday in March, 2:00 am - summer Ò winter change: last Sunday in October 3:00 am currently set province will be displayed: press “Ok”... -
Page 20: Correction Menu Pag
CORRECTION menu ➢ The message appears on the display to indicate the change that was made This function is used to change the sunrise and sunset time that is automatically calculated by the system (maximum correction ±120 At this point, pressing “Ok” on the main page, the corrected sunrise minutes). -
Page 21: Setting Reset Menu Pag
SETTING RESET menu If the PIN code request is active, the keypad will be locked approx. 3 minutes after the keypad was last pressed. At this This menu is used to reset all settings that were made, restoring the point, when pressed again, a request to factory values: enter the PIN code will appear. -
Page 22: Hour Meter Menu Pag
HOUR METER MENU RESET MENU The hour meter function indicates the total time in which the output The instrument’s default status can be reset with the reset function. remained in the on status. There are 4 different resets available: The hour meter range is between 0 and 99999 hours, when the - reset settings: deletes all settings that were made maximum limit is reached, it is automatically reset. -
Page 23: Ir Interface Pag
IR INTERFACE To transfer a program from GLX+Q AST to the remote control, first: The switches (GLX+Q 1 1COM 16A 2M AST IR and GLX+Q 1 2COM ➢ generate a program with the traditional method onl GLX+Q AST 16A 2M AST IR) have an IR interface that makes it easy to exchange (see “Automatic programming”) -
Page 24: Paste Function Pag
Paste function problem with the transmission is signalled with the message on the clock’s display. To transfer a program from the remote control to one or more GLX+Q AST, first: At this point, the programs and date and time settings are transferred to the ➢... -
Page 25: Battery Replacement Pag
BATTERY REPLACEMENT REFERENCE STANDARDS The battery charge level can be checked: Compliance with Community Directives 2014/35/EU (low voltage) - automatically by the instrument once a week - manually, hold down the “ ” key on the main page for 3 seconds. 2014/30/EU (E.M.C.D.) If the battery charge level is lower than the specific threshold, is declared in reference to the harmonized standard:... - Page 27 GENERAL ELECTRIC 41 Woodford Avenue Plainville, CT 06062 - USA...
Need help?
Do you have a question about the GLX+Q 1 1COM 16A 2M AST IR and is the answer not in the manual?
Questions and answers