Table of Contents
Advertisement
Quick Links
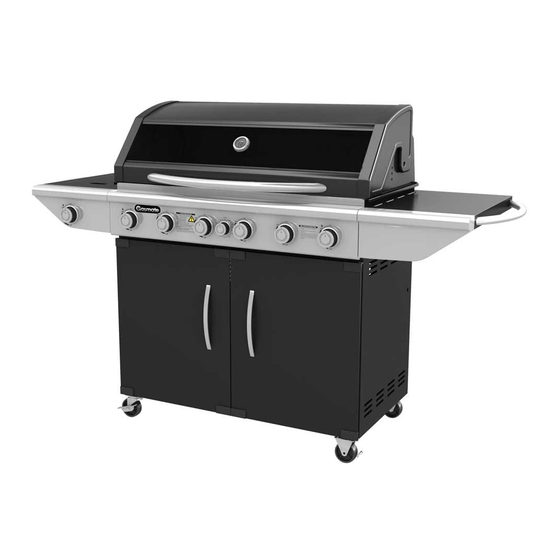
VEGA SPECIALIST
Vitreous enamel hood and body
Hood includes glass window and
temperature gauge
Sure-fire rotary ignition
Timer
Side burner
Gasmate
®
is a registered trademark of:
Important: Retain these instructions for future use
03313 06/15
BBQ SERIES
BQ8243 & BQ8262
Sitro Group Australia Pty Ltd
Aber – Hamilton, N.Z.
Cast iron rail burners
Cast iron grill and reversible hotplate
Certified for conversion to natural gas
Propane only
IAPMO Oceana certified
www.gasmate.com.au
www.gasmate.co.nz
Advertisement
Table of Contents

Subscribe to Our Youtube Channel
Related Manuals for Gasmate VEGA SPECIALIST Series


Summary of Contents for Gasmate VEGA SPECIALIST Series
- Page 1 Certified for conversion to natural gas Sure-fire rotary ignition Propane only Timer IAPMO Oceana certified Side burner Gasmate ® is a registered trademark of: Sitro Group Australia Pty Ltd www.gasmate.com.au Aber – Hamilton, N.Z. www.gasmate.co.nz Important: Retain these instructions for future use...
-
Page 2: Table Of Contents
CONTENTS GENERAL INFORMATION Gas Installation Codes Section Page • Barbecues must be used in accordance with the General information installation requirements of your gas supply authority, or the Australian Standard AS 5601. General assembly • Barbecues for use with bottled gas are labelled ‘propane gas’. -
Page 3: For Your Safety
Location of your Barbecue Always keep cylinder in an upright position. Always close the cylinder valve when the barbecue DO NOT use your barbecue in garages, porches, is not in use. sheds, breezeways, or other enclosed areas. Your Do not subject the cylinder to excessive heat. barbecue is to be used OUTDOORS. - Page 4 Nominal Hourly Gas Consumption Total Gas Number of Injector Size Injector Size Gas Type Consumption Pressure BBQ Burners BBQ Burner Side Burner MJ/h Ø 1.15mm 70 MJ/h 2.75 kPa Ø 1.15mm Ø 1.0mm 83 MJ/h 2.75 kPa Propane Ø 1.15mm 105 MJ/h 2.75 kPa Ø...
-
Page 5: General Assembly
GENERAL ASSEMBLY Disconnecting: Connecting & Disconnecting to 1. Ensure the burner control is in the the gas source ‘OFF’ position. 2. Ensure cylinder valve is in the full off position. Familiarise yourself with the general information and safety guidelines located at the front of this For storage and cylinder exchange, disconnect manual. -
Page 6: Operating Procedure
OPERATING PROCEDURE Burn-off Roasting The cooking surface does not need any burn-off For best results when roasting remove the time. Due to the nature of the coating, DO NOT hotplate and centre the grill. use sharp or metallic objects on the surface. The outer two burners should be used on the low to medium setting. -
Page 7: Care And Maintenance
CARE & MAINTENANCE Care & Maintenance Care of Cooking Surface As with all appliances, proper care and Use and care of the easy clean cooking surface is maintenance will keep them in top operating important. Do not use metal utensils or cut food condition and prolong their life. -
Page 8: Bq8243
4 BURNER BBQ EXPLODED DIAGRAM BQ8243 - EXPLODED DIAGRAM... -
Page 9: Bq8243
BQ8243 - COMPONENTS 1. Hood and body 2.Side burner assy x 3.Side shelf x 1 pc 4.Side shelf handle x 2 5.Left door x 1 pc assy x 1set 1set 6.Right door x 1 pc 7.4B Hot plate x 1 pc 8.4B Grill grate x 1 pc 9.4B Flame tamer x 1 10.4B Drip tray assy... -
Page 10: Bq8262
BQ8262 - EXPLODED DIAGRAM 6 BURNER BBQ EXPLODED DIAGRAM... - Page 11 BQ8262 - COMPONENTS 1.6B Hood and body 2. Side burner x 1pc 3. Side shelf x 1pc 4. Side shelf handle x 5.Left door x 1pc assy x 1set Right door x 1pc 7.3B Hot plate x 1pc 8.3B Grill Grate x 2pc 9.3BFlame tamer x 2pc 10.6B drip tray x 1pc 12.6B Base panel...
-
Page 12: Assembly Instructions
BQ8243 & BQ8262 ASSEMBLY INSTRUCTIONS STEP 1 Attach castors and wheels using M6*12 screws (16 pieces). STEP 2 Attach the cylinder tray using M6*12 screws (8 pieces) and M6 flange nuts (8 pieces). STEP 3 Attach the back panel using M6*12 screws on both sides (4 pieces). - Page 13 STEP 4 Attach the back panel, left side panel and right side panel to the bottom panel using M6*12 screws (5 pieces). STEP 5 Attach trolley front upper crossrail using M6*12 screws (4 pieces) STEP 6 Attach trolley top panel and trolley side top panel as shown using M6*12 screws (9 pieces).
- Page 14 STEP 8 Insert upper hinge pin into top bracket (8-1). Insert lower hinge screw into castor bracket (8-2) and secure with M4 lock nuts (2 pieces), (8-3). STEP 9 Attach the barbecue body onto the trolley using M6*12 screws (4 pieces - 2 per side). STEP 10 Attach the handles onto the side burner and side shelf...
- Page 15 STEP 11 Attach the side burner assembly onto the barbecue body using M6*12 screws (4 pieces), and M4*10 (1 piece) at the side shelf’s front panel. STEP 12 Attach the side shelf assembly onto the barbecue body using M6*12 screws (4 pieces), and M4*10 (1 piece) at the side shelf’s front panel.
- Page 16 STEP 14 Slot the warming rack into position as shown using the holes provided in the rear hood and BBQ body. Position each grill plate above a flame tamer. Insert the solid plate. STEP 15 Slide in the drip tray and secure with M4*10 screws (2 pieces) and M4 nuts (2 pieces), then locate the grease cup as shown.
- Page 17 STEP 17 Connect the hoses as shown. Feed the hose and regulator through side hole and connect the regulator to the cylinder. Note: Leak test all connections before using barbecue.
-
Page 18: Natural Gas Conversion
NATURAL GAS CONVERSION Conversion ONLY to be done by an authorised person. TO BE INSTALLED ONLY ON OR IN A SERVICING INSTRUCTIONS NON-COMBUSTIBLE ENCLOSURE Appliances should be serviced at least annually Note: Recommended clearances must be maintained. and servicing must only be carried out by a Licensed Plumber or Authorised Person. -
Page 19: Safe Locations
SAFE APPLIANCE LOCATIONS Within a partial enclosure that includes an overhead cover and more than two walls, the This appliance shall only be used in an above following will apply: ground open-air situation with natural ventilation, at least 25% of the total wall area is completely without stagnant areas, where gas leakage and open, and at least 30% of the remaining wall area products of combustion are rapidly dispersed by... -
Page 20: Notes
For any queries or assistance call Customer Service (Australia Only) 1300 174 876 Hours of operation: Monday to Friday 8.30am - 5.30pm EST Do not return to place of purchase. Keep your purchase receipt, this will be required to make any claims under the 12 month warranty.
Need help?
Do you have a question about the VEGA SPECIALIST Series and is the answer not in the manual?
Questions and answers