Table of Contents
Advertisement
Quick Links
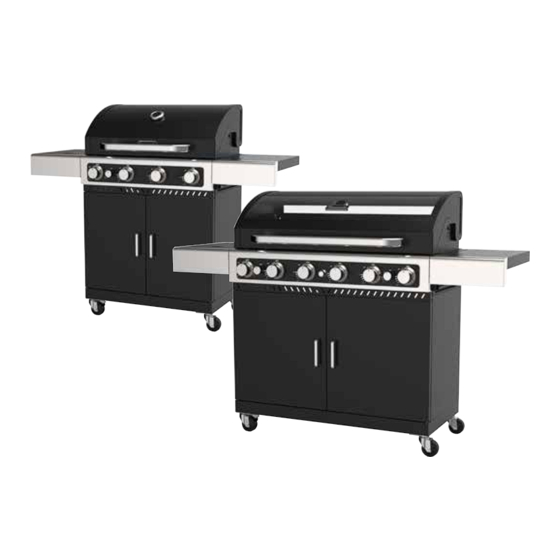
QUASAR HOODED
TROLLEY BBQ RANGE
Model No. BQ3471 (4 Burner), BQ3473 (6 Burner),
BQ3475 (PRO 4 Burner), BQ3477 (PRO 6 Burner)
LCC27 REGULATOR SUPPLIED
This LCC27 Regulator can only be used with the new safer industry standard LCC27 Gas Cylinder Connection.
OUTDOOR USE ONLY
Important: Retain these instructions for future use.
Gasmate
is a registered trademark of Sitro Group Australia Pty Ltd www.gasmate.com.au
04638 11/23
®
Aber Living, N.Z. www.gasmate.co.nz
Advertisement
Table of Contents

Subscribe to Our Youtube Channel
Related Manuals for Gasmate BQ3471


Summary of Contents for Gasmate BQ3471
- Page 1 This LCC27 Regulator can only be used with the new safer industry standard LCC27 Gas Cylinder Connection. OUTDOOR USE ONLY Important: Retain these instructions for future use. Gasmate is a registered trademark of Sitro Group Australia Pty Ltd www.gasmate.com.au 04638 11/23 ® Aber Living, N.Z. www.gasmate.co.nz...
-
Page 2: General Information
Keep these Main Burner (4) Ø 0.9mm Ø 1.48mm 10.8MJ/h (x4) instructions for future reference. one make sure this procedure is carried out in a flame BQ3471 54.7MJ/h Side Burner (1) Ø 0.92mm Ø 1.55mm 11.5MJ/h free atmosphere. -
Page 3: For Your Safety
GENERAL INFORMATION ASSEMBLY INSTRUCTIONS LOCATION OF YOUR BARBECUE FOR YOUR SAFETY DO NOT use your barbecue in garages, porches, • Never lean over cooking surface when lighting. Before assembling the barbecue, read these breezeways, sheds or other enclosed areas. Your Instructions carefully. - Page 4 QUASAR 4 EXPLODED DRAWING QUASAR 4 PARTS LIST No. Description No. Description Hood Burner assembly Thermometer Control panel assembly Hood handle Main control knob Warming rack Side burner control knob Cooking grill Firebox assembly Heat tent Manifold assembly Grease tray Regulator &...
- Page 5 QUASAR 6 EXPLODED DRAWING QUASAR 6 PARTS LIST No. Description No. Description Hood Burner assembly Thermometer Control panel assembly Hood handle Main control knob Warming rack Side burner control knob Cooking grill Firebox assembly Heat tent Manifold assembly Grease tray Regulator &...
- Page 6 QUASAR PRO 4 EXPLODED DRAWING QUASAR PRO 4 PARTS LIST No. Description No. Description Hood Firebox assembly Thermometer Manifold assembly Hood handle Regulator and Hose assembly Warming rack Left side panel Cooking grill Right side panel Heat tent Back panel Door beam Grease tray Door stopper...
- Page 7 QUASAR PRO 6 EXPLODED DRAWING QUASAR PRO 6 PARTS LIST No. Description No. Description Hood Firebox assembly Thermometer Manifold assembly Hood handle Regulator and Hose assembly Warming rack Left side panel Cooking grill Right side panel Heat tent Back panel Grease tray Door beam Grease cup...
- Page 8 ASSEMBLY INSTRUCTIONS ASSEMBLY INSTRUCTIONS HARDWARE STEP 3 Attach the door beam to the cabinet with 4 x M6x12 bolts (A) as shown below. Attach the door stopper with 2 x M5x12 A-31xM6x12 bolts B-4xM5x12 bolts C-4xM4x6 bolts bolts in the middle of the cabinet bottom shelf at the front. D-8xM6x15 bolts E-4xM6 nut F-4xM5x30 bolts...
- Page 9 ASSEMBLY INSTRUCTIONS ASSEMBLY INSTRUCTIONS STEP 5 STEP 8 Attach the doors to the cabinet with the hinge pins at top and bottom as shown below. Attach the left side burner front panel to the side burner shelf with 2 x M6x12 bolts (A). Attach the side shelf front panel to the side shelf with 2 x M6x12 bolts (A).
- Page 10 ASSEMBLY INSTRUCTIONS STEP 13 (PRO VERSIONS ONLY) STEP 11 Assemble the rotisserie as shown in the below diagram using 4 of the M6x12 bolts and the 4x M6 nuts. Attach the handle to the hood using 4 x M6x12 bolts (A). Attach all control knobs to control panel. Insert the flame tamers into the fire box over the left hand burners where the grill(s) will be located.
-
Page 11: General Assembly
GENERAL ASSEMBLY ASSEMBLY INSTRUCTIONS STEP 15 STEP 16 REGULATOR SAFETY FEATURE CONNECTING & DISCONNECTING TO GAS Step 12 Step 12 Step 13 Step 13 SOURCE Step 12 Step 13 Attach the regulator to your gas cylinder. Attach the regulator to your gas cylinder. Step 12 Attach the regulator to your gas cylinder. -
Page 12: Lighting Procedure
LIGHTING PROCEDURE BURNER OPERATION & IGNITION SYSTEM CHECK Before lighting your barbecue for the first time, read the SIDE BURNER Problem Possible Reason Solution instructions fully to ensure the barbecue is assembled 1. Lift up the side burner cover (ensure it is always open Valve on cylinder is closed Open the valve on the cylinder correctly and is ready for use. -
Page 13: Operating Procedure
OPERATING PROCEDURE CARE & MAINTENANCE It is recommended that the BBQ is regularly cleaned CLEANING THE CAST IRON COOKING BURN OFF COOKING SURFACES 7. Clean any clogged ports with a piece of stiff wire and should be serviced at least annually. Servicing must SURFACE (such as an opened paper clip). -
Page 14: Natural Gas Conversion
BBQ and connect the Natural Gas supply hose with High-flow Natural Gas Regulator. A chain It is recommended to use the Gasmate GM4025 High should be fixed between an anchor point near the Flow Natural Gas Kit or similar, with a high flow regulator gas supply and the BBQ to prevent movement of the and minimum of Ø10mm internal supply hoses to ensure... - Page 15 DIAGRAMMATIC REPRESENTATIONS OF OUTDOOR AREAS The following figures are diagrammatic representations of outdoor areas. Rectangular areas have been used in these figures – the same principles apply to any other shaped area. This appliance shall only be used in an above ground –...
Need help?
Do you have a question about the BQ3471 and is the answer not in the manual?
Questions and answers