Advertisement
Quick Links
Catalog
All
Details
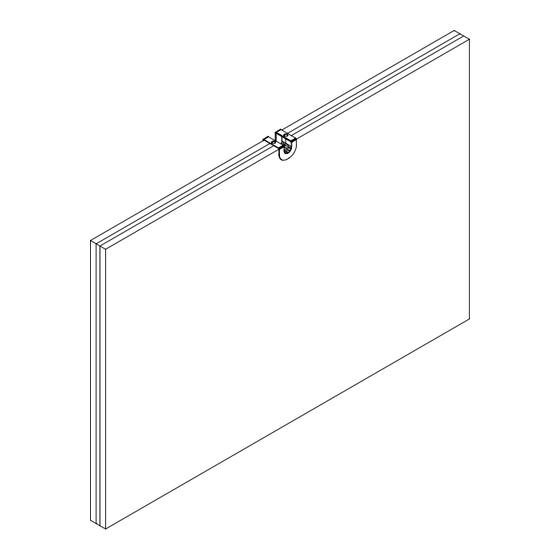
Wall Mounted Tack boards are installed by attaching clips directly to the wall, then attaching the tack board to the clips.
The tack board has pre-installed screws which the clips will hook onto.
Pre-installed
screws
Step 1 - Placement
Place the tack board on the wall and softly tap the
locations where the pre-installed screws are on the back.
This will dent/mark the wall with locations you will need.
Note: Use a soft mallet to avoid damaging the tack board
or loosening the screws on the back.
Note: Use a hard surface (wood block, metal plate,
etc...) to protect the fabric from damage when tapping
the tack board.
IMPORTANT: The tack board will require 5/8" of space
above the fi nal placement location in order to be installed.
Please plan either to mount the tackboards fi rst or allow
for this space between the tack board and any overheads
in use.
Step 2 - Attach Brackets to the wall.
Using the marks from step 1, mount the brackets onto the
wall with the supplied clip screws. Align the clip so you
can see the mark through the "U" in the top of the clip.
Product
Wall Mounted Tack boards (C-TACKINSTALLL) V2
Tack board
Phone: 800.434.7400 Fax: 978.562.0811 Web: www.ais-inc.com
Clip Screws
Mounting Clip
!
Allow for 5/8"
for overheads
5/8"
Predrill and use appropriate light duty wall anchors.
Wall Mark
© 2013, AIS
Date
01.30.13
Marks left by
screw heads
Wall Mark
1 of 2
Advertisement

Subscribe to Our Youtube Channel
Related Manuals for AIS C-TACKINSTALLL


Summary of Contents for AIS C-TACKINSTALLL
- Page 1 Date 01.30.13 1 of 2 Wall Mounted Tack boards (C-TACKINSTALLL) V2 Details Wall Mounted Tack boards are installed by attaching clips directly to the wall, then attaching the tack board to the clips. The tack board has pre-installed screws which the clips will hook onto.
- Page 2 Date 01.30.13 2 of 2 Wall Mounted Tack boards (C-TACKINSTALLL) V2 Details Wall Mounted Tack boards are installed by attaching clips directly to the wall, then attaching the tack board to the clips. The tack board has pre-installed screws which the clips will hook onto.
Need help?
Do you have a question about the C-TACKINSTALLL and is the answer not in the manual?
Questions and answers