
Subscribe to Our Youtube Channel
Related Manuals for Youshiko YC9386


Summary of Contents for Youshiko YC9386
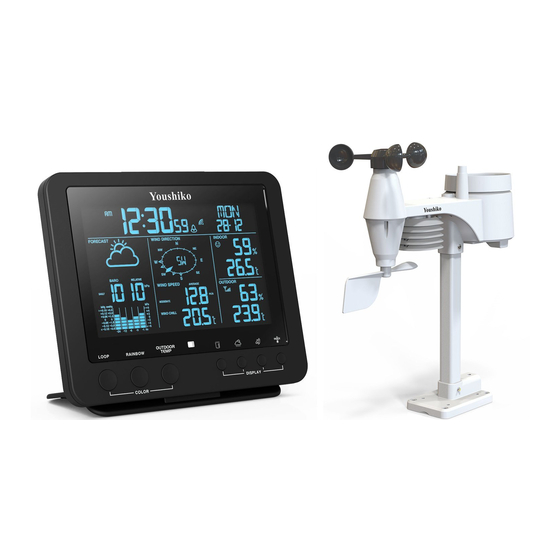
- Page 1 PROFESSIONAL WEATHER STATION WITH WIRELESS 5-IN-1 SENSOR Model: YC9386 USER MANUAL...
-
Page 2: Table Of Contents
CONTENTS INTRODUCTION…………………………………………………………………………………………….3 OVERVIEW……………………………………………………………………………………………..4 LCD DISPLAY...........................6 INSTALLATION..........................7 DISPLAY MAIN UNIT........................8 WEATHER FORECAST........................11 BAROMETRIC/ATMOSPHERIC PRESSURE................11 RAINFALL............................11 WIND SPEED/WIND DIRECTION....................12 WIND CHILL/HEAT INDEX/DEW-POINT..................13 HISTORY DATA (ALL RECORDS IN THE PAST 24 HOURS)............13 MAX/MIN MEMORY FUNCTION....................13 HI/LO ALERT..........................14 WIRELESS SIGNAL RECEPTION....................14 TEMPERATURE & HUMIDITY......................15 DATA CLEARING...........................15 POINTING 5-IN-1 SENSOR TO THE SOUTH................15 COLOURFUL BACKLIGHT DISPLAY....................15... -
Page 3: Introduction
INTRODUCTION Thank you for your purchase of this delicate Professional Weather Station With Wireless 5-IN-1 Sensor. The wireless 5-IN-1 sensor contains a self-emptying rain collector for measuring rainfall, anemometer, and wind vane, temperature and humidity sensors. It is fully assembled and calibrated for your easy installation. -
Page 4: Overview
OVERVIEW LCD DISPLAY 12 13 14 15 16 17 9 10 11 21 22 23 24 25 26 1. Table stand 14. Wall-mounting hole 2. [ SNOOZE / LIGHT ] button 15. [ ALERT ] button 3. LCD display 16. [ ] button 4. - Page 5 WIRELESS 5-IN-1 SENSOR 1. Rain collector 2. Balance indicator 3. Antenna 4. Wind cups 5. Mounting pole 6. Radiation shield 7. Wind vane 8. Mounting base 9. Mounting claim 10. Red LED indicator 11. [ RESET ] button 12. Battery door 13.
-
Page 6: Lcd Display
1. Wind cups anemometer 2. Wind vane LCD DISPLAY NORMAL TIME AND CALENDAR 1. MAX/MIN 2. Low battery indicator for main unit 3. Time 4. DST 5. RCC Signal strength indicator 6. Day of the week 7. Alarm 8. Ice pre-alert "on" 9. -
Page 7: Installation
1. BARO indicator 2. HISTORY 3. ABSOLUTE/RELATIVE indicator 4. Barometer measurement unit(hPa/inHg/mmHg) 5. Barometer reading 6. Hourly records indicator RAINFALL 1. RAINFALL indicator 2. Time range record indicator 3. Day records indicator 4. HISTORY 5. Hi Alert and Alarm 6. Current rainfall rate 7. - Page 8 Unscrew the battery door at bottom of unit and insert the batteries according to the +/- polarity indicated. Screw the battery door compartment on tightly. Note: 1. Ensure the water tight O-ring is properly aligned in place to ensure water resistant. 2.
-
Page 9: Display Main Unit
Insert required batteries in outdoor sensor , Further connect the main display unit with power supply then press reset button on both units. After this weather station will connect with outdoor sensor and with radio control signal automatically, You don’t need to do anything further, Radio control will connect with in few mins to few hours and some time can take up to 24h. - Page 10 RADIO CONTROLLED/ATOMIC CLOCK FUNCTION When the unit receives RCC signal, a sync-time symbol will appear on the LCD, and synchronizes daily. Note: 1. The strength of radio-controlled time signal from the transmitter tower may be affected by geographical location or building around. 2.
-
Page 11: Weather Forecast
3. Press again to activate alarm with ice-alert function. 4. To disable the alarm, press until the alarm icon disappears. RC on ALARM on ALARM off ALARM with ice-alert TO SET THE ALARM TIME 1. Press and hold the [ ALARM ] button for 2 seconds to enter alarm setting mode HOUR will begin to flash. -
Page 12: Rainfall
refers to the average atmospheric pressure. 2. When you change the relative atmospheric pressure value, the weather indicators will change along with it. 3. The relative atmospheric pressure is based on the sea level, but it will change with the absolute atmospheric pressure changes after operating the clock for 1 hour. -
Page 13: Wind Chill/Heat Index/Dew-Point
The wind level provides a quick reference on the wind condition and is indicated by a series of text icons Level LIGHT MODERATE STRONG STORM 2-8 mph 9-25 mph 26-54 mph ≥ 55 mph Speed 3-13 km/h 14-41 km/h 42-87 km/h ≥... -
Page 14: History Data (All Records In The Past 24 Hours)
HISTORY DATA (ALL RECORDS IN THE PAST 24 HOURS) • The Display main unit automatically record and display data of past 24 hours on the hour. • To check all the history data in the past 24 hours, press the HISTORY button. •... -
Page 15: Wireless Signal Reception
Note: 1. The unit will automatically exit setting mode in 5 seconds if no button is pressed. 2. When ALERT alarm is on, the area and type of alarm that triggered the alarm will be flashing and the alarm will sound for 2 minutes. 3. -
Page 16: Colourful Backlight Display
1. First install the outdoor 5-IN-1 sensor with its arrow pointing to the South. 2. On the Display main unit, press and hold the [ WIND] button for 8 seconds until the upper part (Northern Hemisphere) of the compass lights up and blinking. 3. -
Page 17: Troubleshooting
1. Rotate the rain collector by 30° anticlockwise. 2. Gently remove the rain collector. 3. Clean and remove any debris or insects. 4. Install all the parts when they are fully clean and dried. “Unlock” Position “Lock” Position TO CLEAN THE THERMO/HYGRO SENSOR 1. - Page 18 • The socket-outlet shall be installed near the equipment and shall be easily accessible. • Do not dispose old batteries as unsorted municipal waste. Collection of such waste separately for special treatment is necessary. MAIN UNIT Dimensions (W x H x D) 136 x 168 x 24.5 mm Weight 370g with batteries...
- Page 19 WIRELESS 5-IN-1 SENSOR Dimensions (W x H x D) 343.5 x 393.5 x 136 mm Weight 734g with batteries Battery 3 x AA size 1.5V battery (Lithium battery recommended) Frequency 868 MHz Transmission Every 12 seconds OUTDOOR TEMPERATURE Temp. unit °C or °F Displayed range -40°C to 80°C (-40°F to 176°F)
-
Page 20: Easy Installation For Sensor
EASY INSTALLATION FOR SENSOR ASSEMBLY THE STAND AND POLE Step 1 Insert the top side of the pole to the square hole of the weather sensor. NOTE: Ensure the pole and sensor's indicator align. Step 2 Place the nut in t he h exagon h ole on t he s ensor, then insert the screw in other side and tighten it by the screw driver. -
Page 22: The Packing
THE PACKING C8429&PE bag C8440Base Pearl wool Battery C8440&Bubble bag Inner Tray...
Need help?
Do you have a question about the YC9386 and is the answer not in the manual?
Questions and answers
Stopped working when transmitter batteries changed. No outdoor readings showing - only dashes! Full restart done but still not working.
@Colin Lennox Swan
If the Youshiko YC9386 stops working after changing the transmitter batteries and shows only dashes for outdoor readings, follow these steps to manually pair the sensor:
1. Replace the batteries with new ones.
2. Press the [SCAN] button on the display unit.
3. Press the [RESET] button on the wireless 5-IN-1 sensor.
Note: Pressing the [RESET] button on the sensor generates a new code for pairing.
This answer is automatically generated