Advertisement
WMS3 Speaker Wall Mount
Thank you for choosing a Sanus Systems product. Please read the entire manual before proceeding. This product is designed
for speakers weighing 8 pounds or less. Never use defective parts. Improper installation may cause damage or serious in-
jury. If you do not understand these directions, or have any doubts about the safety of the installation, please call a qualified
contractor or contact Sanus at (800)359-5520 or www.sanus.com for assistance. We would be glad to help with any issues
regarding installation or missing parts. Parts missing from Sanus products purchased through authorized dealers can be
shipped directly to you.
Supplied Parts:
(4) Wall/Speaker Plate - a
(2) Satellite Speaker Adapter - d
Supplied Hardware:
(4) #12 x 3/4" Self Tapping Screw - g
(4) #12 x 1 3/4" Self Tapping Screw - h
(4) #12 Plastic Anchor - i
(2) #8 x 3/4" Self Tapping Screw - j
(4) 1/4-20 x 1/2" Machine Screw - k
(2) 1/4-20 x 7/8" Machine Screw - l
Customer Service: 800.359.5520. See complementary Sanus products at www.sanus.com
Required Tools:
Hammer, Phillips Screw Driver, Drill, Drill Bits.
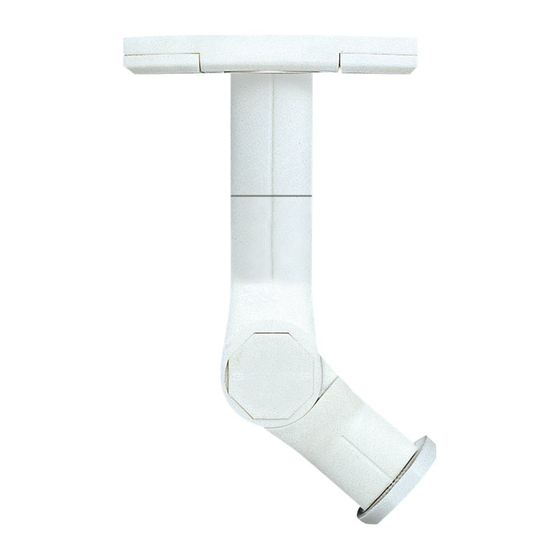
(2) Ceiling Extension - b
(8) Wall Plate Hardware Cover - e
Sanus Systems 2221 Hwy 36 West, Saint Paul, MN 55113 11.19.04
(4) Arm Assembly Hardware Cover - f
(2) M5 x 20mm Machine Screw - m
(2) M5 x 1/8" Plastic Spacer - n
(2) 8-32 x 5/8" Machine Screw - o
(2) 8-32 Key Hole Nut - p
(2) M4 x 8mm Flat Head Machine Screw - q
(1) Allen Key - r
(2) Arm Assembly - c
Advertisement
Table of Contents

Subscribe to Our Youtube Channel
Related Manuals for Sanus Systems WMS3


Summary of Contents for Sanus Systems WMS3
-
Page 1: Supplied Hardware
WMS3 Speaker Wall Mount Thank you for choosing a Sanus Systems product. Please read the entire manual before proceeding. This product is designed for speakers weighing 8 pounds or less. Never use defective parts. Improper installation may cause damage or serious in- jury. - Page 2 1] Mount the Speaker Plate. Determine if you will be mounting the speaker to the Wall/Speaker Plate (a) or the Satellite Speaker Adapter (d). Speakers with dual threaded inserts on the back and small wood speakers without threaded inserts will require the Wall/Speaker Plate.
- Page 3 3] Final Assembly. A] Place the Wall/Speaker Plate Hardware Covers (e) onto the Wall/Speaker Plates (a). B] If you are using the Ceiling Extension (b) place it onto the Wall/Speaker Plate next. Tighten the allen set screw until it is snug. If you are not using the Ceiling Extension skip to step C. Warning: Do not overtighten! Continuing to tighten the allen set screw once it is snug will not make the connection stronger.
Need help?
Do you have a question about the WMS3 and is the answer not in the manual?
Questions and answers