
Related Manuals for SystemAir Topvex SX/C Series


Summary of Contents for SystemAir Topvex SX/C Series
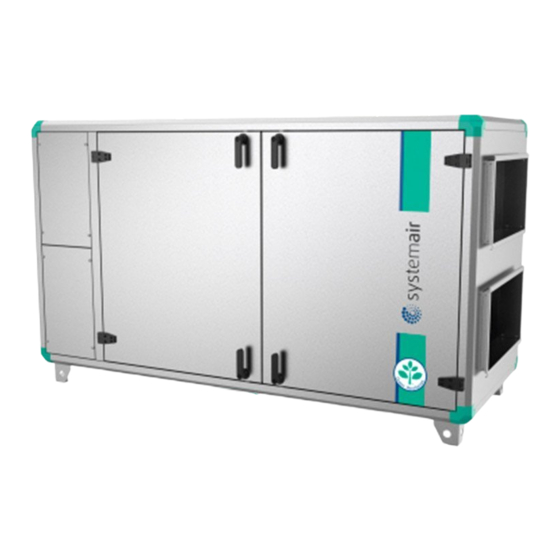
- Page 1 Topvex SX/C, Topvex TX/C Air Handling Unit Installation instructions Document in original language | 131677 · A004...
- Page 2 131677 | A004...
-
Page 3: Table Of Contents
Contents EU Declaration of Conformity ......1 Warnings............2 Product information .........2 General ..........2 Technical data ........3 3.2.1 Dimensions and weight Topvex SX/C ......3 3.2.2 Dimensions and weight Topvex TX/C ......4 3.2.3 Electrical data ......6 Transport and storage ......7 Installation.............8 Unpacking ..........8 Where/how to install ......8 Condensation drain.........9 Installing the unit........ -
Page 5: Eu Declaration Of Conformity
EU Declaration of Conformity | EU Declaration of Conformity Manufacturer Systemair Sverige AB Industrivägen 3 SE-739 30 Skinnskatteberg SWEDEN Office: +46 222 440 00 Fax: +46 222 440 99 www.systemair.com hereby confirms that the following products: Air handling units Topvex SX/C and Topvex TX/C... -
Page 6: Warnings
Product information General This installation manual concerns air handling unit type Topvex SX/C, TX/C manufactured by Systemair Sverige AB. The units include the following model options: • Model: Topvex SX/C03, Topvex SX/C04, Topvex SX/C06, Topvex TX/C03, Topvex TX/C04 and Topvex TX/C06. -
Page 7: Technical Data
Product information | Technical data 3.2.1 Dimensions and weight Topvex SX/C 1063 1063 Model 1041 1772 1926 Topvex SX/C03 1127 1905 2060 Topvex SX/C04 1412 2187 2344 Topvex SX/C06 SX/C06 has 4 extra feet Model Weight, kg Topvex SX/C03 Topvex SX/C04 1120 Topvex SX/C06 131677 | A004... -
Page 8: Dimensions And Weight Topvex Tx/C
| Product information 3.2.2 Dimensions and weight Topvex TX/C Fig. 1 Dimensions (mm) Topvex SX/C03 (drawn as left hand unit) Model 1587 1210 1435 Topvex TX/C03 Model ØM Weight, kg Topvex TX/C03 131677 | A004... - Page 9 Product information | Fig. 2 Dimensions (mm) Topvex TX/C04-06 drawn as left hand unit Model 1860 1279 1708 Topvex TX/C04 2150 1630 1998 Topvex TX/C06 TX/C has 4 extra feet Model Weight, kg Topvex TX/C04 Topvex TX/C06 1065 131677 | A004...
-
Page 10: Electrical Data
| Product information 3.2.3 Electrical data Model Fans (W tot.) 230V 1~ and El Heating battery (kW tot.) Fuse (mains) (A) for 400 V 3N~ 230 V 1~ and 400 V 1480 3x25 Topvex SX/C03 EL 1480 Topvex SX/C03 None, HWL, HWH 1088 3x25 Topvex SX/C03 EL M0... -
Page 11: Transport And Storage
Product information | Transport and storage The unit is delivered in one piece standing on a pallet for easy transportation using a forklift. The unit should be stored and transported in such a way that it is protected against physical damage that can harm panels, handles, display etc. It should be covered so that dust, rain and snow cannot enter and damage the unit and its components. -
Page 12: Installation
Unpacking Verify that all ordered equipment are delivered before starting the installation. Any deviation from the ordered equip- ment must be reported to the supplier of Systemair products. Where/how to install The unit is meant for indoor installation. The electronic components should not be exposed to lower temperature than 0°... -
Page 13: Condensation Drain
Installation | Condensation drain The unit must be connected to the condensation drain, which is enclosed upon delivery. The drainage needs to be con- nected on the exhaust air side of the heat exchanger at the bottom of the unit, figure 3. If the unit is to be used for cool recovery the normally plugged drainage outlet needs to be connected as well to a separate tube and water lock (accessories). -
Page 14: Installing The Unit
| Installation Installing the unit The unit is designed for floor installation. Left and right connections are possible. The unit can be installed in the follow- ing positions. Fig. 5 Installing position (left hand units) Fig. 6 Installing position (right hand units) Table 2 Symbol description Symbol Description... -
Page 15: Supply Air Sensor (Topvex Sx/C)
Installation | 3 Connect the unit electrically to the mains through the all pole circuit breaker (safety switch), which is en- closed inside the unit on delivery. The wiring is led di- rectly to the electrical connection box. See enclosed wiring diagram, and chapter 4.6.5 for more information. -
Page 16: Connections
| Installation Connections 4.6.1 Ducting Position Description Symbol Connection supply air Connection exhaust air Connection outdoor air Connection extract air Fan supply air Fan extract air Filter supply air Filter extract air Heat exchanger Electrical connection box Damper by-pass outdoor air Pressure transmitter fans (accessory) Pressure guard filter Re-heater battery... -
Page 17: Condensation And Heat Insulation
Installation | 4.6.2 Condensation and Heat Insulation Outdoor air duct and exhaust ducts must always be well insulated against condensation. Correct insulation installation on ducts connected to the unit is especially important. All ducts installed in cold rooms/areas must be well insulated. Use insulating covering (minimum 100 mm mineral wool) with plastic diffusion barrier. -
Page 18: Electrical Connection, Components
| Installation 4.6.4 Electrical connection, components Danger • Make sure that the Mains supply to the unit is disconnected before performing any maintenance or electrical work! • All electrical connections must be carried out by an authorized installer and in accordance with local rules and regulations. -
Page 19: Topvex External Connections
Installation | 4.6.5 Topvex External Connections Table 3 Connections to external functions Terminal block Description Remark Ground Used for phase 230V 1~ and Earthed neutral (supply voltage) 400V 3~ Used for phase 230V 1~ if the Phase (Main supply voltage) unit has this mains supply 400V 3~/230V 3~ Phase (Main supply voltage) -
Page 20: Bms Connection
| Installation 4.6.6 BMS Connection BMS Connection Communication possibilities for controller E283 WEB. • RS485(Modbus): 50-51-52 or 60-61-62 • RS485(BACnet): 50-51-52 or 60-61-62 • RS485(Exoline): 50-51-52-53 or 60-61-62-63 • TCP/IP Exoline • TCP/IP Modbus • TCP/IP WEB • TCP/IP BACnet Fig. -
Page 21: Installing The Control Panel
Installation | Installing the Control Panel 4.7.1 Dimensions Fig. 9 Control panel dimensions Dimensions (mm) Position 115.0 94.0 26.0 c/c 60.0 50.5 4.7.2 General information The control panel is delivered connected to the Corrigo control unit situated in the electrical connection box. Cable length is 10 m. -
Page 22: Additional Equipment
| Installation Fig. 10 Control panel wire connections Description Position Mounting holes Connection block Connection to brown cable Connection to yellow cable Connection to white cable Connection to black cable Additional Equipment For information concerning additional external equipment such as valve actuators, motorized dampers, E-tool, roof units, wall grilles etc. - Page 23 131677 | A004...
- Page 24 Systemair Sverige AB Industrivägen 3 SE-739 30 Skinnskatteberg, Sweden Phone +46 222 440 00 Fax +46 222 440 99 www.systemair.com...
Need help?
Do you have a question about the Topvex SX/C Series and is the answer not in the manual?
Questions and answers