SystemAir Topvex SR Operation And Maintenance Instructions
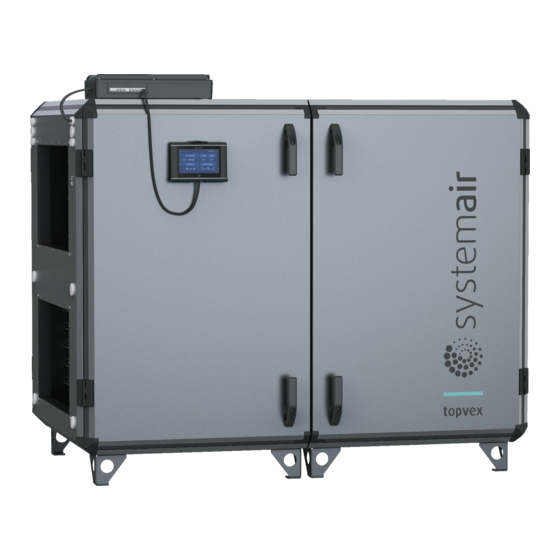
Air handling unit
Hide thumbs
Also See for Topvex SR:
- Installation,operation and maintenance instruction (64 pages) ,
- Installation instructions manual (42 pages) ,
- Installation instructions manual (12 pages)

Related Manuals for SystemAir Topvex SR


Summary of Contents for SystemAir Topvex SR
- Page 1 Air handling unit Topvex SR, TR Operation and Maintenance Instructions Document in original language | 254051 · A001...
- Page 2 © Copyright Systemair AB All rights reserved E&OE Systemair AB reserves the rights to alter their products without notice. This also applies to products already ordered, as long as it does not affect the previously agreed specifications. 254051 | A001...
-
Page 3: Table Of Contents
Water heating coil ........3 7.14 How to replace the fan module....22 Internal components position ....4 7.15 How to replace the heat 4.8.1 Topvex SR ........4 exchanger .......... 23 4.8.2 Topvex TR ........5 7.16 Change the internal battery in control Start up ............6... - Page 4 Contents 14.2.1 Set up an accessory or function with the configuration wizard ........33 14.3 Save commissioning settings ....34 14.4 Quick configuration guides ..... 35 14.4.1 Editable naming ....... 35 14.4.2 Alarm configuration ....37 14.4.3 Fan control type (Pressure).......
-
Page 5: Overview
The air handling units are intended to provide ventilation and depending on settings, heat recovery, air heating or free cooling. Topvex SR, TR are meant for indoor installation. Topvex SR ODK version is weather protected and has the con- trol cabinet built-in in the air handling unit. -
Page 6: Warnings Signs On Product
| Warnings signs on product Warnings signs on product Warning signs located on the air handling units. Fig. 1 Disconnect all supply circuits before access to terminals Fig. 2 Rotating fan during 4 minutes rundown period 254051 | A001... -
Page 7: Product Description
The filters are of bag filter type with filter quality ePM1 60% (F7) for the supply air filter and ePM10 60% (M5) for the extract air filter. The filters need to be replaced when polluted. We recommend ordering original filters from Systemair. -
Page 8: Internal Components Position
| Product description Internal components position 4.8.1 Topvex SR Fig. 3 Left hand unit Description Position Supply air fan (SF) Extract air fan (EF) Supply air filter Extract air filter Heat exchanger Rotor motor (RM) Internal electrical cabinet Heating coil, EL (ELH) or HWH/HWL (HW) -
Page 9: Topvex Tr
Product description | 4.8.2 Topvex TR Fig. 4 Left hand unit Description Position Supply air fan (SF) Extract air fan (EF) Supply air filter Extract air filter Heat exchanger Rotor motor (RM) Internal electrical cabinet Heating coil, EL (ELH) or HWH/HWL (HW) Pressure transmitter supply air fan/extract air filter (PTS) Pressure transmitter exhaust air fan/supply air filter (PTE) Pressure transmitter leakage protection... -
Page 10: Start Up
• Turn on the power supply NaviPad NaviPad is Systemair's user interface with a 7” capacitive touch screen. The user interface provides operation informa- tion about the connected air handling units and allows you to control all functions. You navigate by pressing the touchscreen, to activate a function, change setting or by reading values in real time. -
Page 11: Start-Up Wizard
Start up | 5.1.1 Start-up wizard At the first start up of NaviPad you need to calibrate the screen by pressing lightly on the cross marks. Then you will be requested to fill in following information: • Language • Time & Date Available air handling units will be shown in the device list. -
Page 12: Home Page
Alarm and functions configurations, I/O allocation settings System information Shows information about the air handling unit, installation site, control unit, communication and the Systemair product. Alarm symbol, indicates if there are active alarms. One press on the symbol will direct you to the alarm list. -
Page 13: User Levels
Start up | 5.1.5 User levels Read /write privileges — Home page Possible actions in end user mode are to stop the air handling unit for End user maintenance (e.g. filter exchange), change the time for extended run and When logged out change the temperature setpoint. -
Page 14: Operation
| Operation Operation Controller settings Menus and functions may differ depending on actual configuration and/or application version running in the air handling unit. 6.1.1 Data & Settings Data & Settings 2021–03–01 > Operation overview > In-/Output status > Temperature control >... - Page 15 Operation | 6.1.1.3 Temperature control Settings for temperature. • Limit values • Setpoint for current control type (Example 1) • Min/max limitation • Outdoor temperature values Example 1: Setpoint for current control type Data & Settings > Temperature control > Supply air controller 2021–03–01 10.4 °C Supply air temperature...
-
Page 16: Flow Chart
| Operation 6.1.1.7 Humidity control Setpoints and settings for dehumidification and humidification 6.1.2 Flow chart Flow diagram 2021–03–01 18 000 m³/h 34 Pa -6,8 °C 22,1 °C 198 Pa 71 % Open 32 % RH 84 % 22,1 °C 71 % RH 54 Pa 18 000 m³/h 21,8 °C... -
Page 17: Time Settings
Operation | 6.1.4 Time Settings In this menu date and time can be changed as well as other system settings. Settings for: • Date and time • Schedule for operating time (Example 2 & 3) • Schedule for holiday • Schedule for extra time groups Each day has up to two individual running periods, set desired start and stop time. -
Page 18: Configuration
| Operation 6.1.5 Configuration • System settings • Configuration wizard (Example 4) • Function configuration (Example 5) • I/O allocation settings • Alarm configuration (Example 6) • PID controllers The configuration wizard is a menu that simplify the procedure to Activate and Configure common accessories and functions and Allocate it’s in- and outputs. -
Page 19: System Information
System information Shows information about the air handling unit, installation site, control unit, communication and the Systemair product. To enter information, such as site specific unit name or server partner’s contact information, go to System information setup with user level Service. -
Page 20: Advanced Hmi (Human Machine Interface) Settings
| Operation Advanced HMI (Human Machine Interface) Settings Return to system overview dashboard by pressing on the NaviPad button,. Go to and choose Advanced HMI settings. Login required — 1111 NaviPad settings 2021–03–01 Unit name Home Normal operation Language Time & Date setting Advanced HMI settings Restart NaviPad... -
Page 21: No Communication
Operation | Example 9: Restore NaviPad factory settings You will be requested to confirm your action. All settings including password will be reset and Start-Up wizard will run again. No communication 2021–03–01 Home > Available devices Unit name No Communication If the above symbol are shown the communication to the selected air handling unit is lost. -
Page 22: Maintenance
The bag filter must be changed when necessary, they cannot be cleaned. We recommend ordering original filters from Systemair. Operation time between filter changes depends on the air quality. A differential pressure transmitter indi- cates when it is time to change the filters, which will trigger an alarm in NaviPad. -
Page 23: How To Clean Navipad
Maintenance | How to clean NaviPad Disconnect the NaviPad power cord. Wipe the NaviPad gently with a soft cloth. Remove resistant marks with mild de- tergent (intended for touch screens) on the cloth, gently wipe the screen. Do not use other cleaning agents (they may contain ammonia or other additives). -
Page 24: How To Clean Hot Water Heating Coil
| Maintenance How to clean hot water heating coil Caution • Clean carefully to not damage the batteries aluminium fins. Clean the battery with pressure washer with misting jets or with compressed air. Remove the fan for access, see chap- ter 7.6. -
Page 25: Where To Reset Tripped Fuses
Maintenance | 7.12 Where to reset tripped fuses Position Description Automatic fuse 1~ (Controls only) Automatic fuse 3~ (Fans only) 7.13 How to reset the manual overheat protection (EL units) Push the red button on the electrical heater frame, figure 7, (3). Fig. -
Page 26: How To Replace The Fan Module
| Maintenance 7.14 How to replace the fan module When ordering a replacement fan module, note if it is supply or extract fan. This is important for the fan to get the cor- rect Modbus address. 1. Disconnect the fast coupling to the electric wire and the blue and red tubes from the supply air fan (standard units with CAV). -
Page 27: How To Replace The Heat Exchanger
Maintenance | 7.15 How to replace the heat exchanger Caution • Handle the heat exchanger carefully. • The heat exchanger is heavy. 1. Open the air handling unit’s doors. 2. Loosen the door beam (only SR/TR 20-35, figure 8). Fig. 8 3. - Page 28 | Maintenance Fig. 9 7. Attach the electrical quick connections. 8. Fasten the locking plate including the list. 9. Close the air handling unit’s doors 254051 | A001...
-
Page 29: Change The Internal Battery In Control Unit Cu27-C
Maintenance | 7.16 Change the internal battery in control unit CU27–C The alarm text Internal battery error is shown in NaviPad when it is time to change the battery. Expected life time of battery is 5 years. Caution ESD protection; i.e. an earthed wristband must be used! Disconnect all the wired cable connectors (1) from control unit CU27–C. -
Page 30: Troubleshooting
| Troubleshooting Troubleshooting Check or correct the following before contacting your service representative. Always check if there are any alarms ac- tive in the control panel (chapter 9). 1. Fan(s) do not start • Check if there are any alarm messages. •... -
Page 31: Alarms
Alarms | Alarms A LED-light in the NaviPad button indicate the status of the air handling unit. • Fixed green — Status ok (no active alarms). • Flashing red — Active/returned alarms in one or several air handling units or lost connection with an air handling unit. -
Page 32: Service
| Service Service Before calling your service representative, make a note of the specification and production number from the type label (figure 12) Fig. 12 Type label Position Description Item number Production order number Consecutive number Production date Product code (product specification) Scannable code (spare parts, documentation) 254051 | A001... -
Page 33: Eu Declaration Of Conformity
Phone: +46 222 440 00 www.systemair.com EN 61000-6-2 Electromagnetic compatibility (EMC) – Part 6-2: Generic The manufacturer hereby confirms that Topvex SR, TR standards – Immunity for industrial environments. comply with all applicable requirements in the following directives and regulations. -
Page 34: Declaration Of Conformity
Phone: +46 222 440 00 www.systemair.com EN 61000-6-2 Electromagnetic compatibility (EMC) – Part 6-2: Generic The manufacturer hereby confirms that Topvex SR, TR standards – Immunity for industrial environments. comply with all applicable requirements in the following directives and regulations. -
Page 35: General Conditions
If handles are misplaced; open the doors with a 16 mm wrench. 13.2 Spare parts and reference documentation See spare parts and documentation at https://portal.systemair.com, or use the scannable code on the type label, figure If other accessories not included at delivery are in use, read their separate instructions. -
Page 36: Quick Configuration Guide
| Quick configuration guide Quick configuration guide Access software 4.0-1-04 to 4.4-1-01 14.1 How to set up a function To set up a function in the access controller you need to be logged in as Service to access the configuration menu. After login you follow a 4-step procedure to successfully setup the function. -
Page 37: How To Use The Configuration Wizard
Quick configuration guide | 14.2 How to use the configuration wizard The configuration wizard is a menu that simplify the procedure to Activate and Configure common accessories and functions and Allocate it’s in- and outputs. The wizard makes necessary configurations automatically and guide the user through limited options. -
Page 38: Save Commissioning Settings
| Quick configuration guide 14.2.1.3 Allocation Configuration > Configuration wizard > Set up “function” > In-/Outputs Confirm the in-/output allocation of the connected signals and sensors. Configure in-/output settings (sensor measuring range, polarity, edit name of sensor/signal etc.) as necessary. Complete the setup by pressing Confirm In-/Outputs and complete setup. -
Page 39: Quick Configuration Guides
3. Select Communication devices 4. Edit the name of the air handling unit by selecting Unit name. Note: Default Unit name is either Systemair controller or the unit model name, for example Topvex TR03 HW CAV. 14.4.1.2 I/O naming Change the name of an I/O (in-/outputs), for example a temperature sensor, by selecting the desired I/O function in the Configuration >... - Page 40 | Quick configuration guide Configuration >... > Analog inputs > Supply air 2021–03–01 temperature Supply air temperature Name Original name Supply air temperature Step by step: Select Configuration from the navigation icons 2. Select I/O allocation settings 3. Select the submenu related to the I/O to rename (e.g Analog inputs if temperature sensor) 4.
-
Page 41: Alarm Configuration
Quick configuration guide | 14.4.2 Alarm configuration Configure any alarm available in the controller in the Configuration > Alarms menu. Overview: Configuration > ... > Extra alarm 1 2021–03–01 Action: No action Disabled Level: Delay: Name: Extra alarm 1 Step by step: Select Configuration from the navigation icons 2. - Page 42 | Quick configuration guide Caution Do not use the same in- or output for several functions. Overview: Configuration > I/O allocation settings > Analog 2021–03–01 inputs Analog inputs Device Position Pressure supply air Controller Pressure extract air Controller Configuration > ... > Analog inputs > Pressure supply 2021–03–01 Min volt input (Vmin) 0.0 V...
-
Page 43: Temperature Control Type (Room)
Quick configuration guide | 14.4.3.3 Operation settings Adjust the fan pressure set points in the Data & Settings > Fan Control > Fan setpoints menu. Overview: Data & Settings > Fan control > Fan setpoints 2021–03–01 Setpoint low speed supply air fan 100 Pa Setpoint low speed extract air fan 100 Pa... - Page 44 | Quick configuration guide 14.4.4.2 Configuration Configure the number of connected room temperature sensors in the Configuration > Functions > Tempera- ture control menu. Overview: Configuration > Functions > Temperature control 2021–03–01 Room temperature sensor Step by step: Select Configuration from the navigation icons 2.
-
Page 45: Extended Operation
Quick configuration guide | 14.4.4.4 Operation settings Data & Settings > Temp Control > Supply air 2021–03–01 controller Min limit supply air 14.0 °C Max limit supply air 30.0 °C Step by step: Select Data & Settings from the navigation icons 2. - Page 46 | Quick configuration guide Select Configuration from the navigation icons 2. Select Functions 3. Select Extended operation 4. Select Yes for desired extended operation fan speeds 14.4.5.3 Allocation Select I/O (in-/output) placement for the extended operation speeds in the Configuration >I/O allocation set- tings >...
-
Page 47: Fan Compensation
Quick configuration guide | 14.4.6 Fan compensation 14.4.6.1 Activation Select Yes for Fan Compensation in the Configuration > Functions > Function activation menu. Overview: Configuration > Functions > Function activation 2021–03–01 Fan compensation curves Step by step: Select Configuration from the navigation icons 2. - Page 48 | Quick configuration guide Step by step: Select Configuration from the navigation icons 2. Select Functions 3. Select Fan compensation curve 1/2/3 4. Select which fan level(s) the compensation curve should apply to as Fan level 5. Select when the compensation curve is active as Mode 6.
-
Page 49: Co2 Control (Fan Start/Stop)
Quick configuration guide | 14.4.7 CO2 control (Fan start/stop) 14.4.7.1 Activation Activate the Fan start/stop function for CO2 control from the list of available functions in the Configuration > Func- tions > Function activation menu. Overview: Configuration > Functions > Function activation 2021–03–01 Fan start/stop CO2 Control... - Page 50 | Quick configuration guide 14.4.7.3 Allocation Select I/O (in-output) placement for where the CO2 sensor is connected to the controller in the Configuration > I/ O allocation settings > Analog inputs menu. Overview: Configuration > I/O allocation settings > Analog 2021–03–01 inputs Analog inputs...
-
Page 51: Fire/Smoke Function (Fire)
Quick configuration guide | 14.4.7.4 Operating settings Adjust CO2 limits for the Fan start/stop function and adjust the minimum run time for CO2 control in the Data & Set- tings > Demand control > CO2 menu. Overview: Data & Settings > Demand control > CO2 2021–03–01 800 ppm Start limit fan start/stop... - Page 52 | Quick configuration guide 14.4.8.2 Configuration Configure the operation of the air handling unit, outdoor/exhaust air dampers, the fan setpoints and fire damper func- tion when Fire alarm in the Configuration > Functions > Fire/Smoke > Fire function submenus. Overview: Configuration >...
- Page 53 Quick configuration guide | 14.4.8.3 Allocation Select I/O (in-/output) placement of where fire alarm activation input, fire damper output and position feedback input are connected to the controller in the Configuration > I/O allocation settings submenus Digital inputs and Digital outputs. Overview: Configuration >...
-
Page 54: Free Cooling
| Quick configuration guide 14.4.8.4 Operation settings Set up the Fire damper test settings in the Data & Settings > Fire/Smoke menu. Note: Only applicable if fire damper test is configured. Overview: Data & Settings > Fire/Smoke 2021–03–01 Run time fire damper 90 s Test interval fire damper 7 days... - Page 55 Quick configuration guide | 14.4.9.2 Operation settings Set up all operation parameters for the free cooling function in the Data & Settings > Demand control > Free cooling menu. Overview: Data & Settings > Demand control > Free cooling 2021–03–01 Running when day outdoor temperature >...
-
Page 56: External Cooler (Dx)
| Quick configuration guide 14.4.10 External cooler (DX) 14.4.10.1 Activation Select and activate an unused cooling sequence (C, H or J) in the Configuration > Functions > Function acti- vation > Heating/Cooling sequence setup menu. Overview: Configuration > ... > ... > Heating/Cooling sequence 2021–03–01 setup Start... - Page 57 Quick configuration guide | 14.4.10.2 Configuration Configure what type of cooler is connected in the Configuration > Functions > Function activation > Heat- ing/Cooling sequence setup > Cooling menu. Overview: Configuration >. .. > Heating/Cooling sequence setup > 2021–03–01 Cooling Type of sequence Cooling Type of cooler...
- Page 58 | Quick configuration guide Configuration >... > Analog outputs > Cooling (SEQ-C) 2021–03–01 Range output 0–10 V Configuration > I/O allocation settings > Digital 2021–03–01 outputs Digital outputs Device Position Cooling start (SEQ-C) Controller Step by step: Select Configuration from the navigation icons 2.
- Page 59 Quick configuration guide | 14.4.10.4 Operation settings Adjust the start/stop point for the digital output: Cooling start (SEQ-C) in the Data & Settings > Temperature control > Cooling menu. Overview: Data & Settings > Temperature control > Cooling 2021–03–01 Digital start output start point 10 % Digital start output stop point Data &...
-
Page 60: External Heater (Water)
| Quick configuration guide 14.4.11 External heater (Water) 14.4.11.1 Activation Select and activate an unused heating sequence (A, G or J) in the Configuration > Functions > Function acti- vation > Heating/Cooling sequence setup menu. Overview: Configuration > ... > ... > Heating/Cooling sequence 2021–03–01 setup Start... - Page 61 Quick configuration guide | 14.4.11.2 Configuration Configure what type of heater that is connected (e.g. water) and additional functions such as freeze protection and pump control in the Configuration > Functions > Function activation > Heating/Cooling sequence setup > Heating menu. Overview: Configuration >...
- Page 62 | Quick configuration guide 14.4.11.3 Allocation Select I/O (in-output) placement of where the heater control signal output, pump start output and pump feedback input are connected to the controller in the Configuration > I/O allocation settings submenus Digital inputs, Analog outputs and Digital outputs. Overview: Configuration >...
- Page 63 Quick configuration guide | 14.4.11.4 Operation settings Adjust the settings for pump control and freeze protection in the Data & Settings > Temperature control > Heating menu Overview: Data & Settings > Temperature control > Heating 2021–03–01 Pump stop delay 5 min Pump-kick hour 15 h...
-
Page 64: Changeover
| Quick configuration guide 14.4.12 Changeover 14.4.12.1 Configuration Select one heating sequence and one cooling sequence out of the configured sequences to use with the changeover function in the Configuration > Functions > Function activation > Heating/Cooling sequence setup > Changeover settings menu. -
Page 65: External Stop
Quick configuration guide | Configuration > ... > Analog outputs > Changeover 1 2021–03–01 Range output 0-10 V Step by step: Select Configuration from the navigation icons 2. Select I/O allocation settings 3. Select Digital inputs 4. Select the input connected to the heating/cooling feedback (e.g. DI4) as position for Cooling/(Heating) changeover 1 5. -
Page 66: Support Control
| Quick configuration guide 14.4.13.2 Allocation Select the I/O (in-output) placement of where the external stop switch is connected to the controller in the Configu- ration > I/O allocation settings > Digital inputs menu. Overview: Configuration > I/O allocation settings > Digital 2021–03–01 inputs Digital inputs... - Page 67 Quick configuration guide | 14.4.14.2 Operating settings Adjust the start/stop limits for support heating/cooling and the min run time for the support control function in the Data & Settings > Demand control > Support control menu. Overview: Data & Settings > Demand control > Support Control 2021–03–01 Min time for support control 20 min...
- Page 68 Systemair Sverige AB Industrivägen 3 SE-739 30 Skinnskatteberg, Sweden Phone +46 222 440 00 www.systemair.com...
Need help?
Do you have a question about the Topvex SR and is the answer not in the manual?
Questions and answers