
Related Manuals for LEGRAND PRO 21 7756 16


Summary of Contents for LEGRAND PRO 21 7756 16
- Page 1 PRO 21™ Radio scenario switch 7756 16 Characteristics Connection Power supply 1 lithium battery CR 2032 Radio frequency 868,3 Mhz Range approx. 200 m in free field + 5°C to + 45°C...
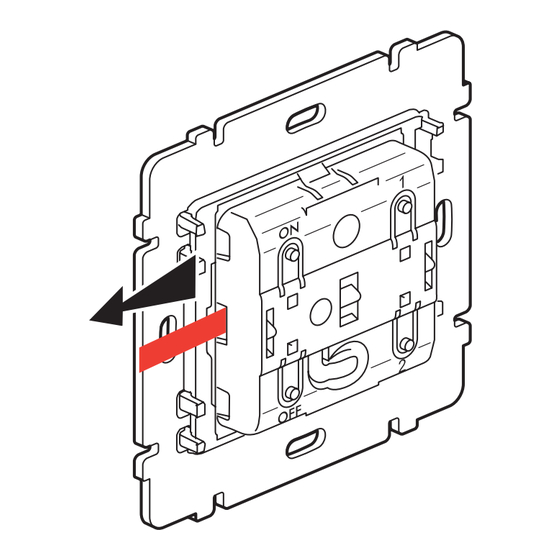
- Page 2 Pictogram fitting onto rocker Battery replacement plates...
-
Page 3: Factory Settings
Description Factory settings On first powering up, pressing the ON and OFF keys controls all the lighting receivers in the factory set- LEARN indicator light Identification No. tings. Pressing LEARN twice cancels this general control function. Programming or learning key. ON / OFF 1 / 2 Control keys... -
Page 4: Operation
Operation The lighting scenario switch can simultaneously control a set of actors that have been associated with it during the lear- ning , it then acts as leader of the scenario. Using the ON or OFF keys, the lighting scenario switch lets you control the lighting points linked to the actors that are associated with the ON key, as follows : - switch on by short press on the ON key - switch off by short press on the OFF key... - Page 5 The indicator lamp The indicator lamp The indicator lamp The indicator lamp goes off blinks slowly blinks quickly flashes Learn scenario Step 1 : Start the learn phase (on the LEADER) Press LEARN Press the command key that is to control the scenario Step 2 : Add an actor to the scenario (on the ACTOR) Press LEARN...
- Page 6 Modification of a scenario Step 1: Open the scenario (on the LEADER) The indicator lamps of all the product in the scenario blink. Press LEARN Press the command key that controls the scenario Step 2 : Modify the state of an actor in the scenario (on the ACTOR) Press LEARN Press LEARN Press the command key...
- Page 7 Clearing a scenario Clear all the scenarios linked with the command key (on the LEADER) The scenario is cleared Press LEARN Press the command key and hold it down for 10 s Clear all the scenarios linked to this product (on the LEADER) Return the product to factory configuration Press LEARN...
- Page 8 DECLARATION DE CONFORMITE Nous déclarons que les produits satisfont aux dispositions de : We declare that the products satisfy the provisions of : La Directive 1999/5/CE du Parlement européen et du Conseil du 9 mars 1999 "R&TTE" sous réserve d'une utilisation conforme à sa destination on condition that they are used in the manner et/ou d'une installation conforme aux normes en vigueur intended and/or in accordance with the current...
-
Page 9: Technische Daten
PRO 21™ Licht Szenarioschalter Funk 7756 16 Technische Daten Anschlüsse Spannungsversorgung 1 x Lithiumbatterie CR 2032 Funkfrequenz 868,3 Mhz Reichweite ca. 200 m freies Feld + 5°C bis + 45°C... - Page 10 Anbringen der Piktogramme Auswechseln der Batterie auf den Tasten...
- Page 11 Beschreibung Werkseinstellung Bei erstmaliger Inbetriebnahme (Spannungsversorgung) werden alle Teilnehmer innerhalb einer Leuchtdiode LEARN Gerätenummer Anlage über die ON und OFF , Taste zentral angesteuert (Zentralbefehl). Diese Werkseinstellung kann durch zweifaches Drücken der LEARN- Taste gelöscht werden. Taste zum Programmieren ON / OFF 1 / 2 „Einlernen“.
-
Page 12: Funktionsweise
Funktionsweise Der Licht Szenario- Schalter steuert alle Empfänger der Beleuchtungsanlage gleichzeitig an, die ihm beim Einlernen durch LEARN- Programmieren zugeordnet wurden. Der Licht Szenario- Schalter ist ein Sensor. Ein- und Ausschalten sowie Dimmen erfolgt über die ON- und OFF- Tasten am Gerät. Die Zuordnung der Aktoren erfolgt über die ON Taste. - Page 13 Legende Die Leuchtdiode Die Leuchtdiode blinkt Die Leuchtdiode blinkt Die Leuchtdiode erlischt langsam ca.1Hz schnell ca. 2Hz blitzt ca. 5Hz Einlernen der Teilnehmer 1. Schritt : Einlernmodus aktivieren (auf dem Sensor) Die Lerntaste LEARN drücken Bedientaste drücken, die dem Aktor (Lernmodus aktivieren) zugeordnet werden soll.
- Page 14 Änderung einer Funktionszuordnung (löschen oder zusätzlich einlernen) 1. Schritt : Auswahl der Funktion am Sensor Die Leuchtdioden auf allen zugeordneten Aktoren blinken. Die Lerntaste Bedientaste drücken, welche die LEARN drücken Aktoren ansteueren. 2. Schritt : Aktor am Sensor hinzufügen oder löschen (am AKTOR) Die Lerntaste Die Lerntaste Die Bedientaste drücken, die...
- Page 15 Löschen aller Funktionszuordnung oder Aktoren Alle eingelernte Zuordnungen am Sensor löschen Die Zuordnung ist gelöscht Die Lerntaste Die Bedientaste 10 Sekunden LEARN drücken lang gedrückt halten. Alle Sensoren auf Werkseinstellung zurücksetzten Das Produkt kehrt zur Werkseinstellung zurück. Die Lerntaste Die Lerntaste 10 Sekunden LEARN drücken lang gedrückt halten.
- Page 16 DECLARATION DE CONFORMITE Nous déclarons que les produits satisfont aux dispositions de : We declare that the products satisfy the provisions of : La Directive 1999/5/CE du Parlement européen et du Conseil du 9 mars 1999 "R&TTE" sous réserve d'une utilisation conforme à sa destination on condition that they are used in the manner et/ou d'une installation conforme aux normes en vigueur intended and/or in accordance with the current...
- Page 17 PRO 21™ Interescenario de iluminación radio 7756 16 Características Conexión Alimentación 1 pila de litio CR 2032 Frecuencia RF 868,3 Mhz Alcance aproximado 200 m en campo libre + 5°C a + 45°C...
- Page 18 Montaje de los pictogramas Sustitución de la pila en los dedos...
-
Page 19: Configuración De Fábrica
Descripción Configuración de fábrica Durante la primera puesta en ten- sión la pulsación de las teclas ON y OFF controla todos los receptores Piloto LEARN N° de identificación de alumbrado de la instalación. Una doble pulsación de la tecla LEARN anula esta función de mando general. - Page 20 Funcionamiento El interescenario de iluminación puede controlar simultáneamente un conjunto de actores que se le asocian durante el aprendizaje , funciona entonces como líder del escenario. El interescenario de iluminación permite controlar con las teclas ON y OFF los puntos de luz conectados a los actores asociados a la tecla ON, en : - encendido por una pulsación corta de la tecla ON - apagado por una pulsación corta de la tecla OFF...
- Page 21 Leyenda Led Off Parpadeo lento Parpadeo rápido Flash Aprendizaje del escenario Paso 1 : crear el escenario, fase LEARN (en el LÍDER) Pulsar LEARN Pulsar la tecla de mando que va a controlar el escenario Paso 2 : añadir un actor al escenario (en el ACTOR) Pulsar LEARN Pulsar la tecla de mando que va a estar asociada al líder...
- Page 22 Modificación de un escenario Paso 1 : abrir el escenario (en el LÍDER) El led de todos los mecanismos del escenario parpadea Pulsar LEARN Pulsar la tecla de mando que controla el escenario Paso 2 : modificar el estado de un actor del escenario (en el ACTOR) Pulsar LEARN Pulsar LEARN Pulsar la tecla de mando...
- Page 23 Borrado de un escenario Borrar todos los escenarios vinculados a la tecla de mando (en el LÍDER) El escenario ha sido borrado Pulsar LEARN Pulsar la tecla de mando durante 10s Borrar todos los escenarios vinculados a este producto (en el LÍDER) Configuraciónde fábrica Pulsar LEARN Pulsar LEARN...
- Page 24 DECLARATION DE CONFORMITE Nous déclarons que les produits satisfont aux dispositions de : We declare that the products satisfy the provisions of : La Directive 1999/5/CE du Parlement européen et du Conseil du 9 mars 1999 "R&TTE" sous réserve d'une utilisation conforme à sa destination on condition that they are used in the manner et/ou d'une installation conforme aux normes en vigueur intended and/or in accordance with the current...
- Page 25 PRO 21™ ¢È·ÎfiÙ˘ ÛÂÓ·Ú›ˆÓ ·Û‡ÚÌ·ÙÔ˜ 7756 16 ÷ڷÎÙËÚÈÛÙÈο ™‡Ó‰ÂÛË ∆ÚÔÊÔ‰ÔÛ›· 1 Ì·Ù·Ú›· ÏÈı›Ô˘ CR 2032 ™˘¯ÓfiÙËÙ· RF 868,3 Mhz ∂Ì‚¤ÏÂÈ· ÂÚ›Ô˘ 200 m Û ÂχıÂÚÔ Â‰›Ô + 5°C ¤ˆ˜ + 45°C...
- Page 26 ∆ÔÔı¤ÙËÛË ÙˆÓ ÂÈÎÔÓÔ- ∞ÓÙÈηٿÛÙ·ÛË Ù˘ Ì·Ù·Ú›·˜ Û˘Ì‚fiÏˆÓ ÛÙ· Ï‹ÎÙÚ·...
- Page 27 Ù¿ÛË, ÙÔ ¿ÙËÌ· ÙˆÓ Ï‹ÎÙÚˆÓ ON ‹ OFF ÂϤÁ¯ÂÈ ÙÔ Û‡ÓÔÏÔ ÙˆÓ ºˆÙÂÈÓ‹ ¤Ó‰ÂÈÍË LEARN ∞Ú. ·Ó·ÁÓÒÚÈÛ˘ ÛËÌ›ˆÓ ʈÙÈÛÌÔ‡ Ù˘ ÂÁηٿÛÙ·Û˘ “In One by Legrand”. ∆Ô ‰ÈÏfi ¿ÙËÌ· ÙÔ˘ Ï‹ÎÙÚÔ˘ Learn ·Î˘ÚÒÓÂÈ ·˘Ù‹ ÙË ÏÂÈÙÔ˘ÚÁ›· ÁÂÓÈÎÔ‡ ÂϤÁ¯Ô˘. ON / OFF 1 / 2 ¶Ï‹ÎÙÚÔ...
- Page 28 §ÂÈÙÔ˘ÚÁ›· √ ‰È·ÎfiÙ˘ ÛÂÓ·Ú›ˆÓ ʈÙÈÛÌÔ‡ ÌÔÚ› Ó· ÂϤÁÍÂÈ Ù·˘Ùfi¯ÚÔÓ· ¤Ó· Û‡ÓÔÏÔ ÚÔ˚fiÓÙˆÓ (actors) Ì ·˘ÙfiÓ Î·Ù¿ ÙËÓ ÂÎÌ¿ıËÛË . ™ÙËÓ ÂÚ›ÙˆÛË ·˘Ù‹ ÏÂÈÙÔ˘ÚÁ› ˆ˜ leader (ÂÓÙÔϤ·˜) ÙÔ˘ ÛÂÓ·Ú›Ô˘ √ ‰È·ÎfiÙ˘ ÛÂÓ·Ú›ˆÓ ʈÙÈÛÌÔ‡ ÂÈÙÚ¤ÂÈ ÙÔÓ ¤ÏÂÁ¯Ô ·fi Ù· Ï‹ÎÙÚ· √¡ ‹ OFF ÙˆÓ ÛËÌ›ˆÓ ʈÙÈÛÌÔ‡ Ô˘ Û˘Ó‰¤ÔÓÙ·È...
- Page 29 §Â˙¿ÓÙ· ∏ ʈÙÂÈÓ‹ ¤Ó‰ÂÈÍË ∏ ʈÙÂÈÓ‹ ∏ ʈÙÂÈÓ‹ ¤Ó‰ÂÈÍË ∏ ʈÙÂÈÓ‹ ¤Ó‰ÂÈÍË ·Ó·‚ÔÛ‚‹ÓÂÈ ÁÚ‹ÁÔÚ· ¤Ó‰ÂÈÍË Û‚‹ÓÂÈ ·Ó·‚ÔÛ‚‹ÓÂÈ ·ÚÁ¿ ·Ó·‚ÔÛ‚‹ÓÂÈ ¤ÓÙÔÓ· ∂ÂÍ‹ÁËÛË Î·Ù¿ÛÙ·ÛË ÊˆÙÂÈÓ‹˜ ¤Ó‰ÂÈ͢ ™Ù¿‰ÈÔ 1 : ÍÂΛÓËÌ· Ù˘ ÂÎÌ¿ıËÛ˘ (¿ӈ ÛÙÔ LEADER) ¶·Ù‹ÛÙ ÙÔ ¶·Ù‹ÛÙ ÙÔ Ï‹ÎÙÚÔ ÂϤÁ¯Ô˘ ÙÔ ÔÔ›Ô LEARN ı·...
- Page 30 ∆ÚÔÔÔ›ËÛË ÂÓfi˜ ÛÂÓ·Ú›Ô˘ ™Ù¿‰ÈÔ 1 : ·ÓÔ›ÍÙ ÙÔ ÛÂÓ¿ÚÈÔ (¿ӈ ÛÙÔ LEADER) √È ˆÙÂÈÓ¤˜ ÂӉ›ÍÂȘ fiÏˆÓ ÙˆÓ ÚÔ˚fiÓÙˆÓ ÙÔ˘ ÛÂÓ·Ú›Ô˘ ·Ó·‚ÔÛ‚‹ÓÔ˘Ó. ¶·Ù‹ÛÙ ÙÔ ¶·Ù‹ÛÙ ÙÔ Ï‹ÎÙÚÔ ÂϤÁ¯Ô˘ LEARN Ô˘ ÂϤÁ¯ÂÈ ÙÔ ÛÂÓ¿ÚÈÔ ™Ù¿‰ÈÔ 2: ÙÚÔÔÔ›ËÛË Ù˘ ηٿÛÙ·Û˘ ÂÓfi˜ actor ÙÔ˘ ÛÂÓ·Ú›Ô˘ (¿ӈ ÛÙÔÓ actor) ¶·Ù‹ÛÙÂ...
- Page 31 ¢È·ÁÚ·‹ ÂÓfi˜ ÛÂÓ·Ú›Ô˘ ¢È·ÁÚ¿„Ù fiÏ· Ù· ÛÂÓ¿ÚÈ· Ô˘ Û˘Ó‰˘¿˙ÔÓÙ·È Ì ÙÔ Ï‹ÎÙÚÔ ÂϤÁ¯Ô˘ (¿ӈ ÛÙÔ LEADER) ∆Ô ÛÂÓ¿ÚÈÔ ‰È·ÁÚ¿ËΠ¶·Ù‹ÛÙ ÙÔ ¶·Ù‹ÛÙ ÙÔ Ï‹ÎÙÚÔ LEARN ÂϤÁ¯Ô˘ Î·È ÎÚ·Ù‹ÛÙ ÙÔ ·ÙË̤ÓÔ ÁÈ· 10s ¢È·ÁÚ¿„Ù fiÏ· Ù· ÛÂÓ¿ÚÈ· Ô˘ Û˘Ó‰˘¿˙ÔÓÙ·È Ì ÙÔ ÚÔ˚ÔÓ ·˘Ùfi (¿ӈ ÛÙÔ LEADER) ∂·Ó·ÊÔÚ¿...
- Page 32 DECLARATION DE CONFORMITE Nous déclarons que les produits satisfont aux dispositions de : We declare that the products satisfy the provisions of : La Directive 1999/5/CE du Parlement européen et du Conseil du 9 mars 1999 "R&TTE" sous réserve d'une utilisation conforme à sa destination on condition that they are used in the manner et/ou d'une installation conforme aux normes en vigueur intended and/or in accordance with the current...
-
Page 33: Üzembe Helyezés
PRO 21™ Világítási scenárió kapcsoló RF 7756 16 Jellemzők Üzembe helyezés Áramellátás 1 db CR 2032 lítium elem Adatátviteli 868,3 Mhz frekvencia Hatótávolság kb. 200 m szabad területen + 5°C-tól + 45°C-ig... - Page 34 Piktogramok felhelyezése a Elemcsere billentyűkre...
- Page 35 Leírás Gyári beállítások Az első feszültség alá helyezéskor az ON és OFF gombok megnyomá- sával gyári beállításon vezérli az LEARN (Tanulás) jelzőlámpa Referencia szám összes lámpatestet. A LEARN gomb kétszeri megnyo- mása törli ezt az általános vezérlő funkciót. Programozó vagy tanuló gomb. ON / OFF 1 / 2 Irányító/...
- Page 36 Működés A világítás scenárió kapcsoló egyszerre vezérelhet több végrehajtót, amelyek a programozás során hozzá lettek társítva, tehát ő a programcsomag vezérlője A világítás scenárió kapcsoló lehetővé teszi az ON gombhoz társított végrehajtó-szerelvényekhez csatlakoztatott lámpa- testek vezérlésére az ON és OFF gombok által, a következőképpen : - bekapcsolás az ON gomb rövid megnyomásával - kikapcsolás az OFF gomb rövid megnyomásával - fényerő...
- Page 37 Jelmagyarázat Nem működő A jelzőlámpa A jelzőlámpa A jelzőlámpa jelzőlámpa lassan villog gyorsan villog felvillan Műveletsor beprogramozása 1. Kezdje a programozást a VEZÉRLŐ-n Nyomja meg a Nyomja meg a vezérlőgombot, amelynek LEARN gombot irányítania kell a műveletsort 2. Rendeljen hozzá egy VÉGREHAJTÓ-t a programcsomaghoz Nyomja meg a Nyomja meg azt a funkciógombot, LEARN gombot...
- Page 38 Programcsomag módosítása 1. Kezdje a programozást a VEZÉRLŐ-n Minden, a programcsomagba tartozó termék jelzőlámpája villogni kezd Nyomja meg a Nyomja meg a vezérlőgombot, LEARN gombot amely irányítja a programot 2. Módosítsa a programcsomag VÉGREHAJTÓ-szerelvényének állapotát Nyomja meg a Nyomja meg a Nyomja meg azt a LEARN gombot LEARN gombot...
- Page 39 Programcsomag törlése Töröljön ki minden programcsomagot, amely a vezérlőgombhoz lett rendelve a VEZÉRLŐ-n A műveletsort törölte Nyomja meg a Nyomja meg a LEARN gombot vezérlőgombot és tartsa lenyomva 10 mp-ig Töröljön ki minden programcsomagot, mely a termékhez lett rendelve a VEZÉRLŐ-n A termék visszatér a gyári beállításokhoz Nyomja meg a...
- Page 40 DECLARATION DE CONFORMITE Nous déclarons que les produits satisfont aux dispositions de : We declare that the products satisfy the provisions of : La Directive 1999/5/CE du Parlement européen et du Conseil du 9 mars 1999 "R&TTE" sous réserve d'une utilisation conforme à sa destination on condition that they are used in the manner et/ou d'une installation conforme aux normes en vigueur intended and/or in accordance with the current...
- Page 41 PRO 21™ Radiowy przełącznik scenariuszy 7756 16 Dane techniczne Podłączenie Zasilanie 1 bateria litowa CR 2032 Częstotliwość RF 868,3 Mhz Zasięg około 200 m w pustym polu + 5°C do + 45°C...
- Page 42 Montaż piktogramów na Wymiana baterii osłonach przycisków...
-
Page 43: Ustawienia Fabryczne
Część opisowa Ustawienia fabryczne Przy pierwszym podłączeniu do napięcia, naciśnięcie przycisków ON i OFF uruchamia sterowanie wszyst- Lampka kontrolna LEARN Nr identyfikacyjny kimi odbiornikami światła zgodnie z ustawieniami fabrycznymi. Podwójne naciśnięcie na przycisk LEARN anuluje tę funkcję ogólnego sterowania. Przycisk programowania lub ON / OFF 1 / 2 zapamiętywania. - Page 44 Działanie Przełącznik scenariuszy oświetlenia może sterować równocześnie wszystkimi urządzeniami (aktorami), które zostają do niego przypisane na etapie zapamiętywania . Przełącznik działa odtąd jako Lider scenariusza. Przełącznik scenariuszy oświetlenia pozwala na sterowanie za pomocą przycisków ON lub OFF punktami oświetlenia powiązanymi z urządzeniami (aktorami), które są przypisane do przycisku ON, umożliwiając : - zapalanie światła przez krótkie naciśnięcie przycisku ON - wyłączanie światła przez krótkie naciśnięcie przycisku OFF - zwiększenie poziomu natężenia światła przez przytrzymanie przycisku ON...
- Page 45 Legenda Kontrolka gaśnie Kontrolka miga powoli Kontrolka miga szybko Kontrolka błyska Uczenie się scenariuszy Etap 1 : rozpoczęcie procesu uczenia (na Masterze) Wcisnąć przycisk Wcisnąć przycisk, który będzie LEARN uruchamiał scenariusz Etap 2 : dodawanie urządzenia podległego do scenariusza (na SLAVE’IE) Wcisnąć...
- Page 46 Modyfikowanie scenariusza Etap 1 : otworzyć scenariusz (na Masterze) Kontrolki wszystkich urządzeń scenariusza zaczynają migać. Wcisnąć przycisk Wcisnąc przycisk sterujący LEARN scenariuszem Etap 2 : wprowadzić zmianę stanu urządzenia podległego (na Slave’ie) Wcisnąć przycisk Wcisnąć przycisk Wcisnąć przycisk sterujący, LEARN LEARN który chcemy przyporządkować...
- Page 47 Kasowanie scenariusza Kasowanie wszystkich scenariuszy przypisanych do przycisku sterującego (na MASTERZE) Scenariusz zostaje wykasowany Wcisnąć przycisk Wcisnąć i przytrzymać 10 LEARN sekund przycisk sterujący Kasowanie wszystkich scenariuszy związanych z danym urządzeniem (na MASTERZE) Urządzenie powraca do ustawienia fabrycznego Wcisnąć przycisk Wcisnąć...
- Page 48 DECLARATION DE CONFORMITE Nous déclarons que les produits satisfont aux dispositions de : We declare that the products satisfy the provisions of : La Directive 1999/5/CE du Parlement européen et du Conseil du 9 mars 1999 "R&TTE" sous réserve d'une utilisation conforme à sa destination on condition that they are used in the manner et/ou d'une installation conforme aux normes en vigueur intended and/or in accordance with the current...
- Page 49 PRO 21™ Interruptor cenário rádio 7756 16 Características Ligação Alimentação 1 pilha lítio CR 2032 Frequência RF 868,3 Mhz Alcance cerca de 200 m em campo livre + 5°C a + 45°C...
- Page 50 Montagem dos pictogramas Substituição da pilha nas placas...
-
Page 51: Configuração De Fábrica
Descrição Configuração de fábrica Na primeira colocação em tensão, premindo as teclas ON e OFF comanda todos os receptores de Luz indicadora LEARN N° de identificação iluminação em configuração de fábrica. Uma pressão dupla na tecla LEARN(1) anula esta função de comando geral. - Page 52 Funcionamento O interruptor cenário de iluminação pode comandar em simultâneo um conjunto de actores que lhe foram associados durante a aprendizagem , e funciona então como leader do cenário. O interruptor cenário de iluminação permite pilotar a partir das teclas ON ou OFF os pontos de iluminação ligados aos actores que estão associados à...
- Page 53 Legenda O indicador O indicador luminoso O indicador luminoso O indicador luminoso luminoso apaga-se pisca rapidamente pisca lentamente acende-se rapidamente Memorização do cenário Etapa 1 : iniciar a memorização (em LÍDER) Premir LEARN Premir a tecla de comando que deve pilotar o cenário Etapa 2 : acrescer um actor ao cenário (em ACTOR) Premir LEARN...
- Page 54 Modificação de um cenário Etapa 1 : abrir o cenário (em LÍDER) Os indicadores luminosos de todos os produtos piscam. Premir LEARN Premir a tecla de comando que pilota o cenário Etapa 2: modificar o estado de um actor do cenário (em ACTOR) Premir LEARN Premir LEARN Premir a tecla de comando...
- Page 55 Supressão de um cenário Suprimir todos os cenários ligados à tecla de comando (em LÍDER) O cenário é suprimido. Premir LEARN Premir a tecla de comando e manter durante 10 s Suprimir todos os cenários ligados este produto (em LÍDER) Retorno do produto à...
- Page 56 DECLARATION DE CONFORMITE Nous déclarons que les produits satisfont aux dispositions de : We declare that the products satisfy the provisions of : La Directive 1999/5/CE du Parlement européen et du Conseil du 9 mars 1999 "R&TTE" sous réserve d'une utilisation conforme à sa destination on condition that they are used in the manner et/ou d'une installation conforme aux normes en vigueur intended and/or in accordance with the current...
- Page 57 PRO 21™ Rádiový ovladač scénářů 7756 16 Charakteristika Zapojení Napájení 1 lithiová baterie CR 2032 Frekvence RF 868,3 Mhz Dosah cca 200 m na volném prostranství + 5°C až + 45°C...
- Page 58 Montáž piktogramů na Výměna baterie kryty tlačítek...
-
Page 59: Výrobní Nastavení
Popis Výrobní nastavení Při prvním připojení k napětí stisknu- tím tlačítek ON a OFF ovládáte všechna připojená svítidla. Kontrolka LEARN Identifikační číslo (ID) Dvojitým stisknutím tlačítka LEARN(1) toto nastavení zrušíte. Programovací tlačítko. ON / OFF 1 / 2 Ovládací Ovládací tlačítka tlačítka Způsob komunikace... - Page 60 Funkce Rádiový ovládač scénářů pro osvětlení může současně ovládat několik účastníků, kteří jsou k němu přiřazeni během progra- mování , funguje tedy jako Leader = řídící člen scénářů. Pomocí tlačítek ON nebo OFF řídí rádiový ovládač svítidla napojená na účastníky (Actory), kteří jsou připojeni k tlačítku ON, takto : - rozsvícení...
- Page 61 Legenda Kontrolka zhasne Kontrolka pomalu bliká Kontrolka rychle bliká Kontrolka prudce ostře bliká Osvojování scénáře Etapa 1: zahájení osvojování (LEADER) Stiskněte LEARN Stiskněte ovládací tlačítko, které musí řídit scénář. Etapa 2 : přidat ke scénáři účastníka (ÚČASTNÍK = ACTOR) Stiskněte LEARN Stiskněte ovládací...
- Page 62 Změna scénáře Etapa 1: otevření scénáře (LEADER) Kontrolky všech výrobků blikají. Stiskněte LEARN Stiskněte tlačítko, které řídí scénář. Etapa 2 : změňte stav účastníka scénáře (ÚČASTNÍK – ACTOR) Stiskněte LEARN Stiskněte LEARN Stiskněte ovládací tlačítko, které chcete přidat nebo Chcete-li vymazat výrobek ze scénáře přejděte k etapě...
- Page 63 Vymazání scénáře Vymažte všechny scénáře spojené s ovládacím tlačítkem (LEADER) Scénář je vymazán Stiskněte LEARN Stiskněte ovládací tlačítko a držte jej stisknuté po dobu 10 s Vymažte všechny scénáře spojené s tímto výrobkem (LEADER) Návrat výrobku do továrního nastavení Stiskněte LEARN Stiskněte LEARN a držte stisknuté...
- Page 64 DECLARATION DE CONFORMITE Nous déclarons que les produits satisfont aux dispositions de : We declare that the products satisfy the provisions of : La Directive 1999/5/CE du Parlement européen et du Conseil du 9 mars 1999 "R&TTE" sous réserve d'une utilisation conforme à sa destination on condition that they are used in the manner et/ou d'une installation conforme aux normes en vigueur intended and/or in accordance with the current...
- Page 65 PRO 21™ ëˆÂ̇Ì˚È ‡‰ËÓ ‚˚Íβ˜‡ÚÂθ 7756 16 íÂıÌ˘ÂÒÍË ı‡‡ÍÚÂËÒÚËÍË ëıÂχ ÔÓ‰Íβ˜ÂÌËfl èËÚ‡ÌË 1 ÎËÚË‚‡fl ·‡Ú‡ÂÈ͇ CR 2032 ꇉËÓ˜‡ÒÚÓÚ‡ 868,3 åɈ чθÌÓÒÚ¸ ÓÍÓÎÓ 200 Ï Ì‡ ÓÚÍ˚ÚÓÏ ‰ÂÈÒÚ‚Ëfl ÔÓÒÚ‡ÌÒÚ‚Â ÑˇԇÁÓÌ ‡·Ó˜Ëı ÚÂÏÔ‡ÚÛ + 5 ... + 45°C...
- Page 66 ìÒÚ‡Ìӂ͇ ÔËÍÚÓ„‡ÏÏ Ì‡ á‡ÏÂ̇ ·‡Ú‡ÂÈÍË Í·‚Ë¯Ë ôÂΘÓÍ...
- Page 67 éÔËÒ‡ÌË ᇂӉÒÍË ̇ÒÚÓÈÍË èË Ô‚ÓÏ ‚Íβ˜ÂÌËË ÔËÚ‡ÌËfl ÍÌÓÔÍË ON Ë OFF ÛÔ‡‚Îfl˛Ú „ÛÔÔÓÈ ÓÒ‚ÂÚËÚÂθÌ˚ı à̉Ë͇ÚÓ LEARN à‰ÂÌÚËÙË͇ˆËÓÌÌ˚È ‹ ÔË·ÓÓ‚ ‚ ÒÓÓÚ‚ÂÚÒÚ‚ËË Ò Ëı Á‡‚Ó‰ÒÍËÏË Ì‡ÒÚÓÈ͇ÏË. èË ‰‚ÓÈÌÓÏ Ì‡Ê‡ÚËË Ì‡ ÍÌÓÔÍÛ Learn ÙÛÌ͈Ëfl Ó·˘Â„Ó ÛÔ‡‚ÎÂÌËfl ÓÚÏÂÌflÂÚÒfl. äÌÓÔ͇ ÔÓ„‡ÏÏËÓ‚‡ÌËfl. ON / OFF 1 / 2 äÌÓÔÍË...
- Page 68 îÛÌ͈ËÓÌËÓ‚‡ÌË ëˆÂ̇Ì˚È ‚˚Íβ˜‡ÚÂθ ÏÓÊÂÚ Ó‰ÌÓ‚ÂÏÂÌÌÓ ÛÔ‡‚ÎflÚ¸ „ÛÔÔÓÈ Û˜‡ÒÚÌËÍÓ‚ ÒˆÂ̇Ëfl, ÔÓ‰Íβ˜ÂÌÌ˚ı Í ÌÂÏÛ ‚ ÔÓˆÂÒÒ ÔÓ„‡ÏÏËÓ‚‡ÌËfl ; ‚ ‰‡ÌÌÓÏ ÒÎÛ˜‡Â ÓÌ fl‚ÎflÂÚÒfl ÎˉÂÓÏ ÒˆÂ̇Ëfl. ëˆÂ̇Ì˚È ‚˚Íβ˜‡ÚÂθ ÔÓÁ‚ÓÎflÂÚ ÛÔ‡‚ÎflÚ¸ Ò ÔÓÏÓ˘¸˛ ÍÌÓÔÓÍ ON Ë OFF ÓÒ‚ÂÚËÚÂθÌ˚ÏË ÔË·Ó‡ÏË, ÔÓ‰Íβ˜ÂÌÌ˚ÏË Í Û˜‡ÒÚÌËÍ‡Ï ÒˆÂ̇Ëfl, Ò‚flÁ‡ÌÌ˚ÏË Ò ÍÌÓÔÍÓÈ ON, ‚˚ÔÓÎÌflfl ÒÎÂ‰Û˛˘Ë ÙÛÌ͈ËË : - ‚Íβ˜ÂÌËÂ...
- Page 69 ìÒÎÓ‚Ì˚ ӷÓÁ̇˜ÂÌËfl Ë̉Ë͇ÚÓ Ë̉Ë͇ÚÓ Ë̉Ë͇ÚÓ Ë̉Ë͇ÚÓ ‚˚Íβ˜ÂÌ ÏË„‡ÂÚ Û˜‡˘ÂÌÌÓ ÏË„‡ÂÚ ‚Íβ˜ÂÌ èÓ„‡ÏÏËÓ‚‡ÌË ҈Â̇Ëfl ùÚ‡Ô 1: ̇˜‡ÎÓ ÔÓ„‡ÏÏËÓ‚‡ÌËfl (̇ ãˉÂÂ) ç‡ÊÏËÚ ̇ ç‡ÊÏËÚ ̇ ÍÌÓÔÍÛ ÍÌÓÔÍÛ LEARN ÛÔ‡‚ÎÂÌËfl ÒˆÂ̇ËÂÏ ùÚ‡Ô 2 : ‰Ó·‡‚ÎÂÌË ۘ‡ÒÚÌË͇ ‚ ÒˆÂ̇ËÈ (̇ Û˜‡ÒÚÌËÍ ҈Â̇Ëfl) ç‡ÊÏËÚ ̇ ç‡ÊÏËÚÂ...
- Page 70 àÁÏÂÌÂÌË ҈Â̇Ëfl ùÚ‡Ô 1: Á‡ÔÛÒÍ ÒˆÂ̇Ëfl (̇ ãˉÂÂ) à̉Ë͇ÚÓ˚ ‚ÒÂı Á‡ÌflÚ˚ı ‚ ÒˆÂ̇ËË ÛÒÚÓÈÒÚ‚ ‚˚Íβ˜ÂÌ˚. ç‡ÊÏËÚ ̇ ç‡ÊÏËÚ ̇ ÍÌÓÔÍÛ ÍÌÓÔÍÛ LEARN ÛÔ‡‚ÎÂÌËfl ÒˆÂ̇ËÂÏ ùÚ‡Ô 2 : ËÁÏÂÌÂÌË ‡·ÓÚ˚ Û˜‡ÒÚÌË͇ ÒˆÂ̇Ëfl (̇ 옇ÒÚÌËÍÂ) ç‡ÊÏËÚ ̇ ç‡ÊÏËÚ ̇ ÍÌÓÔÍÛ LEARN ç‡ÊÏËÚ ̇ ÍÌÓÔÍÛ ÍÌÓÔÍÛ...
- Page 71 쉇ÎÂÌË ҈Â̇Ëfl 쉇ÎÂÌË ‚ÒÂı ÒˆÂ̇Ë‚, Ò‚flÁ‡ÌÌ˚ı Ò ÍÌÓÔÍÓÈ ÛÔ‡‚ÎÂÌËfl (̇ ãˉÂÂ) 5 ÒÂÍ ëˆÂ̇ËÈ Û‰‡ÎÂÌ ç‡ÊÏËÚ ̇ ç‡ÊÏËÚ ̇ ÍÌÓÔÍÛ ÛÔ‡‚ÎÂÌËfl ÍÌÓÔÍÛ LEARN Ë Û‰ÂÊË‚‡Èڠ ̇ʇÚÓÈ ‚ Ú˜ÂÌË 10 ÒÂÍ ì‰‡ÎÂÌË ‚ÒÂı ÒˆÂ̇Ë‚, Ò‚flÁ‡ÌÌ˚ı Ò ‰‡ÌÌ˚Ï ÛÒÚÓÈÒÚ‚ÓÏ (̇ ãˉÂÂ) ÇÓÁ‚‡Ú...
- Page 72 DECLARATION DE CONFORMITE Nous déclarons que les produits satisfont aux dispositions de : We declare that the products satisfy the provisions of : La Directive 1999/5/CE du Parlement européen et du Conseil du 9 mars 1999 "R&TTE" sous réserve d'une utilisation conforme à sa destination on condition that they are used in the manner et/ou d'une installation conforme aux normes en vigueur intended and/or in accordance with the current...
- Page 73 PRO 21™ Radyo frekanslı senaryo anahtarı 7756 16 Özellikler Bağlantı Besleme 1 lityum pil CR 2032 Frekans RF 868,3 Mhz Açık alanda kapsama yaklaşık 200 m + 5°C ila + 45°C...
- Page 74 Resimli etiketlerin montajı Pilin değiştirilmesi...
-
Page 75: Fabrika Ayarları
Tanımlama Fabrika ayarları İlk kez çalıştırıldığında ON veya OFF butonları “IN ONE BY LEGRAND” tesisatındaki tüm aydınlatma nokta- LEARN (öğrenme) göstergesi Kimlik N° larının tamamını kontrol eder. LEARN (öğrenme) butonuna iki kez basıldığında, genel kumanda fonk- siyonu iptal olur. Programlama veya öğrenme (LEARN) butonu. -
Page 76: Çalışma Prensibi
Çalışma prensibi Radyo frekanslı senaryo anahtarı öğrenme modunda kendisine atanmış aktörlerin tamamına aynı anda kumanda edebilir. Bu durumda bir senaryonun lideri olarak çalışır. Aydınlatma senaryo anahtarı üzerinden ON ve OFF butonlarına basılarak ON butonuna atanmış aktörlere bağlı aydınlatma noktalarını aşağıdaki gibi kumanda edebilir : - ON butonuna kısa süreli basarak yakma - OFF butonuna kısa süreli basarak söndürme - ON butonuna uzun süreli basarak aydınlatma seviyesini arttırma... - Page 77 Gösterge ışığı Gösterge söner Gösterge yavaşça Gösterge hızlıca Gösterge flaş yapar yanıp söner yanıp söner Senaryonun öğretilmesi Adım 1: Öğrenme moduna geçmek (LİDER üzerinde) LEARN (öğrenme) İlgili senaryoyu kumanda edecek butona basın butonuna basın Adım 2 : senaryoya bir aktör ekleyin (AKTÖR üzerinde) LEARN Lidere bağlı...
- Page 78 Bir senaryonun değiştirilmesi Adım 1 : senaryoyu açın (LİDER üzerinde) Senaryonun bütün ürünlerinin göstergeleri yanıp söner. LEARN (öğrenme) kumanda eden kumanda butonuna basın düğmesine basın Adım 2 : senaryonun bir aktörünün durumunun değiştirilmesi (AKTÖR üzerinde) LEARN (öğrenme) LEARN (öğrenme) idere bağlı çalışması istenen butonuna basın butonuna basın kumanda butonuna basın.
- Page 79 Bir senaryonun silinmesi Kumanda butonu ile bağlantılı bütün senaryoları silmek (LİDER üzerinde) enaryo silinmiştir LEARN Kumanda düğmesine basın üzerine basın ve 10 s tutun Ürünle bağlantılı bütün senaryoları silmek (LİDER üzerinde) Ürünün fabrika ayarlarına geri dönüşü LEARN LEARN üzerine basın üzerine basın ve 10 s tutun...
- Page 80 DECLARATION DE CONFORMITE Nous déclarons que les produits satisfont aux dispositions de : We declare that the products satisfy the provisions of : La Directive 1999/5/CE du Parlement européen et du Conseil du 9 mars 1999 "R&TTE" sous réserve d'une utilisation conforme à sa destination on condition that they are used in the manner et/ou d'une installation conforme aux normes en vigueur intended and/or in accordance with the current...
- Page 81 PRO 21™ Ovládač scenárov osvetlenia - RADIO 7756 16 Charakteristiky Pripojenie Napájanie 1 lítiová batéria CR 2032 RF Frekvencia 868,3 Mhz približne 200 m vo Dosah voľnom priestranstve + 5°C až + 45°C...
- Page 82 Inštalácia piktogramov na Výmena batérie tlačidlá...
- Page 83 Popis Továrenské nastavenie Zatlačením na tlačidlá ON a OFF pri prvom zapnutí sa všetky svetelné okruhy ovládajú podľa továrens- Kontrolka LEARN Identifikačné č. kého nastavenia. Dvojité zatlačenie tlačidla LEARN zruší túto funkciu všeobecného nas- tavenia. Tlačidlo programovania. ON / OFF 1 / 2 Ovládacie Ovládacie...
- Page 84 Funkcie Ovládač osvetlenia (scenárov) môže ovládať celú skupinu pripojených prístrojov (Účastníkov), ktoré sú mu priradené pri programovaní , funguje teda ako líder scenára. Ovládač scenárov môže pomocou tlačidiel ON a OFF ovládať svetelné okruhy pripojených prístrojov, ktoré sú priradené tlačidlu ON, v režime : - rozsvietenie krátkym zatlačením na tlačidlo ON - zhasnutie krátkym zatlačením na tlačidlo OFF - vzostupná...
- Page 85 Legenda Kontrolka rýchlo bliká Kontrolka zhasne Kontrolka pomaly bliká Kontrolka jasno intenzívne bliká Osvojovanie scenára Etapa 1: začatie osvojovania (u LÍDRA) Stlačte LEARN Stlačte ovládacie tlačidlo, ktoré musí riadiť scenár. Etapa 2 : pridať k scenáru účastníka (u ÚČASTNÍKA) Stlačte LEARN Stlačte ovládacie tlačidlo, ktoré...
- Page 86 Zmena scenára Etapa 1: otvorenie scenára (u LÍDRA) Kontrolky všetkých výrobkov blikajú. Stlačte LEARN Stlačte tlačidlo, ktoré riadi scenár. Etapa 2: zmeňte stav účastníka scenára (u ÚČASTNÍKA) Stlačte LEARN Stlačte LEARN Stlačte ovládacie tlačidlo, alebo ktoré chcete pridať Stlačte LEARN Ak chcete vymazať výrobok zo scenára prejdite k etape 3.
- Page 87 Vymazanie scenára Vymažte všetky scenáre spojené s ovládacím tlačidlom (u LÍDRA) Scenár je vymazaný Stlačte LEARN Stlačte ovládacie tlačidlo a držte ho stlačené počas 10 s Vymažte všetky scenáre spojené s týmto výrobkom (u LÍDRA) Návrat výrobku do tová- renského nastavenia Stlačte LEARN Stlačte LEARN a držte stlačený...
- Page 88 DECLARATION DE CONFORMITE Nous déclarons que les produits satisfont aux dispositions de : We declare that the products satisfy the provisions of : La Directive 1999/5/CE du Parlement européen et du Conseil du 9 mars 1999 "R&TTE" sous réserve d'une utilisation conforme à sa destination on condition that they are used in the manner et/ou d'une installation conforme aux normes en vigueur intended and/or in accordance with the current...
- Page 89 PRO 21™ Interscenario met radio 7756 16 Eigenschappen Aansluiting Voeding 1 lithiumbatterij CR 2032 Frequentie RF 868,3 Mhz 200 m in geval van Bereik ca. onbelemmerde transmissie + 5°C tot + 45°C...
- Page 90 Montage van de pictogram- Vervangen van de batterij men op de stiften...
- Page 91 Beschrijving Standaardconfiguratie Bij de eerste inschakeling worden door een druk op de toetsen ON en OFF alle lichtontvangers bediend in Controlelampje LEARN Identificatienummer de standaardconfiguratie. Door tweemaal op LEARN drukken, wordt deze algemene bedieningsfunctie geannuleerd. Toets voor programmering of inlezen. ON / OFF 1 / 2 Bedieningstoetsen...
- Page 92 Werking Het interscenario verlichting kan tegelijkertijd een verzameling actoren bedienen die hieraan toegevoegd zijn tijdens het inlezen , hij werkt dan als Leider van het scenario. Met het interscenario verlichting kunnen met behulp van de toetsen ON of OFF de lichtpunten bediend worden die aan- gesloten zijn op de actoren die met de toets ON verbonden zijn, bij : - inschakelen door kort op de toets ON te drukken - uitschakelen door kort op de toets OFF te drukken...
- Page 93 Legenda Het controlelampje Het controlelampje Het controlelampje Het controlelampje knippert snel gaat uit knippert langzaam flitst Inlezen van het scenario Stap 1: beginnen met inlezen (op de LEIDER) Druk op LEARN Druk op de bedieningstoets die het scenario bestuurt Stap 2 : een actor toevoegen aan het scenario (op de ACTOR) Druk op LEARN Druk op de bedieningstoets die aan de lei- der moet zijn toegevoegd...
- Page 94 Wijziging van een scenario Stap 1: het scenario openen (op de LEIDER) De controlelampjes van alle producten van het scenario knipperen. Druk op LEARN Druk op de bedieningstoets die het scenario bestuurt Stap 2 : de staat van een actor van het scenario wijzigen (op de ACTOR) Druk op LEARN Druk op LEARN Druk op de bedienings-...
- Page 95 Wissen van een scenario Wis alle scenario’s die verbonden zijn met de bedieningstoets (op de LEIDER) Het scenario is gewist Druk op LEARN Druk op de bedienings- toets en houd deze 10s ingedrukt Wis alle scenario’s die bij dit product horen (op de LEIDER) Terugkeer van het product naar de standaardconfiguratie Druk op LEARN...
- Page 96 DECLARATION DE CONFORMITE Nous déclarons que les produits satisfont aux dispositions de : We declare that the products satisfy the provisions of : La Directive 1999/5/CE du Parlement européen et du Conseil du 9 mars 1999 "R&TTE" sous réserve d'une utilisation conforme à sa destination on condition that they are used in the manner et/ou d'une installation conforme aux normes en vigueur intended and/or in accordance with the current...
- Page 97 PRO 21™ ±ntrerupÇtor de scenarii cu unde radio 7756 16 Caracteristici Conectare Alimentare 1 baterie cu litiu CR 2032 FrecvenÈÇ RF 868,3 Mhz DistanÈa de operare 200 m ¥n cámp liber + 5°C la + 45°C...
- Page 98 Montarea pictogramelor pe Schimbarea bateriei suprafaÈa de contact...
- Page 99 Descriere ConfiguraÈie din fabricÇ La prima punere sub tensiune, apÇsarea butoanelor ON Êi OFF comandÇ toÈi receptorii de iluminare Bec de control LEARN Nr. de identificare ¥n configuraÈia de fabricÇ. O dublÇ apÇsare a butonului LEARN anuleazÇ aceastÇ funcÈie de comandÇ generalÇ. Buton de programare sau de ¥nvÇÈare.
- Page 100 FuncÈionare ±ntrerupÇtorul de scenarii de iluminare poate comanda simultan mai mulÈi actori care ¥i sunt asociaÈi ¥n timpul programÇrii iar ¥n acest caz el funcÈioneazÇ ca lider al scenariului. ±ntrerupÇtorul de scenarii de iluminare permite comandarea cu ajutorul butoanelor ON Êi OFF punctele de iluminare legate la actorii care sunt asociaÈi butonului ON, ¥n : - aprindere printr-o apÇsare scurtÇ...
- Page 101 LegendÇ Becul de control Becul de control Becul de control Becul de control se stinge clipeÊte rar clipeÊte rapid scánteiazÇ ±nvÇÈarea scenariului Etapa 1 : ¥nceperea procesului de ¥nvÇÈare (pe LIDER) ApÇsaÈi butonul ApÇsaÈi butonul de comandÇ care LEARN trebuie sÇ comande scenariul. Etapa 2 : adÇugaÈi un actor scenariului (pe ACTOR) ApÇsaÈi butonul ApÇsaÈi butonul de comandÇ...
- Page 102 Modificarea unui scenariu Etapa 1 : deschideÈi scenariul (pe LIDER) Becurile de control ale tuturor produselor clipesc. ApÇsaÈi butonul ApÇsaÈi butonul de comandÇ LEARN care comandÇ scenariul. Etapa 2 : modificaÈi starea unui actor al scenariului (pe ACTOR) ApÇsaÈi butonul ApÇsaÈi butonul ApÇsaÈi butonul de LEARN...
- Page 103 Âtergerea unui scenariu ÂtergeÈi toate scenariile legate de butonul de comandÇ (pe LIDER) Scenariul este Êters ApÇsaÈi butonul ApÇsaÈi butonul LEARN de comandÇ Êi ÈineÈi apÇsat 10s ÂtergeÈi toate scenariile legate de acest produs (pe LIDER) Revenirea produsului la setarea din fabricÇ ApÇsaÈi butonul ApÇsaÈi butonul LEARN...
- Page 104 DECLARATION DE CONFORMITE Nous déclarons que les produits satisfont aux dispositions de : We declare that the products satisfy the provisions of : La Directive 1999/5/CE du Parlement européen et du Conseil du 9 mars 1999 "R&TTE" sous réserve d'une utilisation conforme à sa destination on condition that they are used in the manner et/ou d'une installation conforme aux normes en vigueur intended and/or in accordance with the current...
-
Page 105: Caractéristiques
PRO 21™ Interscénario radio 7756 16 Caractéristiques Branchement Alimentation 1 pile lithium CR 2032 Fréquence RF 868,3 Mhz Portée environ 200 m en champ libre + 5°C à + 45°C... - Page 106 Montage des pictogrammes Remplacement de la pile sur les doigts...
-
Page 107: Configuration D'usine
Description Configuration d’usine A la première mise sous tension l’appui sur les touches ON et OFF commande tous les récepteurs Voyant LEARN N° d'identification d’éclairage configuration d’usine. Un double appui sur la touche LEARN annule cette fonction de commande générale. Touche de programmation ou ON / OFF 1 / 2... - Page 108 Fonctionnement L'interscénarios d'éclairage peut commander simultanément un ensemble d’acteurs qui lui sont associés lors de l’appren- tissage , il fonctionne alors en leader du scénario. L'interscénarios d'éclairage permet de piloter à partir des touches ON ou OFF les points d'éclairage reliés aux acteurs qui sont associés à...
- Page 109 Légende Le voyant s'éteint Le voyant clignote Le voyant clignote Le voyant flashe rapidement lentement Apprentissage du scénario Etape 1 : débuter l'apprentissage (sur le LEADER) Appuyer sur Appuyer sur la touche de commande LEARN qui doit piloter le scénario Etape 2 : ajouter un acteur au scénario (sur l'ACTEUR) Appuyer sur Appuyer sur la touche de commande...
- Page 110 Modification d’un scénario Etape 1 : ouvrir le scénario (sur le LEADER) Les voyants de tous les produits du scénario clignotent. Appuyer sur Appuyer sur la touche de LEARN commande qui pilote le scénario Etape 2 : modifier l'état d'un acteur du scénario (sur l'ACTEUR) Appuyer sur Appuyer sur Appuyer sur la touche...
- Page 111 Effacement d’un scénario Effacer tous les scénarios liés à la touche de commande (sur le LEADER) Le scénario est effacé Appuyer sur Appuyer sur LEARN la touche de commande et maintenir 10s Effacer tous les scénarios liés à la touche de commande (sur le LEADER) Retour du produit en configuration usine Appuyer sur...
- Page 112 DECLARATION DE CONFORMITE Nous déclarons que les produits satisfont aux dispositions de : We declare that the products satisfy the provisions of : La Directive 1999/5/CE du Parlement européen et du Conseil du 9 mars 1999 "R&TTE" sous réserve d'une utilisation conforme à sa destination on condition that they are used in the manner et/ou d'une installation conforme aux normes en vigueur intended and/or in accordance with the current...
Need help?
Do you have a question about the PRO 21 7756 16 and is the answer not in the manual?
Questions and answers