SOMFY Sonesse 30 RS485 Manual
Hide thumbs
Also See for Sonesse 30 RS485:
- Installation instructions manual (17 pages) ,
- Instructions manual (16 pages) ,
- Integration manual (7 pages)
Table of Contents
Advertisement
Available languages
Available languages
Quick Links
Advertisement
Table of Contents

Subscribe to Our Youtube Channel
Related Manuals for SOMFY Sonesse 30 RS485


Summary of Contents for SOMFY Sonesse 30 RS485
- Page 1 DIGITAL TECHNOLOGY SOMFY ® Sonesse 30 RS485...
- Page 3 Guía de instalación página 18 Por la presente, Somfy declara que el aparato cumple las exigencias esenciales y el resto de disposiciones pertinen- tes de la directiva 1999/5/CE. Podrá encontrar una declaración de conformidad en la página web www.somfy.com/ce. Aplicable para la UE, Suiza y Noruega.
-
Page 4: General Safety Instructions
• Any use outside the sphere of application specified by Somfy is not approved. Such use, or any failure to comply with the instructions given herein will invalidate the warranty, and Somfy refuses to accept liability. -
Page 5: Installation
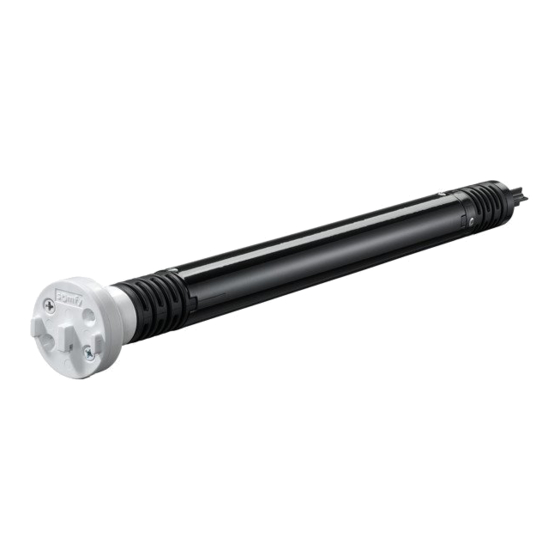
If necessary, screw the bracket inter- face on the motor head. Mount the motorized tube on the end bracket (C ). Mount the motorized tube on the motor bracket (D). Copyright © 2010 Somfy SAS. All rights reserved - V1 - 01/2011... - Page 6 Wall Switch 1 UP or DOWN (White/Blue or White/ Orange) 2 UP or DOWN (White/Blue or White/ Orange) 3 GND (Orange) 5) Correspondence ST OP ST OP ST OP Copyright © 2011 Somfy SAS. All rights reserved - V1 - 01/2011...
-
Page 7: Dry Contact
The shade moves up and will stop at its upper limit. 5) To confirm the end limits press and hold the STOP button until the shade jogs. The end limits are recorded. Copyright © 2010 Somfy SAS. All rights reserved - V1 - 01/2011... - Page 8 STOP button until the shade jogs once. 3) Delete the MY position To delete the MY position, move to this position and press the STOP button until the shade jogs once. Copyright © 2011 Somfy SAS. All rights reserved - V1 - 01/2011...
- Page 9 UP or DOWN button. 2) To stop the shade, press the STOP button. 3) To move the shade to the MY posi- tion, press briefly the STOP button. Copyright © 2010 Somfy SAS. All rights reserved - V1 - 01/2011...
- Page 10 Erasing the memory of the motor. Press and hold all the three buttons simultaneously until the shade jogs 3 times. All the settings are erased. Copyright © 2011 Somfy SAS. All rights reserved - V1 - 01/2011...
-
Page 11: Troubleshooting
• The crown is properly fitted to the tube. • The end-limits of the motor are properly adjusted. • Verify that the shade is within the recommended weight limit Copyright © 2010 Somfy SAS. All rights reserved - V1 - 01/2011... -
Page 12: Consignes Generales De Securite
SECURITE ET INFORMATIONS IMPORTANTES • Ce produit SOMFY doit être installé par un professionnel de la motorisation et de l’automatisation de l’habitat auquel cette notice est destinée. • Avant toute installation, vérifier la compatibilité de ce produit avec les équipements et accessoires associés. - Page 13 Si nécessaire, visser les supports moteurs sur la tête moteur. Monter le tube motorisé sur le support embout.(C ). Monter le tube motorisé sur le support moteur.(D). Copyright © 2010 Somfy SAS. All rights reserved - V1 - 01/2011...
- Page 14 Wall Switch 1 MONTEE OU DESCENTE (Blanc/ Bleu ou Blanc/Orange) 2 MONTEE OU DESCENTE (Blanc/ Bleu ou Blanc/Orange) 3 COMMUN (Orange) 5) Correspondance ST OP ST OP ST OP Copyright © 2011 Somfy SAS. All rights reserved - V1 - 01/2011...
-
Page 15: Mise En Service
5) Pour confirmer les fins de cour- ses, Appuyer sur la touche STOP de l’outil de réglage jusqu’au va et- vient du moteur. Les fins de courses sont enregistrées. Copyright © 2010 Somfy SAS. All rights reserved - V1 - 01/2011... - Page 16 Stop. Le store se met en mouvement et s’arrête en position my. Appuyer de nouveau sur la touche Stop jusqu’au va-et-vient du store. La position My est supprimée. Copyright © 2011 Somfy SAS. All rights reserved - V1 - 01/2011...
- Page 17 à l’autre,appuyer sur les tou- ches Montée ou Descente. 2) Pour stopper le store, appuyer sur la touche Stop. 3) Pour déplacer le store en position My,appuyer sur la touche Stop. Copyright © 2010 Somfy SAS. All rights reserved - V1 - 01/2011...
- Page 18 Montée, Stop et Descente jusqu’au double va-et-vient du store. Retour en configuration d’origine Appuyer simultanément sur les boutons Montée, Stop et Descente jusqu’au triple va-et-vient du store. Tous les réglages sont supprimé. Copyright © 2011 Somfy SAS. All rights reserved - V1 - 01/2011...
-
Page 19: Caracteristiques Techniques
• Que la couronne d’entraînement est bien solidarisée au tube. • Que les fins de course du moteur soient bien réglées. • Vérifier que le store est dans les limites de poids recommandé. Copyright © 2010 Somfy SAS. All rights reserved - V1 - 01/2011... -
Page 20: Normas Generales De Seguridad
SEGURIDAD • La instalación de este producto Somfy deberá correr a cargo de un instalador profesional de automatización de la vivienda y motorización, a quien va dirigida esta guía. • Antes de su utilización, compruebe la compatibilidad de este producto con los equipos y accesorios asociados. -
Page 21: Instalación
Si es necesario, atornille la interfaz del soporte al cabezal del motor. Monte el tubo motorizado en el so- porte final (c). Monte el tubo motorizado en el so- porte motor (d). Copyright © 2010 Somfy SAS. All rights reserved - V1 - 01/2011... - Page 22 Interruptor de pared 1 UP o DOWN (Blanco/Azul o Blanco/ Naranja) 2 UP o DOWN (Blanco/Azul o Blanco/ Naranja) 3 GND (Naranja) 5) Correspondencia ST OP ST OP ST OP Copyright © 2011 Somfy SAS. All rights reserved - V1 - 01/2011...
-
Page 23: Puesta En Marcha
5) Para confirmar los finales de carrera, pulse y mantenga pulsado el botón de parada (STOP) hasta que el estor suba y baje ligeramente. Los finales de carrera quedan regis- trados. Copyright © 2010 Somfy SAS. All rights reserved - V1 - 01/2011... - Page 24 Para eliminar MI (MY) posición, mueva el estor a esta posición y pulse el botón de parada (STOP) hasta que el estor suba y baje ligeramente una vez. Copyright © 2011 Somfy SAS. All rights reserved - V1 - 01/2011...
- Page 25 (UP) o bajada (DOWN). 2) Para detener el estor, pulse el botón de parada (STOP). 3) Para mover el estor a MI (MY) posición, pulse brevemente el botón de parada (STOP). Copyright © 2010 Somfy SAS. All rights reserved - V1 - 01/2011...
- Page 26 Borrado de la memoria del motor Pulse y mantenga pulsados los tres botones simultáneamente hasta que el estor suba y baje ligeramente 3 veces. Se borran todos los ajustes. Copyright © 2011 Somfy SAS. All rights reserved - V1 - 01/2011...
-
Page 27: Datos Técnicos
• La corona esté correctamente ajustada en el tubo. • Los finales de carrera del motor estén ajustados adecuadamente. • El estor se encuentre dentro de los límites de peso recomendados. Copyright © 2010 Somfy SAS. All rights reserved - V1 - 01/2011... -
Page 28: Allgemeine Sicherheitshinweise
Kunden über die Bedienungs- und Wartungsbedingungen des Produkts informieren. • Jede Verwendung, die nicht dem von Somfy bestimmten Anwendungsbereich entspricht, gilt als nicht bestimmungs- gemäß. Im Falle einer nicht bestimmungsgemäßen Verwendung, wie auch bei Nicht-Befolgung der Hinweise in dieser Anleitung, entfällt die Haftung und Gewährleistungspflicht von Somfy. - Page 29 Antriebskopf. Bringen Sie die Welle mit eingesteck- tem Antrieb am Gegenlager (c) an. Bringen Sie die Welle mit eingesteck- tem Antrieb am Antriebslager (d) an. Copyright © 2010 Somfy SAS. All rights reserved - V1 - 01/2011...
- Page 30 1 AUF oder AB (Weiß/Blau oder Weiß/ Orange) 2 AUF oder AB (Weiß/Blau oder Weiß/ Orange) 3 Gemeinsame Steuerleitung (Orange) 5) Entsprechende Tasten ST OP ST OP ST OP Copyright © 2011 Somfy SAS. All rights reserved - V1 - 01/2011...
- Page 31 Endlage an. 5) Bestätigen Sie die Endlagen, indem Sie die STOP-TASTE drücken und halten, bis der Behang mit einer kur- zen Auf-/Ab-Bewegung bestätigt Die Endlagen sind gespeichert. Copyright © 2010 Somfy SAS. All rights reserved - V1 - 01/2011...
- Page 32 Sie können die my-Position löschen, indem Sie den Behang in diese Position fahren und anschließend die STOP-Taste drücken und halten, bis der Behang mit einer kurzen Auf-/Ab- Bewegung bestätigt. Copyright © 2011 Somfy SAS. All rights reserved - V1 - 01/2011...
- Page 33 Endlage in die andere fahren. 2) Durch Drücken der STOP-Taste können Sie den Behang anhalten. 3) Wenn Sie die STOP-Taste kurz drücken, fährt der Behang in die my- Position. Copyright © 2010 Somfy SAS. All rights reserved - V1 - 01/2011...
- Page 34 Einstellungen! Drücken Sie die gleichzeitig alle drei Tasten und halten Sie sie gedrückt, bis der Behang mit drei kurzen Auf-Ab- Bewegungen bestätigt. Alle Einstellungen sind gelöscht. Copyright © 2011 Somfy SAS. All rights reserved - V1 - 01/2011...
-
Page 35: Technische Daten
• Ob während der Drehung des Antriebs eine Endlagenschaltung aktiviert wird. • Ob der Adapter korrekt montiert ist. • Ob die Endlagen des Antriebs richtig eingestellt sind. • Ob das Gewicht des Sonnenschutzes innerhalb der empfohlenen Gewichtsgrenzen liegt. Copyright © 2010 Somfy SAS. All rights reserved - V1 - 01/2011... - Page 36 • Qualquer utilização fora do domínio de aplicação definido pela Somfy não é autorizada. A utilização inapropriada ou qualquer incumprimento das instruções fornecidas neste guia anulam a garantia e a Somfy rejeita qualquer responsabilidade.
- Page 37 Se necessário, aparafusar a interface do suporte à cabeça do motor. Montar o tubo motorizado no suporte da extremidade (c). Montar o tubo motorizado no suporte do motor (d). Copyright © 2010 Somfy SAS. All rights reserved - V1 - 01/2011...
- Page 38 1 PARA CIMA ou PARA BAIXO (Branco/Azul ou Branco/Laranja) 2 PARA CIMA ou PARA BAIXO (Branco/Azul ou Branco/Laranja) 3 GND (Laranja) 5) Correspondência ST OP ST OP ST OP Copyright © 2011 Somfy SAS. All rights reserved - V1 - 01/2011...
-
Page 39: Colocação Em Serviço
5) Para confirmar os limites, prima sem soltar o botão STOP até o estore fazer um movimento acima e abaixo. Os limites são gravados. Copyright © 2010 Somfy SAS. All rights reserved - V1 - 01/2011... - Page 40 Para apagar a posição MY (pessoal), desloque o estore até esta posição e prima o botão STOP, até o estore fazer um movimento acima e abaixo uma vez. Copyright © 2011 Somfy SAS. All rights reserved - V1 - 01/2011...
- Page 41 PARA CIMA ou PARA BAIXO. 2) Para parar o estore, pressionar o botão STOP. 3) Para deslocar o estore para a posição MY (pessoal), pressionar brevemente o botão STOP. Copyright © 2010 Somfy SAS. All rights reserved - V1 - 01/2011...
- Page 42 Apagar a memória do motor. 3) Pressionar sem soltar os três botões simultaneamente, até o estore fazer um movimento acima e abaixo 3 vezes. Todas as definições são apagadas. Copyright © 2011 Somfy SAS. All rights reserved - V1 - 01/2011...
-
Page 43: Características Técnicas
• Se a coroa está correctamente montada no tubo. • Se os limites do motor estão correctamente ajustados. • Verificar se o estore se encontra dentro do limite de peso recomendado Copyright © 2010 Somfy SAS. All rights reserved - V1 - 01/2011... - Page 44 · 本尚飛產品必須有專業的人員根據安裝說明書的指導來安裝。 · 安裝前,請確認本產品與相關設備和配件的兼容性。 · 本安裝說明書涵蓋了如何安裝,調試和使用本產品。 · 此外,安裝人員需遵守關於本產品的相關國家的法律法規,並告知如何使用和維護本產品。 · 不得在尚飛公司指定的應用外使用本產品。任何由此或不按照說明書使用而引發的產品的損壞,將不在尚飛公司 質保範圍內。 兼容的產品和控制 卷簾 RS485控制 幹觸點控制 PROG ST OP RS485設置工具 宜心總線 牆面開關 總控開關 同時給予幹觸點和RS485命令信號會導致通訊衝突,使電機不能正常運行。建議一次使用一種控制信號。 注意事項 電機不能浸水 不能敲擊電機 不要在電機上鑽孔 防止電機跌落 Copyright © 2011 Somfy SAS. All rights reserved - V1 - 01/2011...
- Page 45 安裝 安裝皇冠前,先將網管ID標 籤撕下 。 準備電機 1) 安裝電機的皇冠(a)和轉輪(b)。 2) 測量電機頭到轉輪的中間距離 (L)。 準備卷管 將卷管裁到需要的長度。 電機/卷管的組裝 1) 將電機插入卷管。 2) 用自攻螺絲將轉輪與卷管固定。 安裝支架 安裝尾插支架 (C)。 安裝電機支架 (D)。 Copyright © 2010 Somfy SAS. All rights reserved - V1 - 01/2011...
- Page 46 1 上行或下行(白/藍 或 白/橙) 2 上行或下行(白/藍 或 白/橙) 3 GND (Orange) c) 牆面開關 1 上行或下行(白/藍 或 白/橙) 2 上行或下行(白/藍 或 白/橙) 3 地線(橙) 5) 兩鍵順序開關 ST OP ST OP ST OP Copyright © 2011 Somfy SAS. All rights reserved - V1 - 01/2011...
- Page 47 按住設置工具的停止鍵直到電機抖動: 電機運行方向改變。 按設置工具上行鍵確認電機運行的方案。 調節限位 上下限位的設置沒有先後之分。 1) 按住上行鍵將卷簾運行到需要的上 限位 。 2) 同時按住停止和下行鍵,當卷簾開 始運行時,鬆開按鍵,上限位被電 機記憶。 3) 當卷簾運行到下限位時,按停止 鍵。 如有需要,可以通過輕按上行,下行 鍵調整下限位位置。 4) 同時按住停止和上行鍵,當卷簾 開始 運行時,鬆開按鍵。 下限位被電機記憶。卷簾運行到上限 位後,自動停止。 5) 按住停止鍵直到卷簾反饋,上, 下限 位設置完成。 Copyright © 2010 Somfy SAS. All rights reserved - V1 - 01/2011...
- Page 48 使用 中間位置 1) 設置中間位置 使用上行和下行鍵將電機運行到需要的 中間位置,按住停止鍵直到卷簾反饋一 次,中間位置設置完成。 2) 更改中間位置 使用上行和下行鍵將電機運行到新的中 間位置,按住停止鍵直到卷簾反饋一 次,中間位置更改完成。 3) 刪除中間位置 將卷簾運行到中間位置,按住停止鍵直 到卷簾反饋一次,中間位置刪除。 Copyright © 2011 Somfy SAS. All rights reserved - V1 - 01/2011...
- Page 49 同時按住調試工具的上行,下行和停止 鍵,就能退出設置模式,在設置模式 下,2分鐘內沒有接收到命令,電機自 動退出設置模式。 設置運行速度 1) 按住停止鍵直到電機反饋2次,卷簾 自動上行,下行10秒。 2) 當卷簾運行時,輕按上行鍵調高 運行 速度,輕按下行鍵調低運行速度。 3) 按住停止鍵,卷簾反饋,新電機轉 速設置完畢。 上行,下行和中間位置 1) 輕按上行或下行,卷簾從一個限 位運 行到另一個限位。 2) 在卷簾運行過程中,按停止鍵,卷 簾停止運行。 3) 在卷簾靜止時,按停止鍵,卷簾 運行 到預設的中間位置。 Copyright © 2010 Somfy SAS. All rights reserved - V1 - 01/2011...
- Page 50 2) 同時按住下行和停止鍵,直到卷簾 反饋。 3) 控制上行或下行鍵,將卷簾運行 到新 的限位位置。 4) 按住停止鍵,卷簾反饋,新的上限 位設置完畢。 下限位 1) 按下行鍵,將卷簾運行到下限位。 2) 同時按住上行和停止鍵,直到卷簾 反饋。 3) 控制上行或下行鍵,將卷簾運行 到新 的限位位置。 4) 按住停止鍵,卷簾反饋,新的下限 位設置完畢。 改變電機運行方向 同時按住上行,下行和停止鍵,電機反 饋2次,電機運行方向改變。 刪除所有電機設置 同時按住上行,下行和停止鍵,電機反 饋3次,所有電機設置清除。 Copyright © 2011 Somfy SAS. All rights reserved - V1 - 01/2011...
- Page 51 6 → 28 rpm 可調轉速 28 rpm 出廠轉速 問題解決 電機不工作: 檢查: · 電機的接線是否正確 · 變壓器功率是否足夠 · 控制是否兼容 · 電機是否過熱(等待5分鐘,使電機涼下來) 電機過早停 : 檢查: · 電機限位裝置是否完好 · 皇冠是否安裝正確 · 限位是否設置正確 · 是否超載 Copyright © 2010 Somfy SAS. All rights reserved - V1 - 01/2011...
- Page 52 قد يؤدي استخدام أداة RS485 .وحدة تحكم واحدة فقط إرشادات السالمة العامة ال تغمر المحرك أبدا في أي تجنب تعريض المحرك !سوائل !للصدمات !ال تثقب المحرك أبدا تجنب تعريض المحرك !للسقوط Copyright © 2011 Somfy SAS. All rights reserved - V1 - 01/2011...
- Page 53 عند اللزوم قم بتثبيت واجهة الدعامة على رأس .المحرك بالبراغي قم بتركيب الماسورة التي بداخلها المحرك على الدعامة الطرفية قم بتركيب الماسورة التي بداخلها المحرك على دعامة المحرك التمديدات السلكية .قم بتوصيل كابل الكهرباء بالمحرك Copyright © 2010 Somfy SAS. All rights reserved - V1 - 01/2011...
- Page 54 ( مفتاح حائطيc (1 رفع أو إنزال )أبيض/أزرق أو أبيض/برتقالي (2 رفع أو إنزال )أبيض/أزرق أو أبيض/برتقالي (3 أرضي )برتقالي 5( توافق الرموز ST OP ST OP ST OP Copyright © 2011 Somfy SAS. All rights reserved - V1 - 01/2011...
- Page 55 .فيتم تخزين حد اإلنزال تتحرك الستارة ألعلى وتتوقف عند الحد .العلوي لها لتأكيد الحدود النهائية، اضغط على زر اإليقاف وأبقه مضغوطا إلى أن تتحرك الستارة .ببطء .فيتم تخزين الحدود النهائية Copyright © 2010 Somfy SAS. All rights reserved - V1 - 01/2011...
- Page 56 .الستارة ببطء مرة واحدة محو الوضع المفضل ، قم بتحريك الستارة لمحو الوضع المفضل إلى هذا الوضع ثم اضغط على زر اإليقاف إلى .أن تتحرك الستارة ببطء مرة واحدة Copyright © 2011 Somfy SAS. All rights reserved - V1 - 01/2011...
- Page 57 ،لتحريك الستارة من حد إلى الحد اآلخر اضغط لوهلة قصيرة على زر الرفع أو زر .اإلنزال إليقاف حركة الستارة اضغط على زر .اإليقاف لتحريك الستارة إلى الوضع المفضل .اضغط لوهلة قصيرة على زر اإليقاف Copyright © 2010 Somfy SAS. All rights reserved - V1 - 01/2011...
- Page 58 .تتحرك الستارة ببطء مرتين .محو ذاكرة المحرك اضغط على األزرار الثالثة في وقت واحد وأبقها .مضغوطة إلى أن تتحرك الستارة ببطء 3 مرات .فيتم محو جميع أوضاع الضبط Copyright © 2011 Somfy SAS. All rights reserved - V1 - 01/2011...
- Page 59 .تشغيل الحدود النهائية أثناء دوران المحرك • .تركيب التاج بطريقة صحيحة مع الماسورة • .ضبط الحدود النهائية للمحرك بطريقة صحيحة • تحقق من أن وزن الستارة في النطاق الموصى به • Copyright © 2010 Somfy SAS. All rights reserved - V1 - 01/2011...
- Page 60 Less significant bit transmitted first Parity Stop bit Logical Level 1 RS485 control wiring Pin 1 (red) = (+) Pin 2 (green) = Ground Pin 3 (black) = (-) Copyright © 2011 Somfy SAS. All rights reserved - V1 - 01/2011...
- Page 61 Stop movement CTRL_STOP (02h) >> In Move to absolute position (UP/DOWN/IP) CTRL_MOVETO (03h) Control >> In Move to relative position (Jog/Next IP) CTRL_MOVEOF (04h) >> In Feedback CTRL_WINK (05h) Copyright © 2010 Somfy SAS. All rights reserved - V1 - 01/2011...
- Page 62 Send motor speed for rolling applications POST_MOTOR_ROLLING_SPEED (33h) Out >> Send Intermediate Positions POST_MOTOR_IP(35h) Out >> Send DCT status (Enabled / Disabled) POST_DCT_LOCK(37h) Out >> Send factory default status POST_FACTORY_DEFAULT (3Fh) Copyright © 2011 Somfy SAS. All rights reserved - V1 - 01/2011...
- Page 63 Copyright © 2010 Somfy SAS. All rights reserved - V1 - 01/2011...
- Page 64 Fax: +961 (0) 1 391 228 Fax: +886 (0) 2 2532 4680 Export: Somfy Export Malaisia: Somfy Malaisia: +60 (0) 3 228 74743 Tel: + 33 4 50 96 70 76 Thailand:Bangkok Regional Office Tel: + 33 4 50 96 75 53...
Need help?
Do you have a question about the Sonesse 30 RS485 and is the answer not in the manual?
Questions and answers