Sensopart FT 50 RLA Mounting And Operating Instructions
Distance sensor
Hide thumbs
Also See for FT 50 RLA:
- Mounting and operating instructions (36 pages) ,
- Mounting and operating instructions (88 pages)

Related Manuals for Sensopart FT 50 RLA


Summary of Contents for Sensopart FT 50 RLA
- Page 1 Montage- und Bedienungsanleitung Mounting and operating instructions Instructions de service et de montage FT 50 RLA 70-PL5 220-PL5 Abstandssensor Distance sensor Capteur de distance...
- Page 2 écrite de SensoPart Industriesensorik GmbH. Nous déclinons toute responsabilité concernant les fautes éventuelles d’impression et autres erreurs qui auraient pu intervenir lors du montage de cette brochure.
- Page 3 Eingriffe und Veränderungen am Gerät sind nicht zulässig! Der FT 50 RLA ist kein Sicherheitsbauteil gemäß EU-Maschinenrichtlinien. Der FT 50 RLA entspricht der Laserschutzklasse 2 nach DIN EN 60825/1, Stand 2001. Die techni- schen Anforderungen genügen der EN 60947-5-2, Ausgabe 2000.
-
Page 4: Montage
Sensoranordnung FT 50 RLA positionieren, so dass der Abstand zum Objekt innerhalb des Arbeitsbereiches des Sensors liegt. Den FT 50 RLA auf den Haltewinkel, z.B. Typ MSP F50 (nicht im Lieferumfang enthalten), oder an eine geeignete Vorrichtung schrauben. Bei Stufen, bewegten oder gestreiften Objekten, den Sensor mit seiner Frontscheibe quer zur Bewegungsrichtung montieren (Abb. -
Page 5: Elektrische Installation
Gerätestecker für das Anschlusskabel entsprechend der Einbaulage so verdrehen (Abb. 1), dass das Anschlusskabel frei und ohne abzuknicken angeschlossen werden kann. Buchse des Anschlusskabels in den Stecker des FT 50 RLA einstecken und handfest verschrauben. Anschlusskabel gegen Verrutschen sichern (zum Beispiel mit Kabelbinder). -
Page 6: Bedienung Und Einstellung
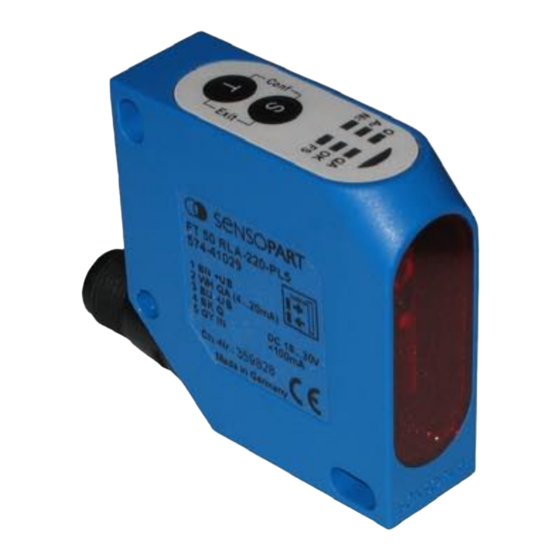
4 mA = Ende Arbeitsbereich, 20 mA = Anfang Arbeitsbereich · Betriebsart = speed mode (kürzeste Ansprechzeit) · Betrieb = freilaufend (Normalbetrieb) Anzeigen und Einstellelemente Der FT 50 RLA wird mit den Tasten S und T eingestellt. Set-Taste: Einstellung ändern bzw. bestätigen oder Schaltpunkt teachen. Toggle-Taste: Einstellung auswählen, springt eine Einstellung weiter. - Page 7 Beträgt der Abstand zwischen 0% - Punkt und 100% - Punkt weniger als 5% des Arbeitsbereichs, wird der Analogausgang automatisch auf 5% vom max. Arbeitsbereich skaliert. Die Mitte des Bereichs wird zwischen den gesetzten 0% - und 100% - Punkt gelegt. FT 50 RLA Abstandssensor - Dokument 068-13799 - Status: 20.09.2005-00...
- Page 8 6.4.3 Einstellmodus deaktivieren (Exit): Erst , dann zusätzlich drücken. Danach sind alle Einstellungen gespeichert. Nach dem Loslassen der Tasten befindet sich der Sensor im Run-Modus. Die Betriebsanzeige „BA“ (grün) leuchtet dauerhaft. FT 50 RLA Abstandssensor - Dokument 068-13799 - Status: 20.09.2005-00...
-
Page 9: Mechanische Daten
-20 ... +80 °C Anschlussart M12 Stecker, 5-polig Gewicht ca. 43 g kleinste messbare Änderung bei Umgebungstemperatur : +40 °C Grenzwerte empfohlene Bürde < 500 Ohm Bemessungsspannung 50 V DC bei angeschraubter Leitungsdose FT 50 RLA Abstandssensor - Dokument 068-13799 - Status: 20.09.2005-00... -
Page 10: Signs And Symbols
When aligning FT50 RLA, ensure that there are no reflections on reflective surfaces. Should the safety label on the FT 50 RLA sensor be partly covered due to its installation positi- on, other safety labels are to be positioned on visible parts of the sensor. When applying the new safety label, make sure that you cannot look into the laser beam whilst reading it. -
Page 11: Appropriate Use
Sensor alignment Position FT 50 RLA so that the distance from the object is within the operating range of the sensor. Screw the FT 50 RLA sensor to the mounting bracket, e.g. type MSP F50 (not included in delivery) or a suitable device. Only use the holes provided in the housing (see dimensioned drawing) for this purpose. -
Page 12: Electrical Installation
The sensor is ready to operate after a delay (≤ 300 ms). LED BA (green) must light. For maximum precision, please allow for a heating period (approx. 5 minutes). FT 50 RLA Distance sensor - Document 068-13799 - Status: 20.09.2005-00... -
Page 13: Operation And Setting
· Operating mode = speed mode (shortest response time) · Operation = free running (normal mode) Indicators and Setting Elements The FT 50 RLA is set with the buttons S and T. Set button: Change or confirm setting or teach in switching point. - Page 14 If the distance between the 0% point is less than 5% of the operating range, the analogue output is automatically scaled to 5% of the max. operating range. The middle of the range is placed between the set 0% and 100% points. FT 50 RLA Distance sensor - Document 068-13799 - Status: 20.09.2005-00...
- Page 15 6.4.3 Deactivating the Set Mode (Exit): First press , then . All settings are then saved. The sensor is in the Run mode after releasing the buttons. The operating indicator „BA“ (green) lights steadily FT 50 RLA Distance sensor - Dokument 068-13799 - Status: 20.09.2005-00...
-
Page 16: Mechanical Data
43 g smallest, measurable difference at ambient temperature : +40 °C limit values recommended burden < 500 Ohm (apparent ohmic resistance ) rating 50V DC with attached connector FT 50 RLA Distance sensor - Document 068-13799 - Status: 20.09.2005-00... -
Page 17: Légende Des Symboles
Le FT 50 RLA n’est pas une pièce de sécurité au sens des directives EU relatives aux machines. Le FT 50 RLA correspond à la classe de protection de laser 2 selon DIN EN 60825/1, édition 2001. Les exigences techniques satisfont à la norme EN 60947-5-5, édition 2000. - Page 18 Positionnement du capteur Positionner le FT 50 RLA de manière à ce que sa distance à l‘objet soit comprise dans le champ de travail du capteur. Fixer le FT 50 RLA sur l’équerre, par ex. type MSP F50 (non fournie sans commande) ou sur l’installation lui étant destinée.
-
Page 19: Installation Électrique
Tourner le capteur de telle façon (voir fig.1) que la fiche soit libre et que le connecteur puisse être monté sans être plié. Enfoncer la prise ronde du connecteur sur la fiche du FT 50 RLA et la visser à la main. Protéger par exemple le connecteur de tout glissement au moyen d’un serre - câble. -
Page 20: Utilisation Et Réglage
· Mode opératoire = speed mode (temps de réponse minimum) · Mode = libre (normal) Affichages et éléments de réglage Le FT 50 RLA se règle avec les touches S et T. Touche Set : Modifier ou confirmer le réglage ou initialiser le point de commutation par apprentissage. - Page 21 5% du champ de travail max. Le milieu du champ est fixé entre le point 0% et le point 100%. FT 50 RLA Capteur de distance - Dokument 068-13799 - Status: 20.09.2005-00...
- Page 22 . Tous les réglages seront alors enregistrés. Après le relâchement des touches, le capteur se trouve en mode Run. Le témoin „BA“ (vert) est allumé en continu. FT 50 RLA Capteur de distance - Dokument 068-13799 - Status: 20.09.2005-00...
-
Page 23: Données Mécaniques
Type de lumière Grandeur du spot lumineux FT 50 RLA-70 1,5 mm x 3 mm pour 30 mm / 1,5 mm x 3,25 mm pour 100 mm Grandeur du spot lumineux FT 50 RLA-220 1,5 mm x 3,5 mm pour 80 mm / 2 mm x 4,5 mm pour 300 mm Eclairage ambiant maxi Lumière constante 5000 lux selon normes EN 60947-5-2... - Page 24 Kontaktadressen / Contact addresses / Contacts Deutschland France SensoPart Industriesensorik GmbH SensoPart France SARL Am Wiedenbach 1 11, rue Albert Einstein D-79695 Wieden Espace Mercure Tel.: +49 (0) 76 73 / 8 21-0 F-77420 Champs - Marne la Vallée Fax: +49 (0) 76 73 / 8 21-30 Tél.: +33 (0) 1 64 73 00 61...
Need help?
Do you have a question about the FT 50 RLA and is the answer not in the manual?
Questions and answers