Table of Contents
Advertisement
Advertisement
Table of Contents

Related Manuals for JUKI DU-1481 Series


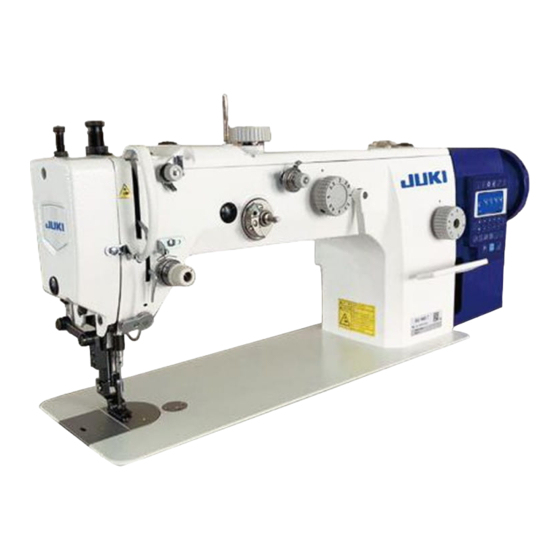
Summary of Contents for JUKI DU-1481 Series
- Page 1 DU-1481 Series INSTRUCTION MANUAL...
-
Page 2: Table Of Contents
CONTENTS 1. Overview of the sewing machine ............ 1 2. Specifications ................... 1 2-1. Specifications ......................1 2-2. Operation environment for the electrical box............1 3. Preparation for operation ..............2 3-1. Installation of the sewing machine ............... 2 3-2. Installing the knee-lifter ..................3 3-3. -
Page 3: Overview Of The Sewing Machine
Amount of the alternating vertical movement of the walking 2.0 to 5.5 mm foot and presser foot Needle (standard) DP × 17, #23 (#18 to #23) Lubricating oil JUKI MACHINE Oil (40226742) Hook Lubrication of hook (thread trimming) Lubricating method Automatic lubrication Thread trimming device... -
Page 4: Preparation For Operation
3. Preparation for operation 3-1. Installation of the sewing machine 1. To prevent possible accidents caused by the full of the sewing machine, perform the work by two persons or more when the machine is moved. Never hold the handwheel since it rotates. -
Page 5: Installing The Knee-Lifter
3-2. Installing the knee-lifter 1. Set up knee-lifter shafts ❷ while fully pulling ❶ this side of the shafts respectively until it will go ❷ ❸ no further. 2. Attach driving arms ❶ to knee-lifter shafts ❷ . 3. Connect right and left driving arms ❶ with links ❸... -
Page 6: Adjusting The Oil Amount In The Hook
Apply an appropriate amount of oil to the portion indicated with an arrow. (Be sure to apply an appropriate amount of oil once a day.) 3-4. Adjusting the oil amount in the hook WARNING : To protect against possible personal injury due to abrupt start of the machine, be sure to start the following work after turning the power off and ascertaining that the motor is at rest. -
Page 7: Adjusting The Oil Amount In The Frame
3-5. Adjusting the oil amount in the frame WARNING : To protect against possible personal injury due to abrupt start of the machine, be sure to start the following work after turning the power off and ascertaining that the motor is at rest. Adjust the amount of oil in the frame by turning oil amount adjustment pin ❶... -
Page 8: Threading The Machine Head
4-2. Threading the machine head WARNING : To protect against possible personal injury due to abrupt start of the machine, be sure to start the following work after turning the power off and ascertaining that the motor is at rest. Thread the thread take-up lever and the relevant ❶... -
Page 9: Installing A Bobbin
4-4. Installing a bobbin WARNING : To protect against possible personal injury due to abrupt start of the machine, be sure to start the following work after turning the power off and ascertaining that the motor is at rest. 1. Installing a bobbin ❶... -
Page 10: Presser Foot Pressure
4-5. Presser foot pressure 1. Adjusting the presser foot pressure 1) Loosen locknut A of the presser spring regula- tor. 2) Adjust the presser foot pressure by turning presser spring regulator B. The presser foot pressure should be minimized as long as the material does not slip under the presser foot. -
Page 11: Adjusting The Presser Foot And The Walking Foot
4-7. Adjusting the presser foot and the walking foot WARNING : To protect against possible personal injury due to abrupt start of the machine, be sure to start the following work after turning the power off and ascertaining that the motor is at rest. 1. - Page 12 3. Adjusting the amount of lift of the presser foot 1) Loosen presser spring regulator ❻ and bracket ❻ fixing screw ❼ . ❼ 2) Lift the presser foot by means of presser foot lifting lever ❽ . Adjust bracket fixing screw ❼ up and down until presser foot ❾...
-
Page 13: Needle-To-Hook Relationship
4-8. Needle-to-hook relationship WARNING : To protect against possible personal injury due to abrupt start of the machine, be sure to start the following work after turning the power off and ascertaining that the motor is at rest. ❷ ❸ ❶... -
Page 14: Adjusting The Feed Timing
4-9. Adjusting the feed timing WARNING : To protect against possible personal injury due to abrupt start of the machine, be sure to start the following work after turning the power off and ascertaining that the motor is at rest. 1) Remove the top cover. -
Page 15: Adjusting The Thread Trimming Device
4-10. Adjusting the thread trimming device WARNING : To protect against possible personal injury due to abrupt start of the machine, be sure to start the following work after turning the power off and ascertaining that the motor is at rest. 1. - Page 16 4. Installing the thread trimming device Solenoid Solenoid Nut Ⓐ 1) Adjusting the operating quantity of the thread valve mount- 4 to 5 mm valve link a ing screw trimming solenoid A. The operating quantity of the thread trim- ❷ ming solenoid is 4 to 5 mm.
-
Page 17: Periodical Cleaning Of The Sewing Machine
6. Adjusting the engagement between the knives Moving knife 1) Adjusting the position of the moving knife and counter knife Counter knife The standard initial position of moving knife ❶ 3 mm is 5 mm from the center of needle. The stan- dard initial position of counter knife ❷... -
Page 18: Adjusting The Reverse Feed Pitch
Oil may accumulate in the lower portion of face plate or inside the thread take-up cover while us- ing the sewing machine Be sure to wipe out oil periodically. Regularly clean the feeding foot, presser foot and throat plate. 4-12. Adjusting the reverse feed pitch WARNING : To protect against possible personal injury due to abrupt start of the machine, be sure to start the following work after turning the power off and ascertaining that the motor is at rest. -
Page 19: Display Screen And Operation
5. Display screen and operation 5-1. Buttons and their functions The operation screen is as illustrated below. Function Button Explanation of sewing machine operation The number of stitches set to the revere feed stitching at the beginning of Selection of reverse feed sewing (A, B) is sewn twice. - Page 20 Function Button Explanation of sewing machine operation For the reverse-feed stitching, the number of stitches is set with A, B, C and D. The number of stitches can be set within the range of 0 to 9. For the constant-dimension sewing, the number of stitches is set with E. The number of stitches can be set within the range of 0 to 99.
- Page 21 Function Button Explanation of sewing machine operation Setting the needle stop position when the motor stops As long as this button is displayed on the LCD, the needle stop position Setting the needle stop when the motor stops is set to the "upper position". position In the case this button is not displayed on the LCD, the needle stop posi- tion when the motor stops is set to the "lower position"...
-
Page 22: Counter Function
5-2. Counter function Counting the number of pieces: In the case the memory switch [041, TM] is set to "0 (zero)" and is held pressed for two seconds, the display will be changed over. 1N: In the case of counting the number of times of thread trimming, the number shown on the counter will be returned to 0 (zero) by pressing key. -
Page 23: List Of Memory Switches
6. List of memory switches (1) User level When key is held pressed for two seconds or more with the sewing machine started, the memory switches can be set. Every time one memory switch is changed, the changed value is stored in memory by pressing key. - Page 24 Parameter Description of parame- Initial Range Explanation of the content represented by the value code value CON: The sewing machine automatically proceeds to the next operation when it carries out reverse feed Selection of the opera- stitching. 013.TYS tion mode after starting CON/STP STP: The sewing machine halts sewing every time reverse feed stitching...
- Page 25 Parameter Description of parame- Initial Range Explanation of the content represented by the value code value Correction to the over- BT5, BT6 = 0, disabled 035.BT5 lapped stitching 5 BT5, BT6 = 1 - 16, operation timing is advanced (in increments of 1/8 stitches) 0 to 999 BT5, BT6 = 17 - 31, operation timing is retarded (in...
- Page 26 (2) Maintenance personnel level When key is held pressed for two seconds or more with the sewing machine started, the memory switches can be set. Every time one memory switch is changed, the changed value is stored in memory by pressing key.
- Page 27 Parameter Initial Explanation of the content represented by the Description of parameter Range code value value Full output time of the Time during which the sewing machine runs with presser foot / reverse 061.FO 0 to 2000 250ms the full output of the presser foot / reverse feed feed stitching solenoids stitching solenoids (at the beginning of operation) at the initial stage...
- Page 28 Parameter Initial Explanation of the content represented by the Description of parameter Range code value value In the case the reverse-feed stitching solenoid is held in the ON state until the set time is reached, the output power to the reverse-feed stitching solenoid is turned OFF to protect the circuit.
-
Page 29: Table Of Error Codes
7. Table of error codes Error code Meaning of the code Possible problem that has occurred Corrective measure 1. The pedal circuit may have a 1. Return the pedal to its neutral problem or the pedal is in the position. depressed state when energizing or self-checking it. - Page 30 Error code Meaning of the code Possible problem that has occurred Corrective measure 1. Parameter setting for the MPD or Turn OFF the power and check SPD is not correct. whether or not the sewing ma- chine motor is normal. 2.
-
Page 31: Names Of Connectors
8. Names of connectors ❶ ❸ ❷ ❹ ❶ Motor power connector ❷ Motor encoder connector ❸ Pedal switch connector ❹ Solenoid connector Check to make sure that the connectors are locked after connection. – 29 –... -
Page 32: Troubleshooting
9. Troubleshooting Phenomenon Item to be checked Cause Corrective measure Orientation and height of Needle insertion position is not Re-insert the needle properly. needle correct. Change the needle with a Needle The needle is bent. new one. Adjust the feed dog timing Feed dog timing Feed dog timing is wrong appropriately. - Page 33 Phenomenon Item to be checked Cause Corrective measure Clearance between the Height of the moving knife and Re-adjust the installation moving knife and the hook that of the hook do not match. position of the moving knife. The moving knife and the Correct the pressure applied Check the pressure ap- counter knife do not match...
- Page 34 Table of comparison between the numerical characters shown on the control box and the actual numerical characters Numerical character portion: Actual numerical 実際の数値 value Font of the displayed 表示の字体 numerical character Alphabetic character portion: Actual alphabetical 実際の文字 character Font of the displayed 表示の字体...
Need help?
Do you have a question about the DU-1481 Series and is the answer not in the manual?
Questions and answers