
Related Manuals for JUKI DU-141H-4


Summary of Contents for JUKI DU-141H-4
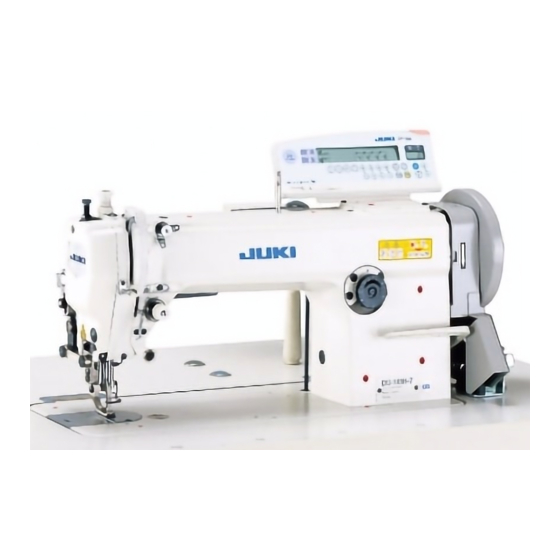
- Page 1 DU-141H-4 DU-141H-7 INSTRUCTION MANUAL NOTE : Read safety instructions carefully and understand them before using. Retain this Instruction Manual for future reference. No.02 40092242...
- Page 3 TO ENSURE SAFE USE OF YOUR SEWING MACHINE For the sewing machine, automatic machine and ancillary devices (hereinafter collectively referred to as "machine"), it is inevitable to conduct sewing work near moving parts of the machine. This means that there is always a possibility of unintentionally coming in contact with the moving parts.
- Page 4 SAFETY PRECAUTIONS i en nal in r r ea a age DANGER W en i i ne e n r l b n aining ele ri al ar in e re be re ening er in r er re en a i en lea ing ele ri al CAUTION...
- Page 5 PRECAUTIONS TO E TA EN IN ARIOUS OPERATION STAGES Tran r a i n li an ine in a a e anner a ing n i era i n Re er e in r an al re en alling r r ing be re li ing r ine in r er again...
- Page 6 ine an le el be re re e bel er an bel in r er re en a i en e b abr ine r I a er e n i e ine i a re re n in r er re en a i en e b abr...
- Page 7 Precautions to be taken so as to use the DU-141H-4 and DU-141H-7 more safely 1. Keep your hands away from needle when you turn ON the power switch or while the machine is in operation. 2. Do not put your fi ngers into the thread take-up cover while the machine is operating.
- Page 8 Model DU-140 Series Description Industrial Sewing Machine Function make stitches and sew Applied harmonized standards, in particular : EN ISO12100, EN ISO10821, EN 50581 Manufacturer : JUKI CORPORATION 2-11-1, Tsurumaki, Tama-shi, Tokyo, Japan...
-
Page 9: Table Of Contents
CONTENTS BEFORE OPERATION ........................1 SPECIFICATIONS ...........................1 1. INSTALLATION OF THE MACHINE ..................1 2. ADJUSTING THE BELT TENSION .....................2 3. INSTALLATION OF THREAD STAND ..................3 4. ATTACHING THE BELT COVER AND BOBBIN WINDER ............3 5. LUBRICATION ..........................4 6. ATTACHING THE NEEDLE ......................4 7. -
Page 10: Before Operation
Link type thread take-up Motor to be used AC servo motor Needle bar stroke 37 mm Lubrication oil JUKI New defrix oil No.1 Noise - Equivalent continuous emission sound pressure level (L ) at the workstation: A-weighted value of 77.5 dB; (Includes K = 2.5 dB);... -
Page 11: Adjusting The Belt Tension
4. Attaching the hinge washer and rubber cushion Fix the rubber hinge washer 1 , the head support rubber 2 supplied with the machine on the table using the nails 3 . Put the head cushion 4 into the head support rubber 2 . 5. -
Page 12: Installation Of Thread Stand
3. INSTALLATION OF THREAD STAND WARNING : To avoid possible personal injury due to abrupt start of the machine, turn off the power to the machine and check to be sure that the motor has totally stopped rotating in prior. 4. -
Page 13: Lubrication
5. LUBRICATION WARNING : To avoid possible personal injury due to abrupt start of the machine, turn off the power to the machine and check to be sure that the motor has totally stopped rotating in prior. 6. ATTACHING THE NEEDLE WARNING : To avoid possible personal injury due to abrupt start of the machine, turn off the power to the machine and check to be sure that the motor has totally stopped rotating in prior. -
Page 14: Winding A Bobbin
7. WINDING A BOBBIN 8. THREADING THE BOBBIN CASE WARNING : To avoid possible personal injury due to abrupt start of the machine, turn off the power to the machine and check to be sure that the motor has totally stopped rotating in prior. 9. -
Page 15: Thread The Machine Head
10. THREAD THE MACHINE HEAD WARNING : To avoid possible personal injury due to abrupt start of the machine, turn off the power to the machine and check to be sure that the motor has totally stopped rotating in prior. Thread the machine head in the order of 1 through to !3 . -
Page 16: Thread Tension
12. THREAD TENSION WARNING : To avoid possible personal injury due to abrupt start of the machine, turn off the power to the machine and check to be sure that the motor has totally stopped rotating in prior. 13. THREAD TAKE-UP SPRING 14. -
Page 17: Height Of The Feed Dog
15. HEIGHT OF THE FEED DOG WARNING : To avoid possible personal injury due to abrupt start of the machine, turn off the power to the machine and check to be sure that the motor has totally stopped rotating in prior. 16. -
Page 18: Needle-To-Hook Relationship
17. NEEDLE-TO-HOOK RELATIONSHIP WARNING : To avoid possible personal injury due to abrupt start of the machine, turn off the power to the machine and check to be sure that the motor has totally stopped rotating in prior. – 9 –... -
Page 19: Auxiliary Thread Tension Controller
18. AUXILIARY THREAD TENSION CONTROLLER 19. PRESSURE OF THE FIXED KNIFE WARNING : To avoid possible personal injury due to abrupt start of the machine, turn off the power to the machine and check to be sure that the motor has totally stopped rotating in prior. 20. -
Page 20: Home Position Of The Rotary Knife
21. HOME POSITION OF THE ROTARY KNIFE WARNING : To avoid possible personal injury due to abrupt start of the machine, turn off the power to the machine and check to be sure that the motor has totally stopped rotating in prior. 22. -
Page 21: How To Replace The Knives
24. HOW TO REPLACE THE KNIVES WARNING : To avoid possible personal injury due to abrupt start of the machine, turn off the power to the machine and check to be sure that the motor has totally stopped rotating in prior. 25. -
Page 22: Troubles And Corrective Measures
26. TROUBLES AND CORRECTIVE MEASURES – 13 –... - Page 24 Please do not hesitate to contact our distributors or agents in your area for further information when necessary. * The description covered in this instruction manual is subject to change for improvement of the Copyright C 2011-2013 JUKI CORPORATION commodity without notice.
Need help?
Do you have a question about the DU-141H-4 and is the answer not in the manual?
Questions and answers